This week I’m hosting a Valentine’s Day Series with 8 different guest bloggers ready to share creative crafts, home decor and recipes! New posts will be at 5am and 3pm Monday through Thursday, with a wonderful round up of my favorite Valentine’s Day projects on Friday. HOPE YOU ENJOY! Next up: Newlyweds on a Budget! Take it away Kari!!
A little bit about me-my name is Kari and I am the blogger behind Newlyweds on a Budget. My husband and I were married a little over 8 months ago and we currently reside in a tiny 2 bedroom married student housing apartment. Complete with cinder block walls and my very own Easy Bake Oven.
 Valentine’s Day has a special place in my heart-not because I’m overly romantic or anything but because my birthday happens to be the day after! Each year I get spoiled for two different reasons and I have to admit I love it.
That being said-I’ve never decorated for Valentine’s day in the past. I’ve always been to busy celebrating my birthday to think about the “love” holiday. This year however I decided to put up a few things including this mason jar LOVE.
I am slightly obsessed with mason jars and everything you can do with them. Sometimes I wish the hubbs and I could be married again just so I can have a reception centered around mason jars-it would be awesome. My husband and I have decided to not spend money on anything other than the necessities for the month of January so I knew that my Valentine’s day craft would have to be free for me.
Inspiration hit for this when I was doing the dishes when I remember seeing this post about tinting jars on Pinterest. So I stopped doing the dishes and started doing this project instead. Here’s what you need to do-
Supplies:
- 4 Mason Jars (or any other jars that strike your fancy)
- Food Coloring
- Modge Podge
- Card board
- Wax Paper
- Twine
- Vinyl
To start off mix your food coloring with a little bit of water-I did about a tablespoon of water.

Then pour the food coloring into the mason jar along with some modge podge-about a tablespoon-and mix it all together.
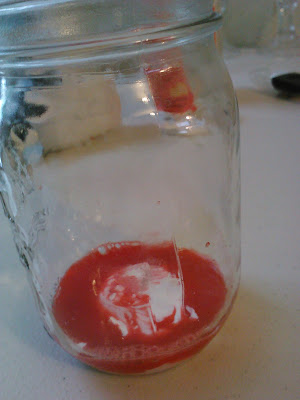
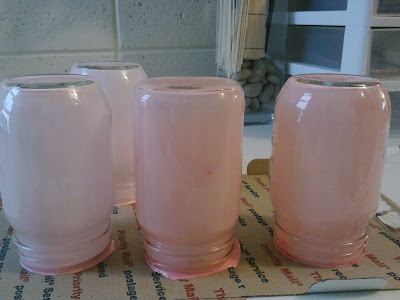
Then holding the jar over another bowl swirl the mixture until you cover the entire mason jar. Pour the excess liquid into the bowl. Then set your mason jars face down on your cardboard and let them sit like that for 20-30 minutes.
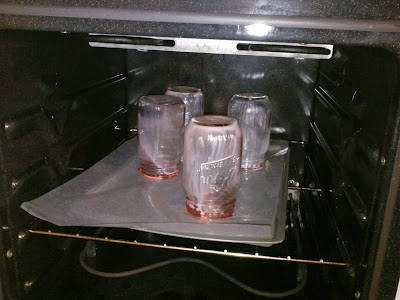
After you’ve let them drain set your oven to warm and place the jars on some wax paper. Put the jars in the oven face down for 10 minutes and then turn them over and leave them in the oven face up for another 30 minutes.
Next, using my Cricut I cut out the letters and put them on the mason jars.


Now if we were spending the money I’d head to the store and pick up some cute white flowers to go in the vases. Either way I love how they turned out!
Thanks Erin for hosting such an awesome series! I’d love it if you visited my site Newlyweds on a Budget!

Thank you SO MUCH Kari for sharing this adorable Valentine’s Day project! I appreciate you being a part of my series. You can find Kari on Facebook or Twitter or on her blog daily at Newlyweds on a Budget.

Anna@DirectionsNotIncluded says
I never realized it was so easy to color the jars! Super cute Kari!
Pamela @ Pink Hammers & Sippy Cups says
Wow! I actually saved the same pin as to how to tint jars but never got around to looking at it! I’m glad to see it’s so simple! I’m quite excited to do this! I can only imagine the possibilities!!!
Veronica says
Just wondering what material you cut the letters out of, Kari? Vinyl, cloth, or paper? And then how did you afix them – with the Mod Podge or another adhesive? Thanks!
Kari says
Veronica-I used some bright pink vinyl that I had received as a bonus when ordering another color. Black or white would look great as well. As far as sticking them on I didn’t do anything fancy-I just pulled the backing off the vinyl and eye balled it. You could use transfer paper or glad press n’ seal to transfer the vinyl and that would probably make it straighter but I wasn’t too worried about it. Eyeballing it got them on pretty straight.
Let me know if you have any other questions-you can email me directly at [email protected]
Thanks!