Hi {How to Nest for Less} fans, thanks for having me!
.
I’m Hilani, from over at Handmade by Hilani. I love to sew, and when free time of two boys allows, you can usually find me at my sewing machine. I’ve been sewing off and on for 13+ years, and never seem to get bored by it. I’ve been blessed with the success of my hobby, turn small business, because my girlfriends said believe in yourself. The power of believing and doing!

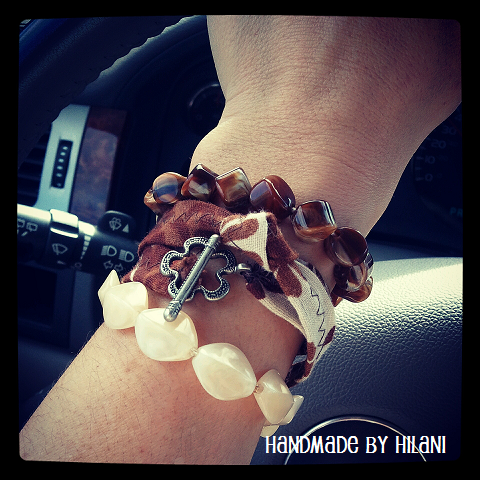
Now let’s get down to it! I’m so excited to be here, in Erin’s corner of blog-land and share with you a fun tutorial for sewers of all levels. Below is a project for a fun fabric bracelet I made a while ago. I posted to Instagram a picture of it, and shared in a variety of places. Which then resulted in rave reviews over it’s fun look. I decided I {had} to share how to make it so those able to, could create their own.
**It is sewn with a sewing machine, but I don’t know why you couldn’t hand sew it…
What you’ll need:
1 Hand sewing needle
1 Toggle Clasp
1 16 1/2″ x 2″ scrap fabric
Scissors
Clear Ruler
Pencil
Iron
Fray Check (optional)
Sewing Machine Needle 12 or 14
Thread
Project Specs:
Start to Finish Time 30 minutes
Level: Beginner

Step 1:
Cut your strip of Fabric and iron flat
Step 2:
Place your clear ruler an inch from bottom of your strip and draw a pencil mark, along the middle of the fabric

This is what you should have when done

Step 3:
Press with an Iron both sides inward towards your pencil mark, like so

Then fold over both outside edges

Step 4:
Begin to pin along your strip

Now it’s time to sew….yippy!
Step 5:
Set your machine to
Zig Zag stitch, 5 Width, 3 Length, 5.5 tension


Step 6:
Sew forward and reverse a little bit at the beginning and then begin to sew down the middle of your strip repeating the reverse and forward at the end, like below


Step 7:
Cut your thread. Thread a hand needled with a long piece of thread and begin adding your toggle clasps

Bring your hand needle from the bottom side of the fabric, but not through the top layer.

This is how the bottom side should look when done.
This is how it looks when both have been added.

Step 8:
Now it’s time to tie our decorative knot at the
center of the bracelet.


Lay it side by side to make sure your knot is in the middle of your bracelet, as best as possible.

Complete:

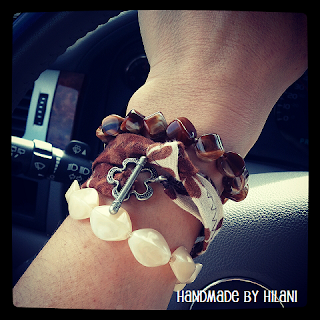
Enjoy, have fun, add extra bracelets with it, and be creative with colors!

Follow Handmade by Hilani in a variety of ways:

Hilani-Handmade by Hilani says
Thanks so much Erin for having me and letting me share my bracelet tutorial with your fans! Have a great rest of your week and holiday weekend!
howtonestforless says
Thanks Hilani! Glad to have you here 🙂
Shannon Fox says
Sew cute! Love that darling fabric too. These would make fun gifts!!
Lisa says
That’s really adorable. I was looking for such a tutorial for a while. It made ma task easy.