Today I’m sharing just how I created my DIY craft room desk because it was quite popular in my Craft Room Makeover post.
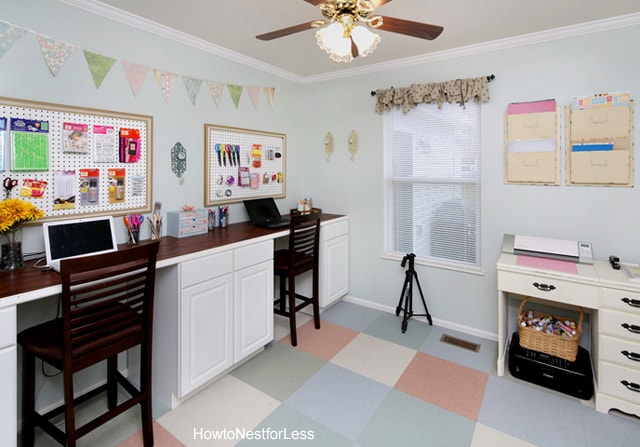
My craft room is extremely small– only 10 x 10ft. I need a good workspace that was functional, plus lots of storage. After looking at local stores and online for the perfect desk, I finally came to realization that I would have to build my own desk (or spend over $1,000 for something similar to what I wanted). So here is the tutorial of how I made my craft room desk!
How to Build a Craft Room Desk
Base Cabinets
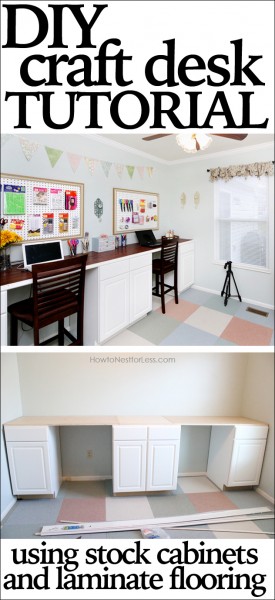
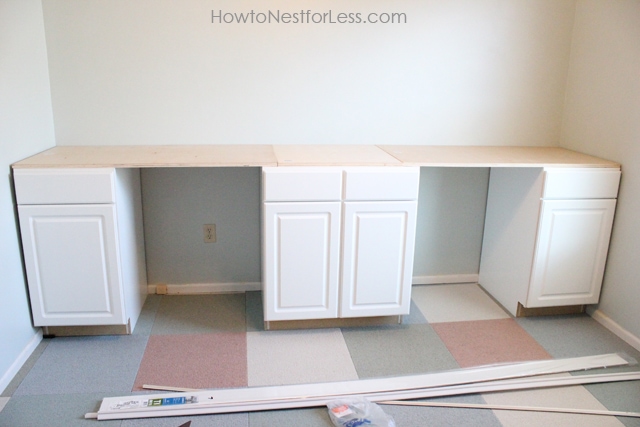
The desk idea started with these white kitchen base cabinets we purchased from Lowe’s. The middle one is a 30 inch wide with two drawers that we purchased for $169. The end cabinets are each 18 inches. Cost was $112 each.
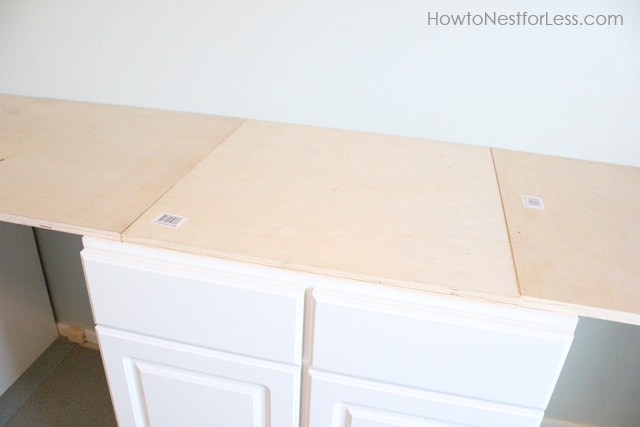
Plywood Top
For the top of the craft room desk we used 3/4 inch plywood. Make sure your pieces are flush going across the entire 10 foot desk. We laid out first at Lowe’s so we wouldn’t have any surprise ridges when we got home!
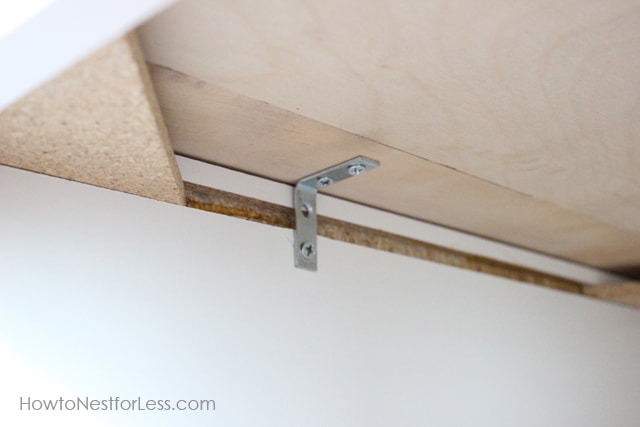
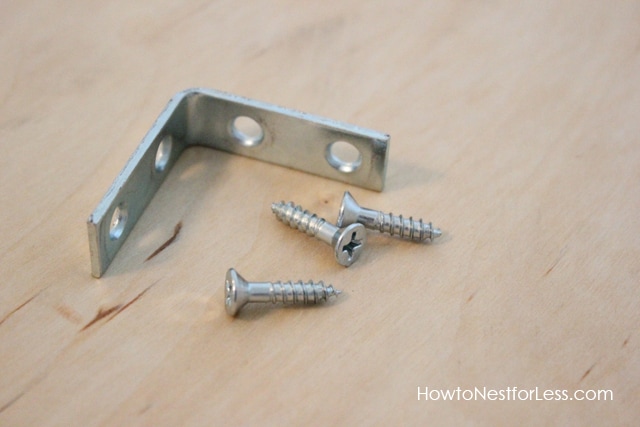 To attach the plywood to the cabinets, we used L brackets on the underside of the wood so it can’t be seen.
Laminate Flooring
Next it was time to add the top to the desk. At first I was going to use oak and stain it, but after talking it over with my hubby, I realized that I wanted something that could easily be replaced when I mark it up with my exacto knife, hot glue gun or anything other type of scratch or ding. So I had a great design idea!
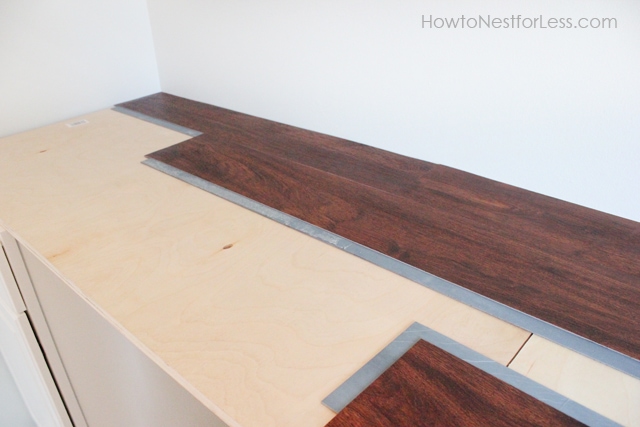 So we used laminate flooring! Yep, I found some Allure laminate flooring on clearance and paid $12 for a box that covered the entire craft room desk… with plenty to spare! I just followed the interlocking edge design to install. To cut where I needed, I just scored with a utility knife and snapped off the excess pieces. No need to glue down, those gray edges above are super sticky.
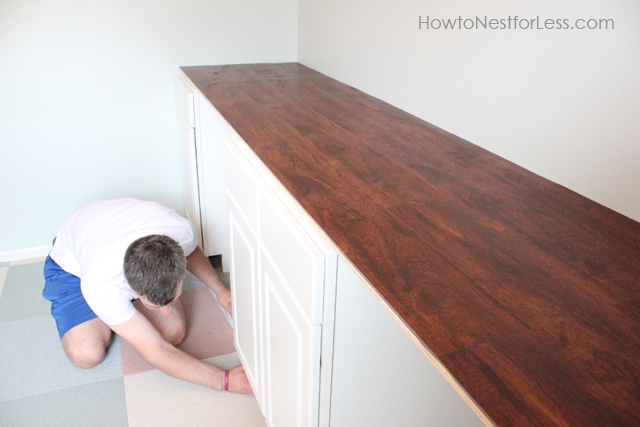 Lookin’ pretty, right? Only took about 10 minutes to install the laminate.
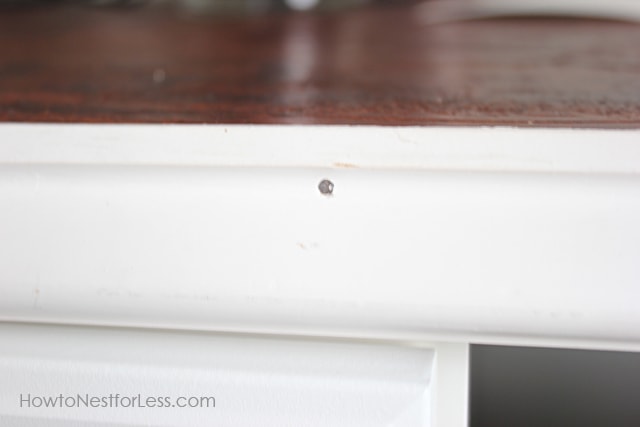 Next we added some white trim to the front. Just nailed it into place with finishing nails, filled in the holes and gave it a quick coat of flat white.
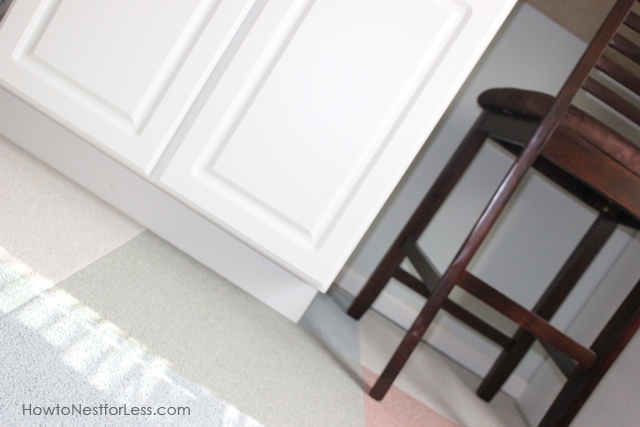 Did you notice before that the bottom of the cabinets were bare? We added some white toe kicks to give it a finished look!
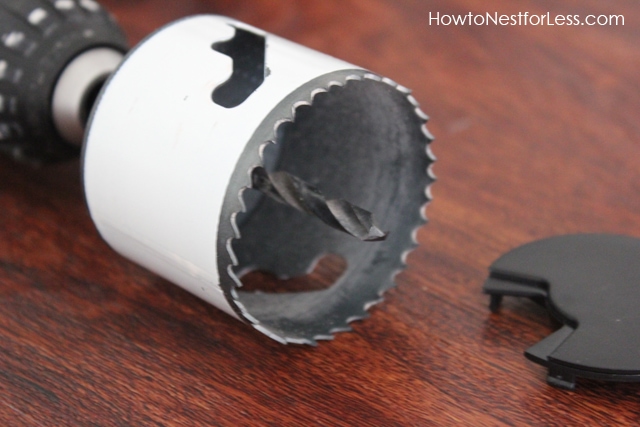
Cord Holes
Now to make a hole in the top of the desk for all of our computer cords to go through. We used this special drill bit (above).
OK, now I have to admit, this is where a major project FAIL came in. Yep, we screwed up the first one. Not because of the drill bit, but because the circle drill bit was the wrong size! So, am I super happy that I used a laminate top that’s easily replaceable? You betcha!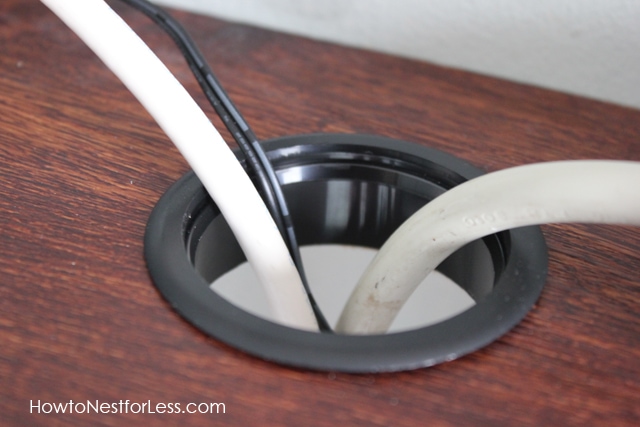 Here’s the replaced section of the craft room desk and the perfectly drilled hole for all my cords. And that’s it. Here’s some after shots!
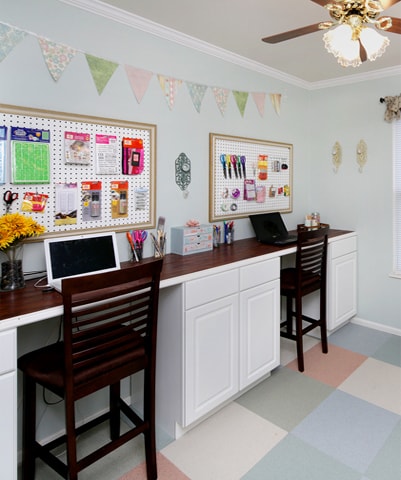
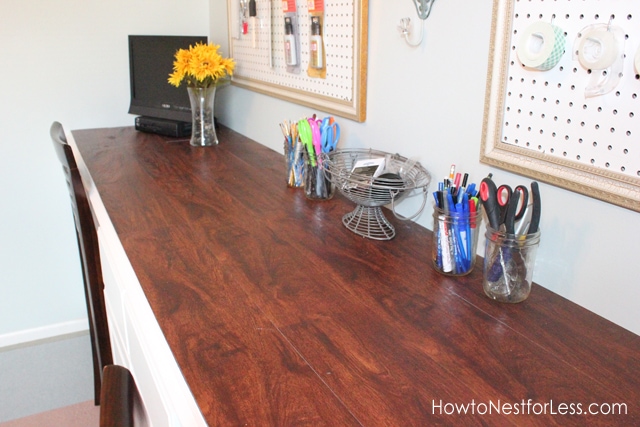
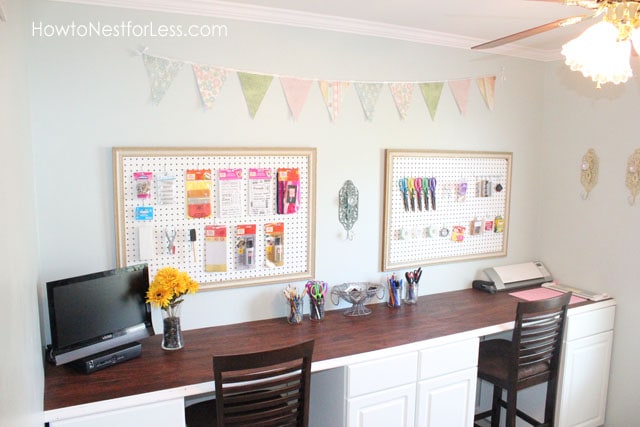
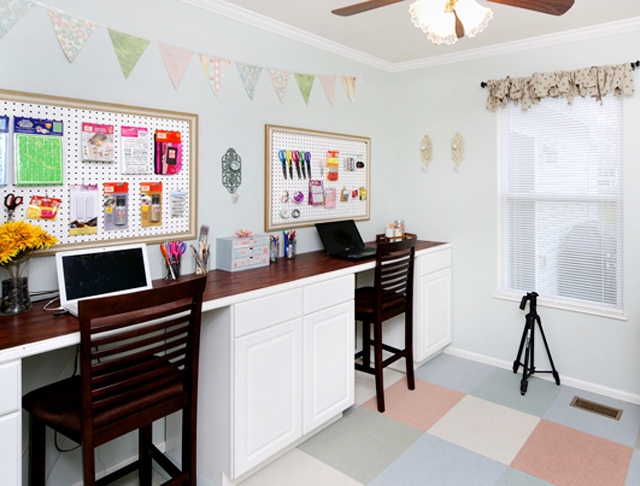
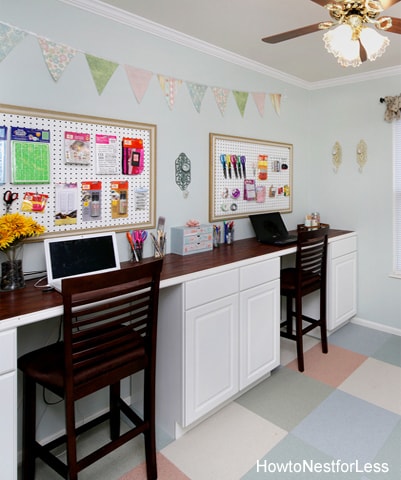
If you want to see the rest of the Craft Room, click here!

Sunday Burquest says
Ok, this is AMAZING! It looks great and will actually be functional. I’m so impressed!!
howtonestforless says
Thanks Sunday! Hope you have a great weekend 🙂
Amanda @ Serenity Now says
Love that you used laminate flooring–genius! We’ve used that drill bit before for the same purpose, and I think it’s so cool that you can make your own holes for cords without having to spend tons of money! Great job!
Mary says
What do you guys use for the plastic circular piece that fits in after you drill the hole? Where could I buy something like that? Thanks!
Jaqueline Donk says
I would love to know this as well!!! I was wondering as soon as I saw the pictures. Great question, I hope someone responds.
christinee279 says
LOVE your peg board in frames! What a great way to dress up something so UGLY. 🙂
BeccaW says
Fantastic tutorial, thanks for sharing it! Using laminate flooring is such a good idea, and we even have extra from floor projects I could probably use. Wonderful inspiration!
howtonestforless says
Thanks so much Becca!
Laura Ingalls Gunn says
Your project feels perfect for summer! Give yourself a huge pat on the back. Well done!
Judy says
Great project, I could scrap there anytime. Good space.
howtonestforless says
THanks Judy!
northern cottage says
very very very cool – love it!
howtonestforless says
Thanks girl!
Jeanne says
I LOVE it! This is such a cost effective and useful space. I have left over bamboo flooring from our bedroom redo. I know what I’m gonna do with it now. Thanks for the inspiration! I’ve pinned it and I’m a new follower. Came over from Debbie Does Creations.
howtonestforless says
Thanks so much Jeanne. Let me know how yours turns out!!
Andrea says
Very nice. I wouldn’t think to put laminate on top.
Mary @ Sea Quilts says
Absolutely brilliant! I think my space may be even smaller. This one is going in the file.
Thanks ~
Mary
howtonestforless says
Thanks Mary!
Jessica says
Beautiful! I love how you designed your own desk and that you used laminate flooring for the top! I would LOVE to have a desk like this in our house! Thank you for sharing!
howtonestforless says
Thanks Jessica!
cassie says
i want to come over and get crafty NOW!!! what a great space!
howtonestforless says
LOL Thanks Cassie!
Judy says
Now that is a great craft desk. I love the idea that you used laminate flooring for the top. Genius. Thanks for sharing at DIYbyDesign.
Nici ~ Posed Perfection says
I love your craft room! What a great room for creative inspiration!
Katie says
I am so jealous of you right now! This desk is fabulous! I would love for you to share this with my readers on Blog Stalking Thursday Linky Party! http://www.thecraftyblogstalker.com/2012/08/blog-stalking-thursday-52.html
Michelle says
Great desk! Thanks for sharing the tutorial! I was wondering if you might consider linking this post up at my homeschool spots, organization, back to school, etc. linky party? Some moms out there might be trying to find a way to make some great desk space for kids on a budget so this would be a great link to add to the collection! 🙂
http://www.thenatureofgrace.blogspot.com/2012/07/reading-spot-and-homeschool-havens-link.html
Jessica says
That is such a great idea! Love it! Found your blog on the 36th Ave. I’ll be following! Thanks!
Allison says
Oh Em Gee! I may have to copy this I am working on my guest bedroom / craft space now!
Roeshel S (@DIYShowOff) says
Awesome tutorial, Erin! And the desk? Beautiful! What a creative solution! Love it! Well…I’m featuring this in the highlights and pinning too! 🙂 Thanks so much for coming over and linking up your creativity!
howtonestforless says
You’re too sweet to feature me twice this week. I’m one lucky girl!!
Kay says
This is one of the coolest things I’ve ever seen!
[email protected] says
Hey Girl! 🙂
Featuring you today! Amazing! Love it, & I’m sooooo jealous! 🙂
Ginger
http://www.gingersnapcrafts.com/2012/08/take-look-at-you-my-favorites_9.html
howtonestforless says
Oh, thank you so much Ginger! You made my day!!
Kara says
Erin, what a creative and beautiful space! Your craft room has inspired me! After looking for months, I finally have a starting point for my 10 x 10 room.
Sara says
This is absolutely fab!! Hope you can link up at my trendy tuesday party!! hhttp://www.sweetlittlegals.com/2012/08/trendy-tuesday-12.html
Inspire Me Heather says
I love your desk Erin! You have totally inspired me to do mine just like yours – the flooring idea is just brilliant! I’ve got this linked to my DIY desks post too today, nice job!
howtonestforless says
Thanks so much Heather!
Debi says
Did you attach The cabinets to the wall?
howtonestforless says
No, we did not. We have plans to sell our home and didn’t want to damage the walls.
Rupa says
I found that most of the kitchen base cabinets are 30 inches high which seems too high for a desk. Did you find shorter cabinets or cut them down?
howtonestforless says
Hi Rupa, the cabinets are actually stock height and I did not trim them down. The desk is a little high which is why I have bar height stools at the desk. The chairs fit it perfectly though! And it’s a great height for standing while working on my crafts as well. Hope that helps!
Adam says
I was curious about this too. I like the idea of having a workspace that is a little higher than a standard desk, but need to find the best chairs to fit it. What height are the seats on your chairs? Do you have a link to where you purchased them?
howtonestforless says
Any counter height stool works perfectly. If you think about it, these are standard kitchen cabinets. If you were to have a center island in your kitchen, they would require any standard counter height stools. Since I don’t have a link to my current stools, you can just Google counter height stools or check out some options from like Joss & Main or Wayfair. I hope that helps a little!
Rupa says
oops – I meant 35 inches high, not 30 inches high. 30 inches was how tall I wanted the desk to be. Thanks!
Mona Chapman says
I have some white bathroom vanity cabinets that I want to use for this very thing, but I was trying to figure out an inexpensive top for it. I have the original counter top, but there is a sink cut out in it. I could have my hubby patch the hole with plywood, then cover with laminate flooring.
howtonestforless says
Ooh, you could try that! Good luck to you.
Eugenia Bell says
Your craft room is beautiful!!! Did you use one sheet of plywood across or three separate pieces?
howtonestforless says
THank you! Actually, the plywood is separate pieces. You can’t tell with the laminate flooring on top!
Dee@delolovesdesign says
Just came across your blog and love this tutorial! The desk looks great!
dee@delolovesdesign
howtonestforless says
Thank you so much Dee!
Julie Patterson says
Wow! This is amazing to look at and so functional. I am jealous! How much money & time would estimate it took to get this done? I’d love to make one for myself too.
howtonestforless says
The total cost was about $500 but that was for a 10ft desk plus tons of storage (cabinets and drawers). Took less than a weekend to complete!
Terry says
Fabulous and so easy. I would prefer to have mine lower to fit roller office chairs. This is a great idea inspiration.
howtonestforless says
Thank you Terry!
Jessica says
So my husband and I totally copied this! What did you do to the back on the desk to cover the flooring panel? On ours you can see the unfinished edge of wood flooring. 🙁
howtonestforless says
Awesome!!! We used quarter round trim around the edges to finish it off!
Sheri says
This is a fabulous idea and just what I was looking to accomplish in my craft area. Did you glue the flooring down? How did you get it to stay in place? All the flooring we looked at were meant to “float” which left me a bit perplexed.
Sheri
howtonestforless says
The flooring we used had a sticky back side which we adhered to the plywood (like a super sticky sticker). I’m sure you could use a strong adhesive instead, like Elmers ProBond Advanced.
jana says
Love the desk. What color is the flooring that you used?
howtonestforless says
I used the Walnut color of the Allure laminate flooring.
Priscilla Resendez says
Thank you so much for sharing this. We have a den on our second floor that really needs some storage space but also somewhere our kids can also just sit and do homework too. I’ve been wanting do something like this but couldn’t get my husband to visualize it…now I have a visual! LOL thank you so much!!!
Janie says
I absolutely love this and wanting to do the same…..question I have is the flooring you used vinyl peel and stick or hardwood. I am going to look and see what kind of deals I can find. You and your husband did a fantastic job and so professional looking. LOVE LOVE this
howtonestforless says
Vinyl peel and stick! Thank you so much 😉
Linda K says
That’s awesome! And I have the Allure vinyl flooring in my craft room and spare bedroom. Love it. Hadn’t thought about it for a table top.
howtonestforless says
It’s awesome for the table top. Durable and replaceable!
Durante says
How deep is the desk? I absolutely love this idea!
howtonestforless says
It’s as deep as the cabinets… so I think about 24 inches.
Charity says
I loved this idea so much that I made one for my dining room. I used three $5 file cabinets that I found at goodwill and a yard sale. I also had left over flooring any plywood that worked perfectly. This has been the project that I am most proud of. Everyone compliments me on it. Thank you so much for the inspiration.
howtonestforless says
You’re welcome! So glad you were inspired 🙂
Susan says
Using the laminate flooring is genius! I have thought of a couple of ideas where I could do something similar. Thanks for the ideas!!
Julie says
I had a question for you. I love the desk and I’m thinking of doing the same at my office. Now since the desk is cabinet high, not your regular office desk, did you have to use higher chairs for the desk? Thanks!
howtonestforless says
Yes, we used counter height stools for the desk.
Bill Sinn says
LOVE this idea. I’ve wanted to do built-ins for our loft/office area. We laid laminate flooring through out the house and for the last two years didn’t do the built ins because of 1) cost, and 2) I wasn’t sure what kind of top would match the laminate flooring. This idea killed two birds with one stone, plus the top of the desks will match the floor, can’t get more custom looking than that! Guess what I’ll be doing next weekend! Thanks for the great idea!
howtonestforless says
Glad it helped!!
Jax says
You’ve got a great idea there, but a couple of issues I assume you’ve bumped into. Kitchen cabinets are 34 1/2″ high which, when added to a standard countertop of 1 1/2″ is 36″ is great for a kitchen but too high for keyboard and craft work using a standard office chair. A traditional desktop or tabletop is 30″. There are a few solutions for this: first,you can cut you top and put a support on the sides of the cabinets and the walls and lower the finished top to 30″ above the floor. Second, you can use drafting chairs in those places, which are higher. Or third, you can cut the toe-kick down or off (caveat – if you cut it all the way off, your cabinet door is not going to open especially if your floor is carpeted) 9+use in-stock vanity cabinets instead of kitchen cabinets. Vanity cabinets are the right height for tooth brushing and hair styling and also for keyboarding and crafting. Another caveat here: If you buy a stock countertop from Lowe’s or Home Depot they are 25″ deep, the depth of a kitchen cabinet. Vanity cabinets are only 21″ deep. The simplest solution is to cut the back splash off. Hopefully this will help someone before they get too far in their planning and purchasing. In my own studio I lowered the countertops in the work areas and left them where the storage and drawer were. Good luck with all your studios. There’s little that is more satisfying than having your own space for doing your won thing..
Melinda says
Oh My, Love Love the flooring idea. I have been thinking of adding some kitchen cabinets to an area adjacent to my kitchen and my biggest question, what to put on top……This would be perfect. At some point I would like to replace everything with granite, but now is not the time. Thanks for the idea!
howtonestforless says
You’re welcome!! Glad I could help 🙂
Lisa says
I’m getting my ideas ready for this project but I’m not clear on the photo that shows how/where the plywood is attached to the cabinets. Can you please clarify this for me? TIA!
howtonestforless says
To attach the plywood to the cabinets, we used L brackets on the underside of the wood so it can’t be seen.
https://howtonestforless.com/wp-content/uploads/2012/07/L-bracket-for-desk.jpg
If you look at the photo above, that shot is looking up through the open cabinet door to the plywood we laid on top. Here you can easily screw on the plywood to the sides of the inside of the cabinets. Hope that helps!!
Julie says
Just found this on Pinterest. Love, love, love!!! I wanted a desk for my son with two seating areas. One for homework and one for artwork (plus I already have two cute chairs!). Was visualizing it, but couldn’t decide on the pieces to use. The top was holding me back the most. Great ideas!
howtonestforless says
Thanks Julie! Good luck with yours!!
Katherine says
I absolutely love this idea, and I am implementing this in my craft room ever so slowly. How much space did you leave between the cabinet bases for the chair and sitting? Also, did you overhang the plywood over the front at all or did you keep it flush with the face of the cabinets? Thanks so much!
howtonestforless says
I think there was about 30 inches between cabinets. We also overhung the plywood by about 3 inches, which is normal for countertop lip. Hope that helps!
Dayton says
Hi Julie!
Do you have any complaints about the bar height chairs?I will be doing mostly computer work so I’m struggling with what type of cabinets to get. Getting kitchen cabinets would be the easiest but I’m nervous about the chair height and not being able to put my feet on the ground, etc. Any comments on your chairs so far?
howtonestforless says
We had bar stools that had an bar in the front along the two front legs to rest your feet. I loved the height because I could stand or sit at it.
Jennyfer says
Freaking brilliant!!! Thank you for posting!!!!!
Laura says
Wow! I came across this on pinterest and I am really impressed. What a lovely workspace! I could see having half of the desk for my computer/office stuff and using the other half exclusively for crafting. I appreciate the step by step tutorial, I feel like I could actually do this.
howtonestforless says
Thank you so much Laura! One of my favorite DIY projects 😉
Nancy says
I have this flooring in my den washroom and laundry room. I have a pool and it is perfect for dripping little feet! Its beautiful too. Love your idea for it!
Lacey says
The cabinets I am looking at are 35 inches (which seems standard) so I am assuming yours are also that height. Did you find this made for an awkwardly high desk?
howtonestforless says
You will need counter height stools but I found the height to be quite nice. Perfect to stand at when needed, or to sit. Best of both worlds 😉
Karen says
Very cute! I have a question…the hole that you cut out for the electrical cords – what did you use for the plastic ring that “lines” the cut out hole?
howtonestforless says
They make special plastic rings. They’re available at any hardware store specifically for these type of cut outs!
Annie says
This so clever and crafty!, Love it!!!
Lilian T. Baker says
Awesome tutorial,I wish I could turn my apartment into like this, but perhaps a little difficult for me.
Djenane says
I love your idea. I already bought the cabinets and I’m using butcher block for the counter top. But I realized that it’s pretty tall ( I bought kitchen cabinets). Is yours high too? Did you use bar stool type chairs?
Thanks for the inspiration….
howtonestforless says
Yes, you will need counter height stools. LOVE the butcher block idea!
Amy says
Hi. I also use repurposed cabinets from our kitchen remodel. I would love to see how you organize the lower cabinets. I feel like I have so much wasted space. Always looking for ideas on how to better utilize these awesome large cabinets. Can I peek into yours?
howtonestforless says
Here’s a post I did on the organization:
https://howtonestforless.com/2013/03/14/craft-room-organization/
Danielle says
This is awesome! I am going to make my scrapbook nook in my closet. I am going to do this! We already have Bamboo left over from our flooring so shouldn’t be to expensive! Where did you get your peg boards from?
howtonestforless says
Lowe’s!
Ashley says
So most laminate I see are lock and click types. What type was the laminate with the adhesive strips? I am going to do something similar to this in my office, I just cannot seem to find a desk I like (and they are so expensive to only have them fall apart a couple years later. I want to make mine longer so I can have two monitors, and for some light crafting I do now and then.
howtonestforless says
It was called Allure laminate flooring. We got it on clearance so not sure if they still sell it. I would check Lowe’s or Home Depot!
Ann says
Just what I need and perfect timing too. I’m so happy I found this tutorial! I’m redoing my studio and this will be a perfect table for me to paint at and still have enough room for my glasses and mugs to dry. Thank you for sharing and creating this wonderful tutorial.
howtonestforless says
You’re welcome!
Nancy Apfel says
Thanks for the ideas! How deep are your top pieces – 10 x ?. Did you have to do any cutting once you got it home? How did you get the laminate to fit so perfectly? I don’t have any way of cutting once I get home so would have to have it cut at the store. Thanks!
howtonestforless says
The cabinets were 23.75 inches deep so we made the countertop 25 inches deep for a little bit of overhang. The planks were each 6 inches wide so 4 fit perfectly, then we covered that last inch with molding. Hope that helps!
Misti says
Can I al what color paint you have on your craft room walls? Your whole room is beautiful!
howtonestforless says
Thank you! The color is Sea Salt by Sherwin Williams!
Luci says
Thank you for sharing. Absolutely fantastic idea and looks incredible!
Dawn says
Amy thoughts on how to install cabinets on carpet?
howtonestforless says
Remove your baseboard first. I just set the cabinets on top of the carpet and secured them to the wall. Then you can add the baseboard back on. Hope that helps!
Kate says
Thanks for this insight – I was going to ask if you secured them to the wall. I live in an apartment that doesn’t have flush walls (there is a bump-out in sections) and am worried about securing cabinets to the wall being in a rental space. I may just have to go for a more expensive desk option.
Thanks for this amazing guide!
Laura says
How high are the base cabinets? I am finding that from Lowes they are 35 inches high. I think that will be too high for a desk? Thanks!
howtonestforless says
That is correct. You need counter height stools for it!
Jackie Bergholtz says
We made this desk for a homework station on our office and love it! Thanks for the inspiration!☺
Meredith says
This is gorgeous and I’m about to build the exact thing! I’ve got my laminate flooring already! Quick question…. are these cabinets “counter height” like about 35 inches?? I’ve been looking into purchasing some “desk height” ones, that are about 27 inches, but I’m wondering if I should just do counter heigh ones. Does your chair sit at nice height for using the computer? Or is it too high? Thanks!
howtonestforless says
The cabinets are just normal counter height for any base cabinet or kitchen island! You will need counter height stools though and not bar stools!
Taimay Jones says
This is exactly what my husband I are talking about doing. One thing we realized tonight though is that the cabinets are counter height (35 inches), not desk height (30 inches). What size chairs did you use? Thanks for the info!
howtonestforless says
Yes, that is correct that it’s counter height! We just purchased counter height bar stools… I think ours were from TJ Maxx!
Crystal says
Thinking about doing this for my daughters desks/homework station/craft area. Do the cracks between the planks make it difficult to write on? I am envisioning their pencil leads poking through their papers where the planks meet.
Also, we are planning to use upper kitchen cabinets instead of lowers because they are available in various depths and heights.
Ewo Lam says
I like the colour of the floor carpet. Where can I order that?
Hannah says
Curious how the laminate flooring held up for you. We are looking into doing the same thing for my craft room. Thanks!
Susan says
Where did you find the plastic cover for the cord insert?
carmen says
You could do a Google search or look on Amazon.
Brenda says
Please tell me what the flooring is ON THE FLOOR. I love it, but can’t find it. What is it and where did you get it?