As most of you know, Picnik will soon be going away and a lot of bloggers are left in the dark when it comes to adjusting their photos and creating new blog buttons. I’ve always been an avid user of Photoshop and currently have recently been posting about my favorite Tips & Tricks.
 Well today I thought I’d share a quick tutorial on how to make creative blog buttons using Photoshop and stock photos… perfect for beginners. So let’s get going!

First thing you want to do is find your design elements. Since I’m guessing most of you aren’t graphic designers or illustrators, you’ll need a little help with this part! One of my favorite sites to purchase stock photos, illustrations and vector artwork is BigStockPhoto.com.
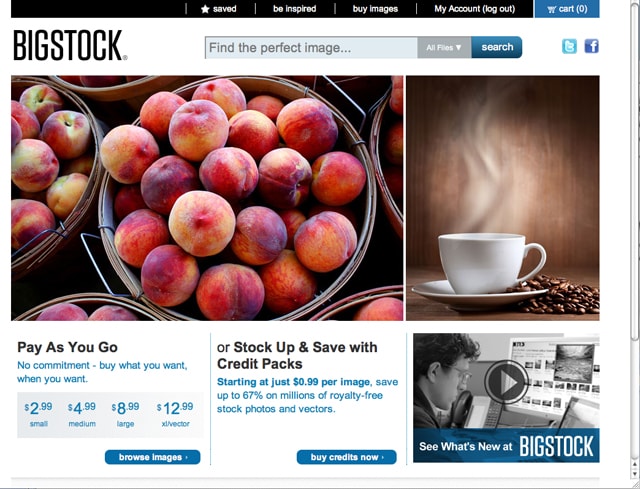
You can purchase web-sized JPGs from as little as $2.99. Yes, you can sometimes find little illustrations online that you can grab off Google, but some of those images are copyrighted. Play it safe and purchase your clip art or illustrations. Plus anything you purchase for a blog button can also be used for your website header or Facebook timeline cover! Just note that any item you purchase from BigStockPhoto.com cannot be redistributed. It is for personal use only.
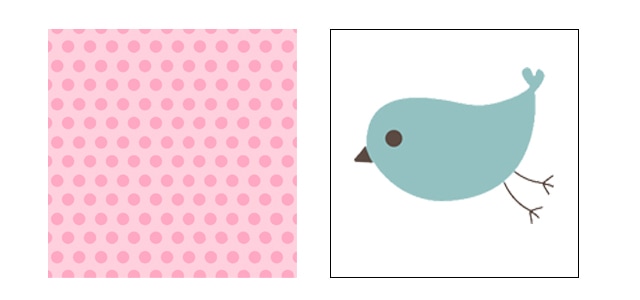
For the first blog button I found this little pink polka dot background (which you could easily create yourself) and a little blue birdie.
 First thing you’re going to do is size your downloaded photo. I suggest starting with a 300 pixel square. Most websites and bloggers use 125×125 pixel buttons, but I find it better to create the file larger and scale down as needed.
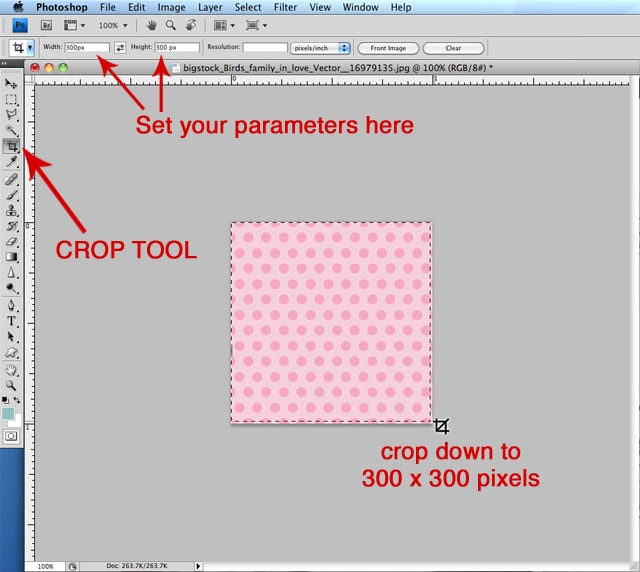
You can either create a new document at 300×300 pixels and drag your downloaded background to the new document and transform it to fit (Image > Free Transform), or you can crop the downloaded image to size (I chose the latter for this exercise).
I set the width and height in the Options Bar to 300 pixels each (see above screenshot) and cropped the image.
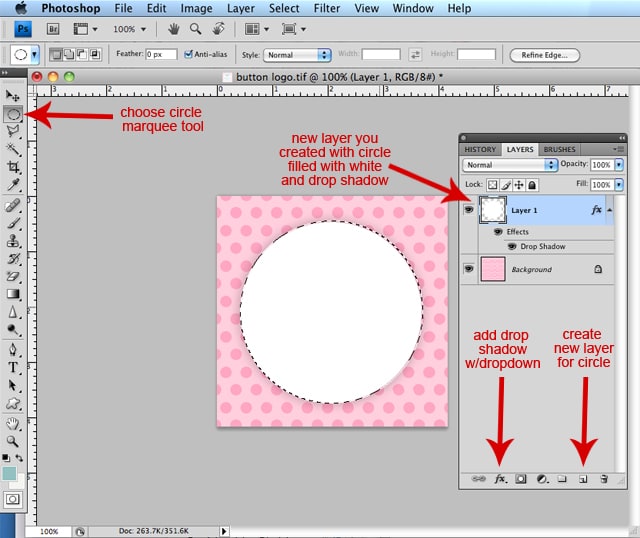
 Create a new layer on top of the background image. Use the circle marquee tool to draw a circle and fill it with white (Edit > Fill). Add a drop shadow if preferred.
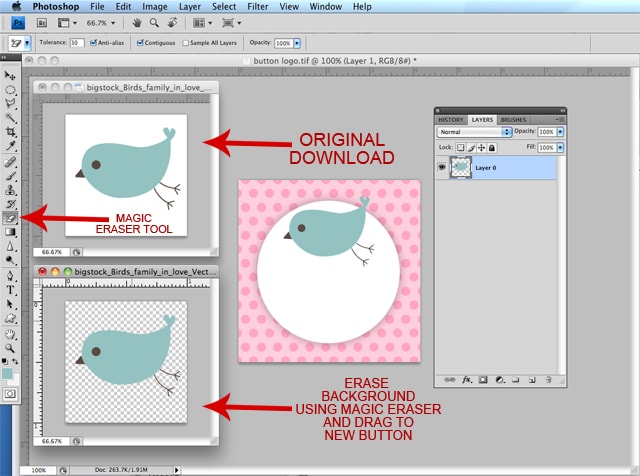
 If your icon (like my birdie) has a plain white background you can use the Magic Eraser to isolate the bird. Just click in the white area with the tool and it magically disappears! Now you can drag the bird onto the new button and create a layered effect.
 Next let’s add some text! Use the type tool to create your text, change the font, and choose your colors. Position it into place.
 Go ahead and save the layered file as a PSD to you can make any changes in the future.
To make the JPG version, go to Layer > Flatten Image.

NOW WE MUST CHANGE THE IMAGE SIZE TO 125X125 PIXELS.
Go to Image > Image Size.
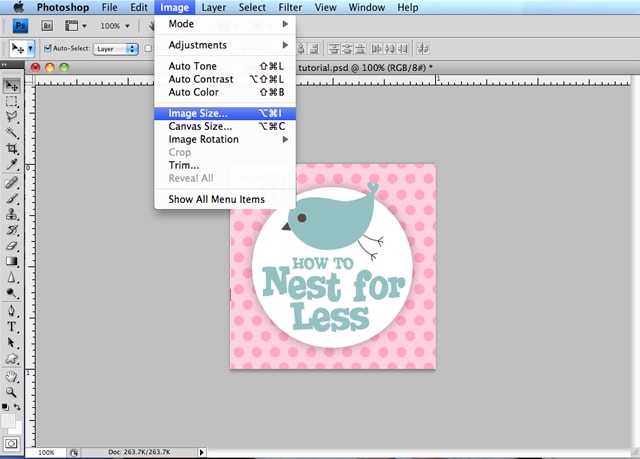 Change the pixel with at the top to 125 (the height should automatically change with it).
![]() Now you can SAVE AS a JPEG by going to File > Save As. Change the format to JPEG and click SAVE.
Now you can SAVE AS a JPEG by going to File > Save As. Change the format to JPEG and click SAVE.
TADA! YOU HAVE A BLOG BUTTON!
{aint’ she cute?}
If I didn’t overload you too much already,
wanna see one more quick thing?
For this next blog button I decided to download this fancy background with several tags. It had everything I was looking for… clean space to type my information, a little birdie for “How to NEST for Less” and some little clothes buttons (for this blog BUTTON!). OK, it’s not always that easy to find something so perfect, but it does happen!
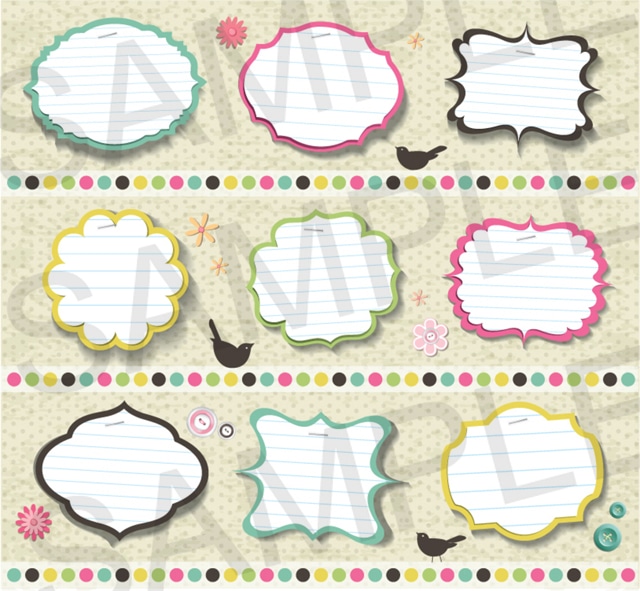 I downloaded the small version and saved it to my desktop.
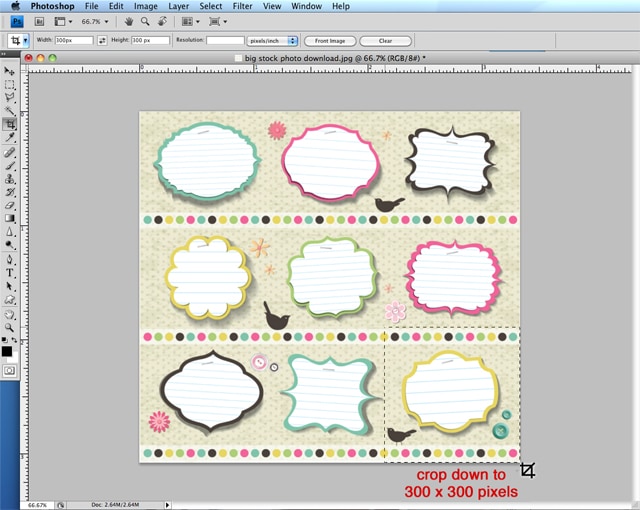 Now I don’t need all of this. I only want the bottom right hand corner so I’m going to crop out the rest.
Use your crop tool and set the parameters in your Options Bar to 300×300 pixels. Again, I do this size first because it’s easier to see the details when I’m creating these elements and I can always make the image smaller… you can NEVER make an image bigger (it will get pixelated and blurry!).
 Once you have the image cropped, you can add your text (I rotated mine a bit with the Transform tool or Control/Apple T).
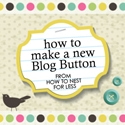
And that’s it!
Looks like a professionally designed button in a matter of minutes!
BigStockPhoto.com has a bunch of elaborate, predesigned scrapbook-like elements available for download. This is make your design effort SUPER SIMPLE! Just plop on the text and you’re done! Here are some quick samples of some adorable backgrounds…

One last thing… If you want a grab box with the code for your new blog button, check out these tutorials:
The Cool Realm Code Generator
Between Naps on the Porch
Live. Laugh. Rowe.
Debbie~refreshrestyle says
I am so going to try this! Shared on FB, thanks!
Debbie
Claire says
Thanks for such a great tutorial, Erin! I’m hoping I can use the information to do something similar in Pixlr since I don’t have Photoshop. I had no idea there were so many great free images!
Can’t wait to make a prettier button 🙂
Claire
Claire says
Oops, make that almost free!
Holly @ My Sister's Suitcase says
Thanks Erin! I just pinned this and I will definitely be referring back to it soon 🙂
Andrea says
This was really great and easy to follow. Thanks, so much! I just recently started my own blog and am trying to learn how to do some of the design stuff myself. Photoshop can be really overwhelming, but you made it look do-able. Your site is gorgeous, just wanted to give you a shout-out since I’m a fellow St. Louisan. 🙂
howtonestforless says
Thanks Andrea! Are you going to the bloggy boot camp in April? Would LOVE to see you there 🙂
Andrea says
I will have to look into it. I am BRAND new to blogging, not even a month in! So, I’m still learning, but I’m so glad to find out there are local resources out there!
howtonestforless says
Good luck Andrea! Let me know if you have any questions 🙂
Shirley@motivatedmommyoftwo says
Do you mind me asking what is bloggy boot camp? I am a new blogger would love to attend. Is this something you have to go in person?
And Thanks for the tutorial I do not have photoshop but thinking I can use pixlr instead
howtonestforless says
Shirly: Yes, bloggy boot camp is a one day blogging and social media conference from the SITS girls. I will be attending the one in St. Louis on April 21st. Here’s a link to the one I’m attending: http://www.bloggybootcamp.com/st-louis-2012/
Laura / Pet Scribbles says
Visiting via Serenity Now’s Weekend Link Party! Glad I saw this, and have already pinned it, as your step-by-steps will come in handy! Thanks for showing us how it is done!
howtonestforless says
THanks Laura!!
Laura says
Visiting from Making the World Cuter’s link party- this is a really helpful post for a new blogger like me! Thanks SO much!
~Laura
Hilani-Handmade by Hilani says
Erin, this is great!!!
Kristiina says
Thank you! I’m going to try this as soon as I have time.
Kate @Craft Whatever says
So simple! Pinning this so I won’t forget!!
Erin@myveryeducatedmother says
Now that’s a tutorial I can actually follow and understand! (I found you via Crafterminds.)
howtonestforless says
Thanks Erin!
Laura Beth says
Erin, thanks for the great blogging tips. I used to use Picnik for EVERYTHING but with that going away I think I need to invest in photoshop!! You really produced some great images :o) Pinning!
howtonestforless says
Thanks so much Laura Beth!
Sarah Carletti says
Well done. Great information! Thank you!
howtonestforless says
You’re welcome Sarah!
Vanessa Barker says
This is such great information. Thank you SO much for sharing
I’d love if you could come link up at my first ever Tutorial Tuesday at Our Thrifty Ideas http://www.ourthriftyideas.com/2012/04/tutorial-tuesday-1.html
thoroughly modern me says
Thank you for putting this together. I am a graphic designer wanna be but don’t think it will ever happen. If I could create blog buttons etc. I would be content!!
howtonestforless says
Good luck!!
Jackie says
Thank you for sharing your tips on making a button!! I’m a new follower! 🙂
howtonestforless says
Thanks Jackie, and welcome!
Kim says
Thanks for the great tip!!!
The American Homemaker says
Very fun! I’m a self taught photoshop user… there is SO much I still need to learn!!!
Rachelle says
This is soooo helpful! I’ve been wondering how everyone has been popping up with these super nice buttons. Thank you for sharing! (I LOVE yours by the way…)
howtonestforless says
Thanks so much Rachelle!
Sarah says
Oh my gosh this is so helpful to me & I found it at just the right time. I need to create a button this weekend & had no idea where to start. Thank you so much for this tutorial! You did a great job explaining it!
howtonestforless says
THanks Sarah! Good luck with your new buttons 🙂
Jenn says
Thanks so much for the great tutorial! I will definitely be using this. Pinned it!
Jenn 🙂
howtonestforless says
THanks Jenn!
Natalie @ A Turtle's Life for Me says
I love your style and your writing style, but, unfortunately, I’m still lost! No worries, I’m sure it’s all my fault, but I just spent about an hour and half trying to make a button and in the end I got nowhere. I’m using Photoshop Elements, though, and I’m wondering if that’s the problem (aside from the fact that this stuff doesn’t come naturally to me AT ALL). Everything just came out all blurry and I couldn’t figure out where to fill in the circle with white and when I used the magic eraser tool, it took away all of my frame and left me with nothing but words! I think I’m off to bed for the night, but I’ll be back to try again tomorrow!
howtonestforless says
Photoshop Elements should be pretty similar to the full version of Photoshop (at least in the uses for creating a blog button). DON’T GET FRUSTRATED!! Practice makes perfect 🙂 Get some sleep and try again tomorrow! And if you have any questions, please feel free to email me (or we can set up a quick phone conference!). I’m here to help 🙂
Natalie @ A Turtle's Life for Me says
You are so sweet and I might take you up on that offer for a little extra help (or I may just pay you b/c I completely mean it when I say I’M LOST!!!). I need to take a break to get ready for Easter but I’ll back after everyone clears out of here on Sunday to try again! Thanks so much!
Hollie Milne says
I appreciate all the tips you share about photoshop.
howtonestforless says
Thanks Hollie 🙂