My brother and his wife just had their first child two weeks ago and it came down to the wire to get a few last-minute details finished in the nursery. One of the things that they just had to cross off the list before the arrival of Baby Evelyn? The glider.
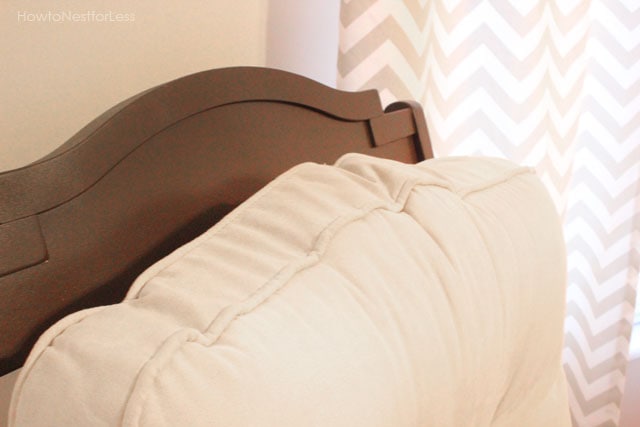
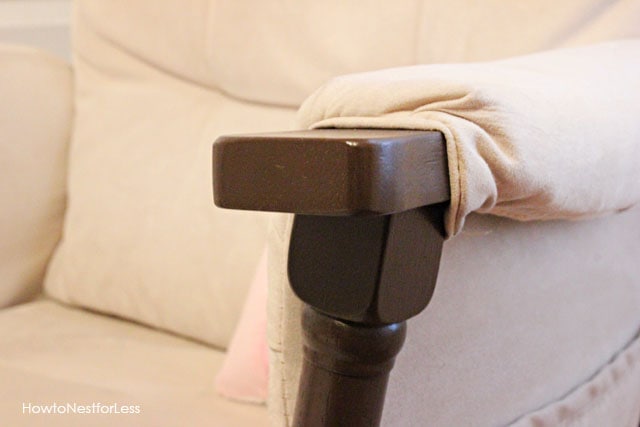
They received this natural wood baby glider from some friends and it was really in great condition. I mean not one little stain in the cream colored cushions and not one knick in the wood. The only problem? The baby’s furniture was Expresso, a dark brown wood color. So I offered to fix it up for them DIY-style!
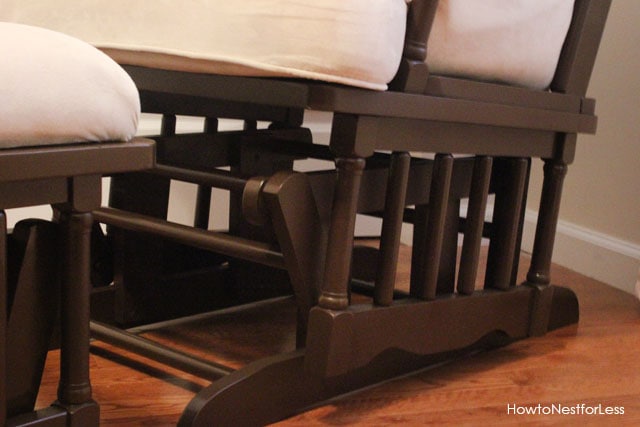
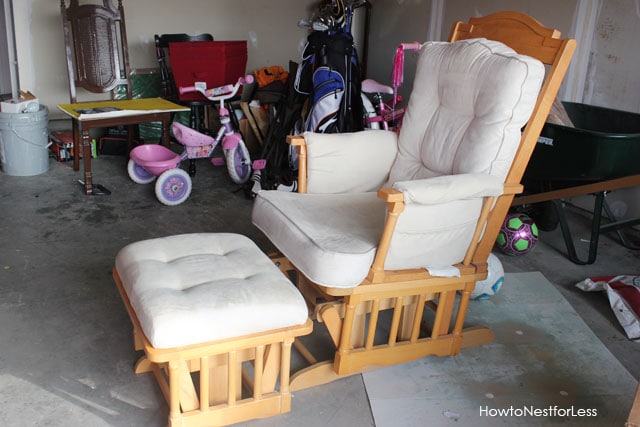 Since there were so many spindles in both the glider chair base and the ottoman, I opted for spray paint with this project. Yeah, brushing paint in all the crevices, nooks and crannies in this project would have been impossible.
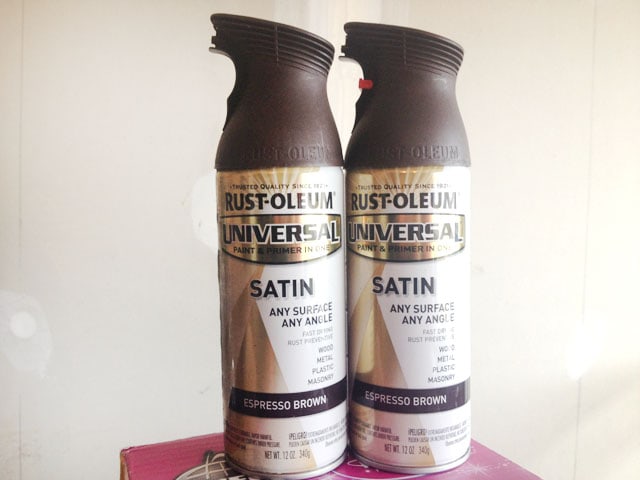
First step was removing all of the cushions. A couple screws and snaps… quite easy. I gave the wood a quick coat of Zinnser 123 Bull’s Eye primer and once that was dry I have the glider chair and ottoman two coats of Rustoleum spray paint in Expresso.
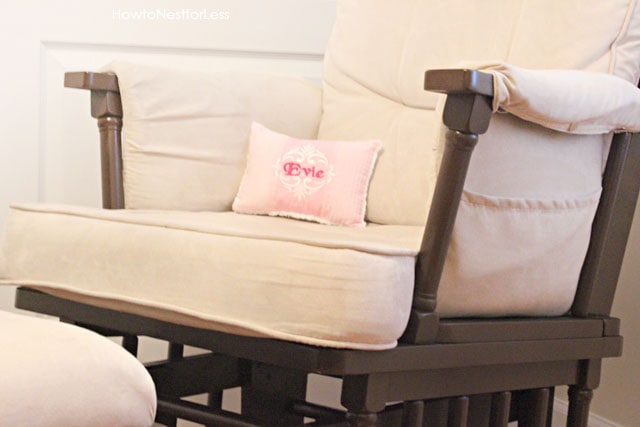
And here’s the final result!
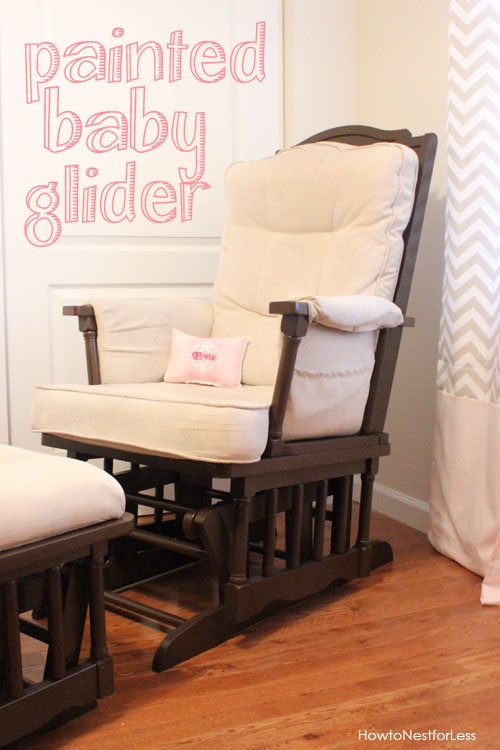 The photos are a little noisy since the bedroom is so dark and I didn’t have my tripod with me, but I’m guessing you get the idea. Looks great with the rest of the expresso nursery furniture. And my sister in law’s mom even thought the glider came with the rest of the bedroom furniture. That made me smile!
Yep, truly is amazing what a simple coat of paint can do!
Glider = FREE
2 cans of Zinnser primer = $12
4 cans of Rustoleum spray paint = $20
One happy baby girl and Mommy = PRICELESS
Total is $32 for a great new glider for Baby Evelyn’s nursery.
Linking up here:
Carolyn’s Homework, Sugar Bee Crafts, Uncommon Slice of Surburbia, Shabby Chic Cottage, Beyond the Picket Fence, House of Hepworths, The 36th Avenue, Today’s Creative Blog, Not Just a Housewife, Tatertots & Jello, Shabby Nest, 30 Handmade Days

Eva Marie Scott says
Wow, that’s looks fab! No way to tell it’s spray painted. Good to know!
howtonestforless says
Thanks so much!
Dana {Crafted Niche} says
Wow! That turned out great! Was it hard to get in all the books and crannies?!
howtonestforless says
I’m not gonnna lie… YES!
Lauren says
Wow! Your glider looks great! I recently used Rustoleum to give an end table (that I converted into a spice cabinet) a new look. I have a glider that looks almost exactly like the one you re-did. I might have a project to do now!
howtonestforless says
End table to a spice cabinet? That’s awesome!!
Crystal says
Wow!! It looks awsome!! It turned out great. Great job!!
Anita says
Looks great! Did you sand the glider at all before spray painting?
howtonestforless says
Nope, no sanding needed! Just give the paint some time to cure before use (usually 7 days).
Carissa says
sooo much better! i love how spray paint completely changes the look of something!
Flo says
I love the look! I am doing a glider for my grandbabies room. What did you do abut the underneath where the mechanism is? Did you tape off or just spray it??
howtonestforless says
Completely sprayed everything! 🙂
zeenat says
Did you have to sand the chair at all?
howtonestforless says
Nope! Just make sure you use good paint.
JC says
This is perfect for what I want to do for my sister’s baby shower gift. I got my glider from a garage sale for $10 and I was going to go through the hassle of stripping it and sanding it, etc.
But this paint option is so much easier. Were there any issues with the gliding motion of the chair after spray painting everything? Before, I was going to use an oil based stain.
howtonestforless says
No issues at all! Still in great shape!!
Kim says
Thank you for posting this!! This is my exact problem. Yay, now I can fix it!
howtonestforless says
Good luck to you!
ashley says
Do you think this would work okay if I have a dark brown glider and I want to spray paint it white?? Did you just do the one layer of primer? Do you think I need to do a couple layers since I’m going from dark to light (white!)? Ahhh, I’m scared I will mess it up!
howtonestforless says
yes, that would work! I would definitely prime first, probably two layers. Don’t worry, you won’t screw it up! Just don’t spray too close so you get drip marks.
Jordan says
I just ordered all the necessities to complete this project. I just got a wooden glider like this and wanted it the color of my furniture so i will be attempting this look!. Did you spray paint outside or inside?
carmen says
I would suggest outside.
Michelle Walker says
Beautiful job! Is there a way to cure the paint faster? I don’t have 7 days. I’m trying to do a child-size glider as a gift. I messed it up trying to refinish with wood stain, but I only have 3 days before the birthday party.