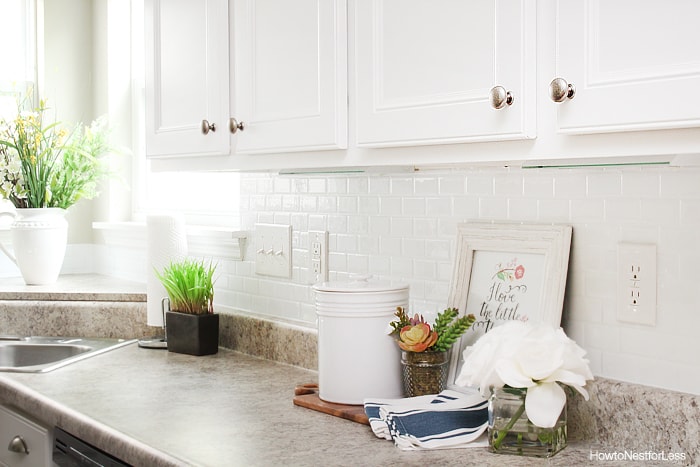
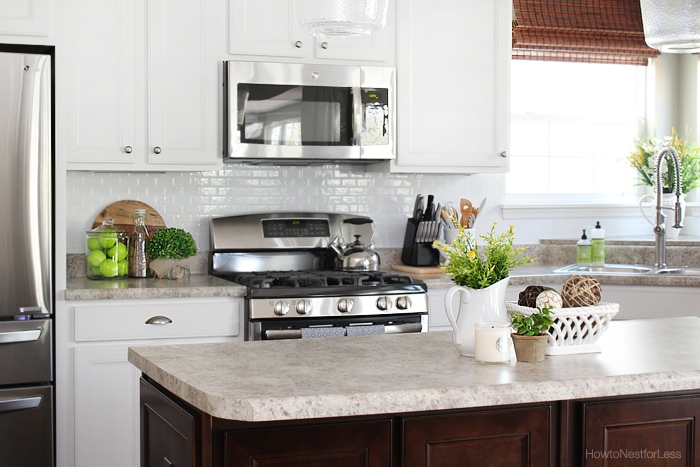
I was surprised at how easy it was to apply this self adhesive kitchen backsplash!
Make sure you follow me on Instagram and Pinterest for a sneak peek into my recent projects!
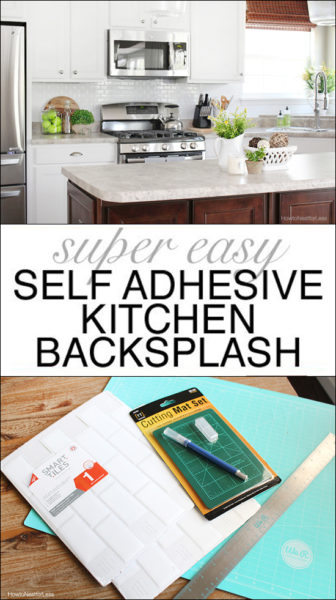
So last summer while we were living with my brother I gave his kitchen a little mini-makeover with Smart Tiles, a self-adhesive kitchen backsplash that I found at The Home Depot. I loved how this DIY backsplash turned out so thought I would try it in our new kitchen.
The PROS of a self-adhesive backsplash?
- I want to get new countertops next year so I wanted something temporary.
- Fast installation. Probably took only 4 hours at most!
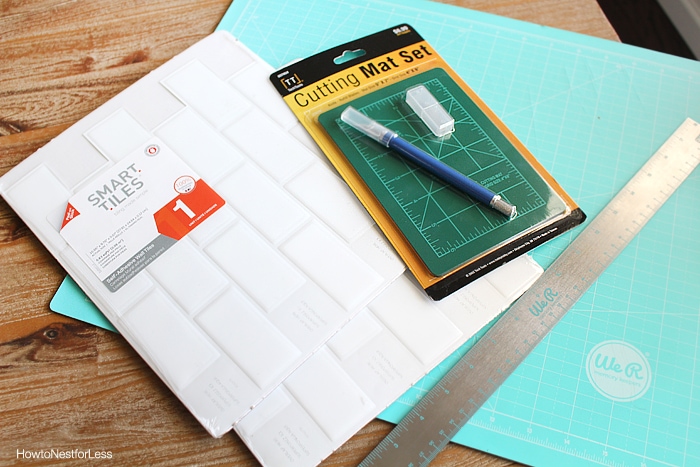
- No special tools needed. Just an exacto knife and cutting mat.
- Easy to wipe down and clean.
- It looks really good!
And here are what I think are the CONS of the backplash:
- When you remove the backsplash it might peel off parts of your drywall. Yeah, pretty big con.
- It’s not necessarily cheap. This backsplash cost me over $300. The ceramic subway tile backsplash we installed in our last house only cost us about $250.
- You have to be careful with how much you overlap each piece because it can look off.
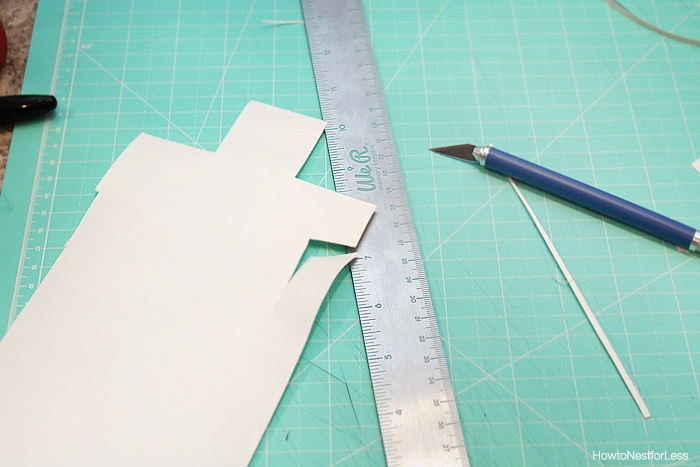
One tip I have for the installation process is to use the backing pieces as a template.
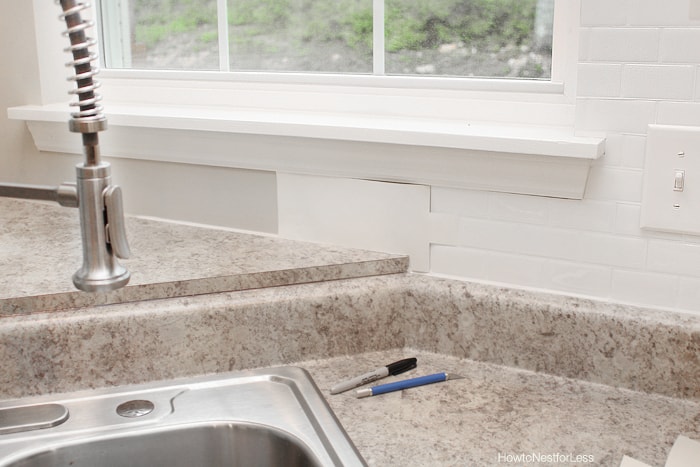
It will especially help in those tricky areas like around windows.
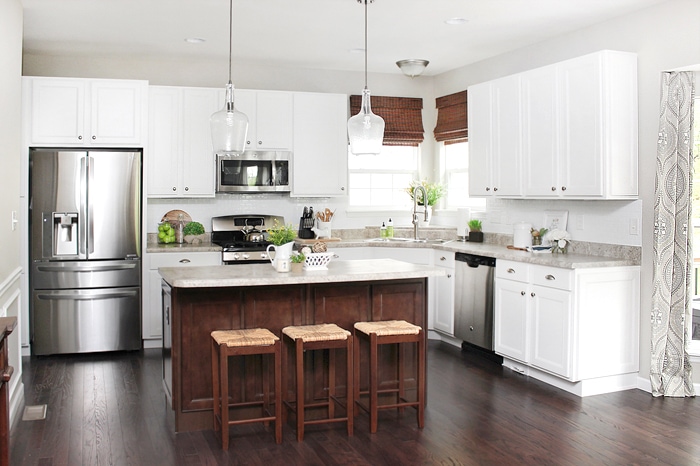
Overall I’m very happy with how it turned out.
Pretty cool looking, right?
The best part is that it was quick to apply with the self adhesive backing.
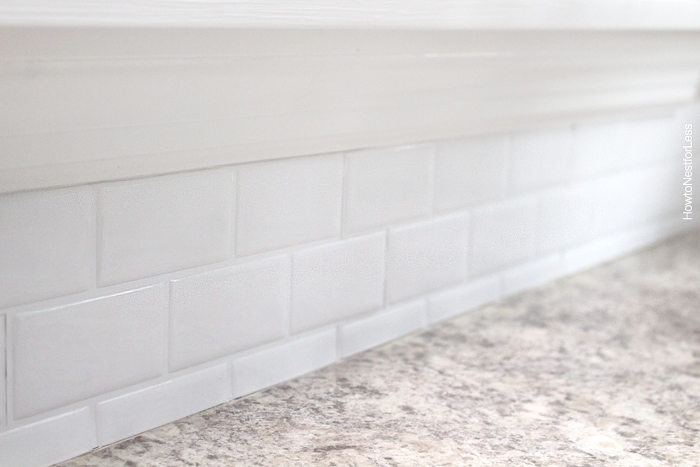
We did end up using some caulk in the corner and around the windows to fill in some minor gaps. Luckily we didn’t need to use any caulk along the bottom since we mounted it pretty flush.
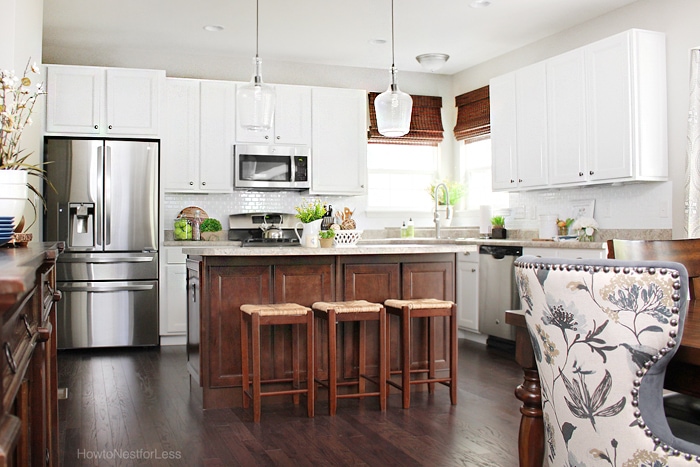
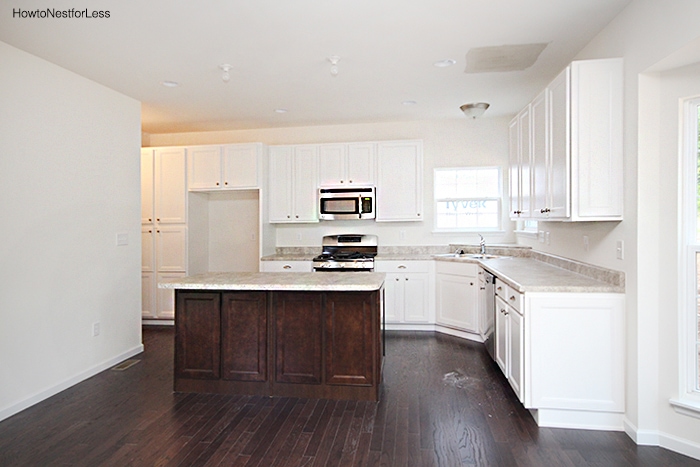
It’s hard to believe how much this kitchen has evolved in the past 8 months.
Overall I’m happy that we decided to use Smart Tiles again since it is a nice temporary solution until we decide on our new countertops. And at least this makes me feel like I don’t need to rush on that decision since my kitchen now feels complete (with the exception of that pesky blank wall to the left of the island).
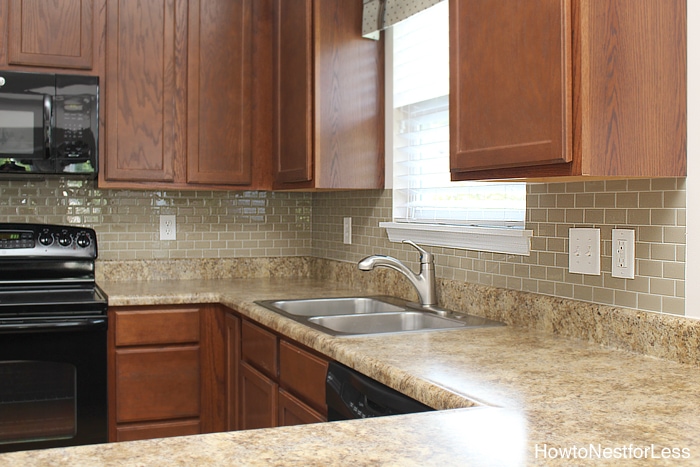
If you want to see a darker tile backsplash & a step-by-step tutorial,
check out my brother’s kitchen mini-makeover.
If you have any questions about this temporary backsplash,
just let me know and I’ll try to answer them the best I can!

Mary T says
I love your kitchen! why do you want to re-do it? Also, I love the farmhouse look insiide, but my home is a colonial on the outside. would it be too much difference to do the farmhouse look inside a colonial home? Thoughts? has anyone else with a colonial done that? I’m in love with all things farmhouse style!!
melanie says
I love the fresh look of your kitchen with a chic contrast of white coordinated nicely with dark brown, and completed with pops of green accents.
Rhonda Chapman says
What a fantastic idea! I didn’t know this existed. I, too, love white. It’s not only a ‘safe’ colour, but there’s something with white, it just feels refreshing, relaxing, calming and pure, I guess?
Do they say how long it’s guaranteed to stay in place?
Erlene A says
Wow, it looks great.I’ve seen this before, but some people say it peels off. Looks like yours stayed up really nice.
howtonestforless says
Still looks great at my brother’s house too!
CD Loken says
Your kitchen is absolutely STUNNING, Erin! Thank you so much for s TON of inspiration-and for sharing at The Wonderful Wednesday Blog Hop!
Nikki says
This is perfect timing! My in laws are considering going this in their kitxhen for a temporary fix. I am sending this to my MIL now.
howtonestforless says
Awesome! Glad you found this 😉
Mary-the boondocks blog says
What a great idea this is, and it is practical and looks really great. I wouldn’t have known it was adhesive if you hadn’t told us. I am hosting a new link party, Sweet Inspiration and would love to have you join us. It runs Friday till Tuesday.
Simone says
Absolutely stunning! Great job!
howtonestforless says
Thank you!
Suzy @ Worthing Court says
This is truly amazing! I’ll be featuring your project at The Scoop this Monday night. Thank you for linking up!
Samantha says
It looks so beautiful! Love it! Thanks for sharing at Dream. Create. Inspire. Link!
Jenny Kavanagh says
I really like this idea. I am waiting for new countertops too and this could be just the answer while I wait! Thanks for sharing
-Jenny
Betty says
“I want to get new countertops next year ” —> you just built this house and moved in 8-9 months ago, why would you already be talking about new countertops?
howtonestforless says
Granite countertops were expensive from the builder and they only offered 6 different color options (none of which we loved).
Kathy Healey says
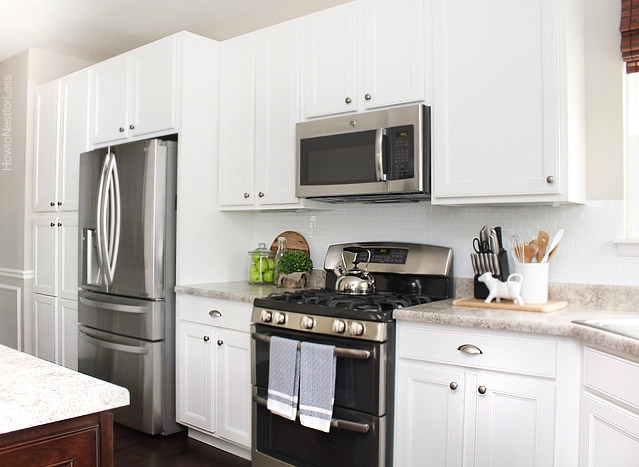
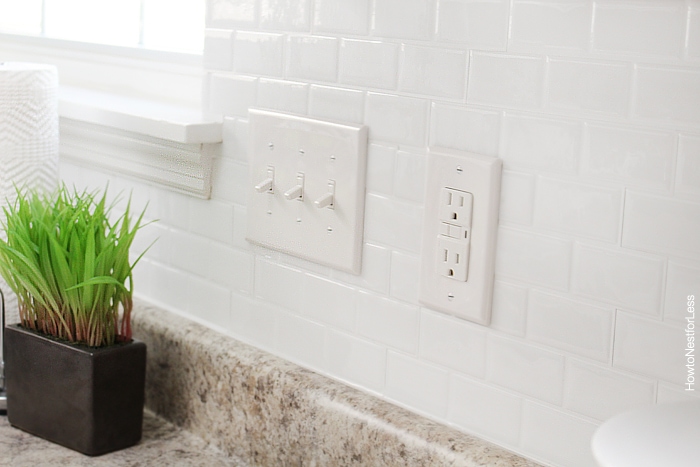
On the right side of the kitchen what did you use to “finish” the end of the backsplash?
howtonestforless says
Nothing! I just cut the tile where the cabinets ended. If you want, you can cut a thin line of the “caulk” from the self-adhesive tiles to make it look like a finished edge.
Lisa at Texas Decor says
This was a fantastic idea! It looks great and your whole kitchen is beautiful!
howtonestforless says
Thanks Lisa!
Ann Victoria Paras says
I love the idea. Why do you call it temporary?
howtonestforless says
It can be permanent! We just know that we will eventually remove it when we upgrade our countertops. Will be much easier to remove this than a ceramic tile backsplash!
mjh says
Would this adhesive tile work over existing real ceramic tile? Or could you suggest a better option for re-doing an existing tile backslash without removing the existing tiles? The prior owner tiled around the sink, the stove and three different walls worth of cabinets…in seashell pink.
howtonestforless says
Yes, it does work over existing tile! So no worries, you can get rid of that seashell pink 😉
saran mason says
hi I saw the update you did to your brother kitchen. my kitchen is the same color cabinets and countertop.. the lament countertop.. I also have a bar /island like in your kitchen that is the same color as my cabinets like your brother..in your kitchen you painted the cabinets white.. trying to see if I was to update my cabinets with paint how would that look.. since they are the same like brown color as your bother kitchen? Help want to be DIY in NC,
howtonestforless says
I think the white kitchen cabinets would go great with the countertops and backsplash! I almost talked my brother into painting his cabinets white but he ended up selling that home last month so I was never able to. Good luck with your kitchen renovations. I bet it will look great!
Nancy Stover says
love the lights from Lowes in your kitchen will you please post the product information I want to buy 2 for my kitchen thanks Nancy
howtonestforless says
Here you go:
http://www.lowes.com/pd/allen-roth-9-88-in-Aged-Bronze-Vintage-Single-Clear-Glass-Geometric-Pendant/50356104
Betty says
Another white kitchen. LOVE. LOVE. LOVE. We will be re-painting our off-white kitchen cabinets this fall with a whiter white like yours. With a possibly dark lower cabinet peninsula. Can you tell me if your kitchen floor is hard wood or laminate? It’s just beautiful with the white cabinets. Looking at your pictures is a huge motivation for me. Thank you, Erin.
howtonestforless says
Our kitchen floor is hardwood, a dark stained oak. We love them but they do show everything and get scratched somewhat easily. We had upgraded slate vinyl in our last house and I actually miss the ease of it!