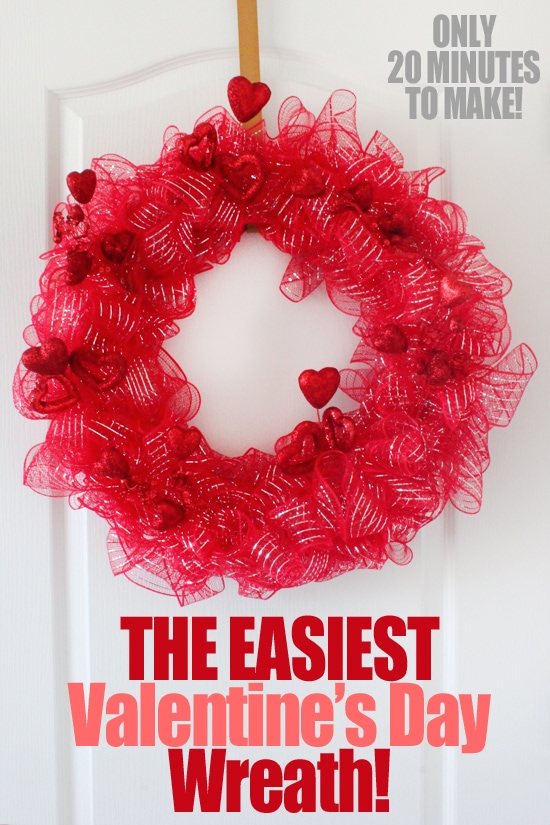
Look at this gorgeous Valentine’s Day wreath!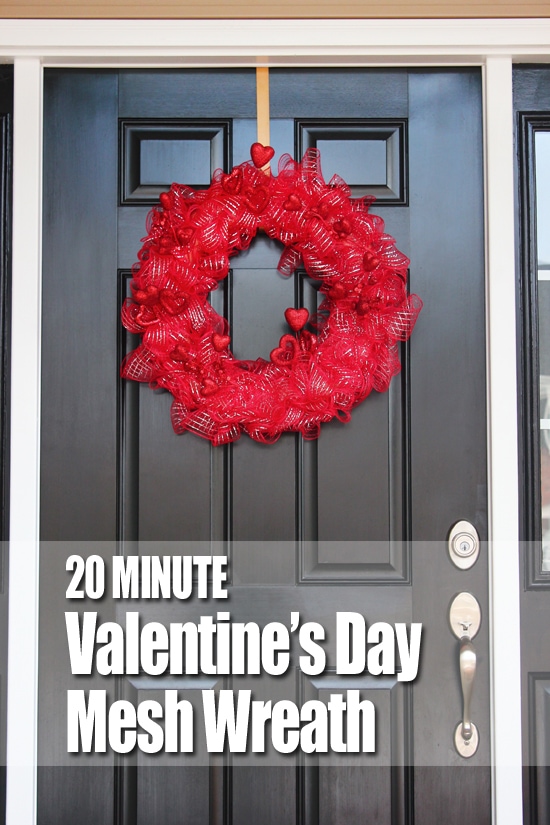
I promise you, this is a 20 minute project. If that. My husband left the house to pick up our child from school down the street and by the time he was back, this was finished. A stunning 20 minute Valentine’s Day wreath!
 Now I must preface this by saying I’ve never made a mesh wreath before. I have no clue how to “really” make one. So if you want to call this cheating… by all means.
OH, and did I mention that the red mesh was on clearance? Yeah, Christmas ribbon at 80% off from Michael’s. Cheap and fast… just my style.
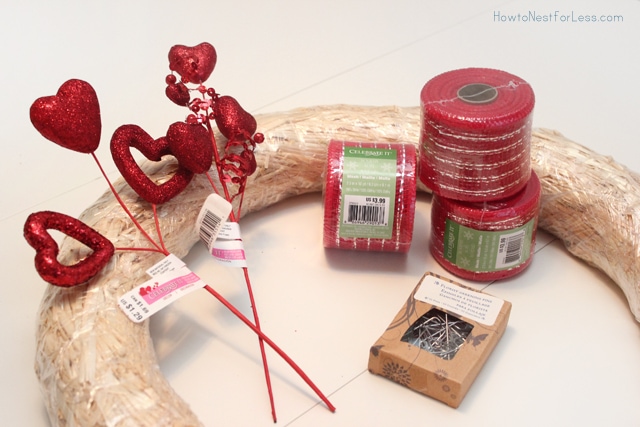 The supplies:
• Straw wreath form still in its plastic
• 7 stems of Valentine’s Day spray ($1.29 each)
• 4 rolls of Christmas mesh ($4 marked down to 80¢ each)
• Greenery pins
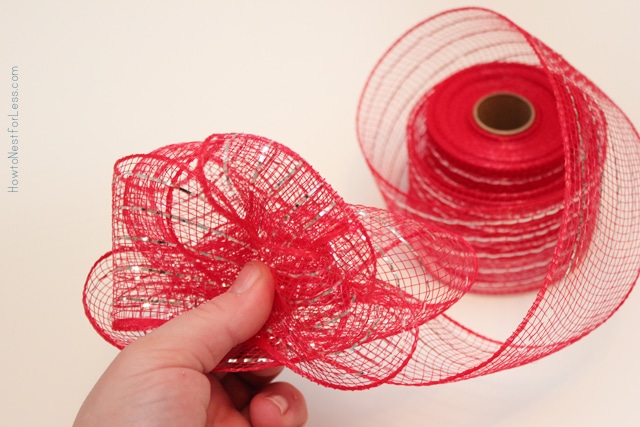
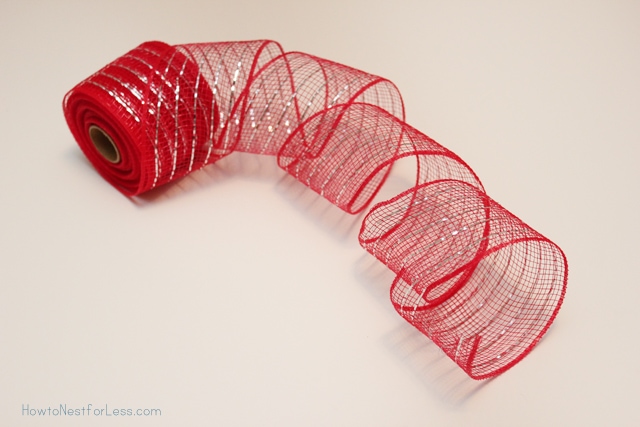 Now let me tell you why this only took 20 minutes at most to complete: I basically let the ribbon mesh fall off the roll (as seen above)…
Then grabbed it a couple loops and pinched it together.
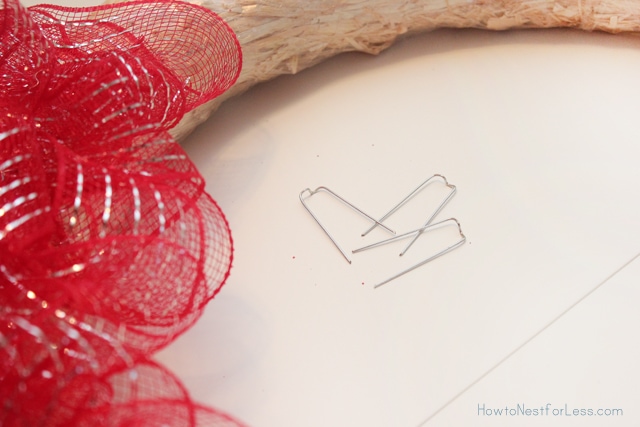
 Then I pinned it to the straw wreath using a greenery pin.
I did NOT cut the mesh before the next pin. Just keep pulling loops and pinning.
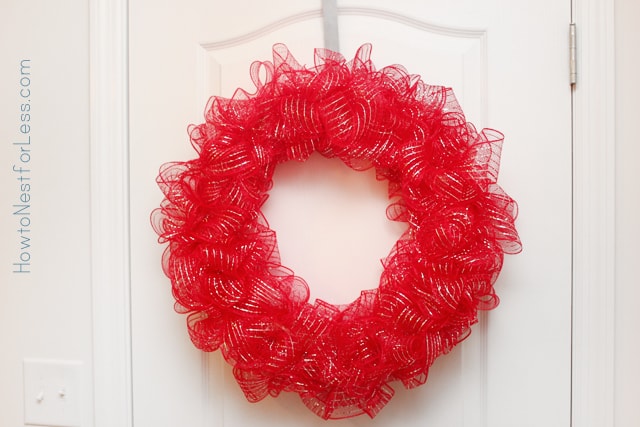
 Now since the mesh is a little see through, I did three different layers around the straw wreath form. One in the center, one along the outside of the wreath, and one along the inside of the wreath.
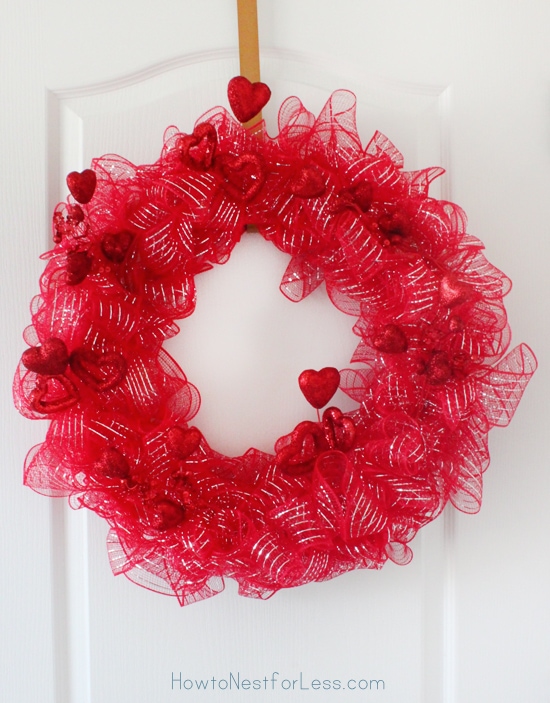
And pretty soon (like less than 15 minutes) your Valentine’s Day wreath will look like this…
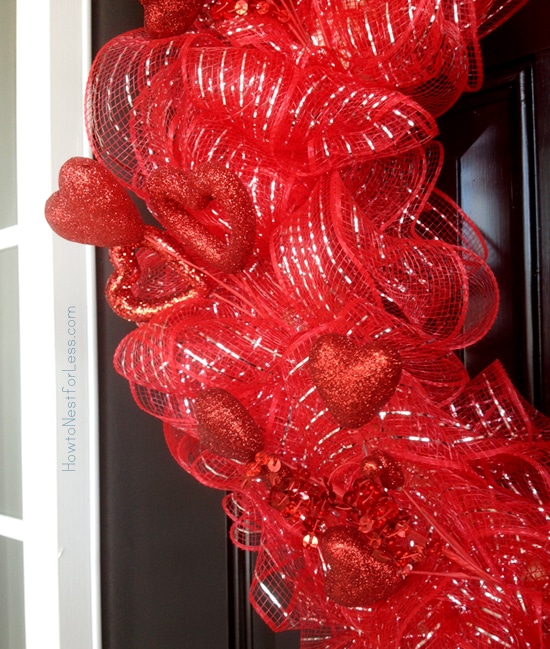
 To add just a little bit of Valentine’s Day bling, I attached the spray with greenery pins as well.
 And BAM! A new Valentine’s Day wreath in less than 20 minutes.
And try to run out and get some of this red Christmas mesh on clearance for 80% off. Seriously. Now if I can go back and find some green for St. Patty’s Day…
For more amazing Valentine’s Day ideas check out Get Inspired: 10 Valentine’s Day Craft Projects

Judy I, St. Louis MO says
Wow! That turned out great. I saw some of that ribbon on sale and just passed it by because I had no idea how to make a wreath with it. I’ll be on the lookout for the ribbon and give it a try.
howtonestforless says
Good luck Judy!
Karen Henderson says
Nice. Very nice. Colors are vibrant. I am sure it will take me more than 20 minutes. 🙁 Thank you so very much for sharing you talent with us.
howtonestforless says
You’ll be surprised Karen! And it’s one of those things that you really can’t mess up since you’re just wadding ribbon and pinning it down. Trust me 😉
Kim Weir says
So cute!
Cheryl @ Artzzle says
Looks great. Don’t ya just love these EZ PZ projects.
kathy t says
It is hard to believe it is this simple! Im going tomorrow to look for the mesh. Thanks forsharing
howtonestforless says
You’re welcome Kathy. Good luck!
Kelly V says
Super Cute! I want to cheat, too! The way I was doing it was real irritating. I won’t go into details.
howtonestforless says
Haha, glad to help you find the easy way 🙂
Connie Watson says
Love this! I am planning a rehearsal dinner with red as a primary color. I am going to try to make a few of these for some extra decor I need; then I will keep one for myself, and give one to the bride, and then have an extra! Your instructions seem simple and very clear! Thanks!
howtonestforless says
You’re welcome Connie! Great idea, too. Good luck to you!
Jennie Duncan says
What an awesome idea! I can imagine that this kind of wreath can be made for any type of holiday. I wonder what a wreath like this in “Christmas” colors would look like? I saved it to my “Pinterest” board for future reference. You did a great job Erin! Thanks for sharing your great idea!!
Carla says
That is so cool and maybe easy. I’m all thumbs when I go getting crafty like that. But I may have to try it.
Thanks for sharing
howtonestforless says
You’re welcome Carla!
Delores says
What is the width on the ribbon that you used?
howtonestforless says
I think it was about 4 inches.
Cindy says
I love the way you made the Easter wreath. What size straw wreath did you use? I am going to make several different wreaths like that. Thanks for posting the directions.
howtonestforless says
I normally use an 18 inch wreath form. Good luck with your wreaths!