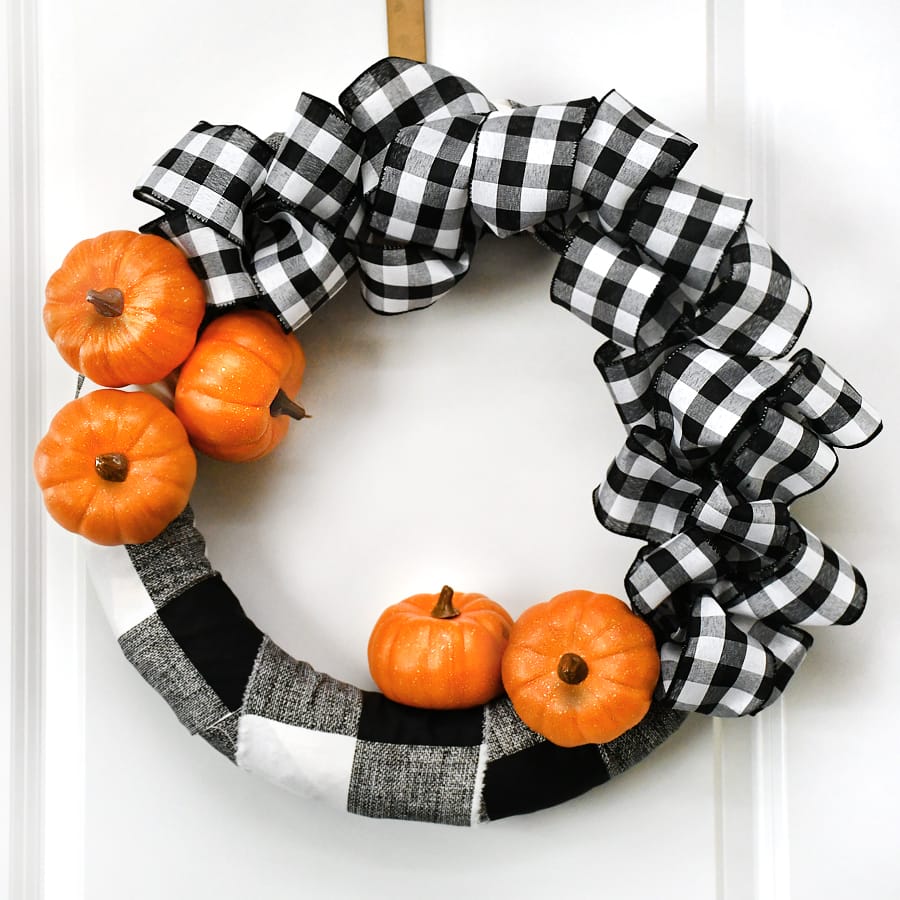
This adorable buffalo check pumpkin wreath looks amazing on the front door or you can hang in the house for some seasonal decor!
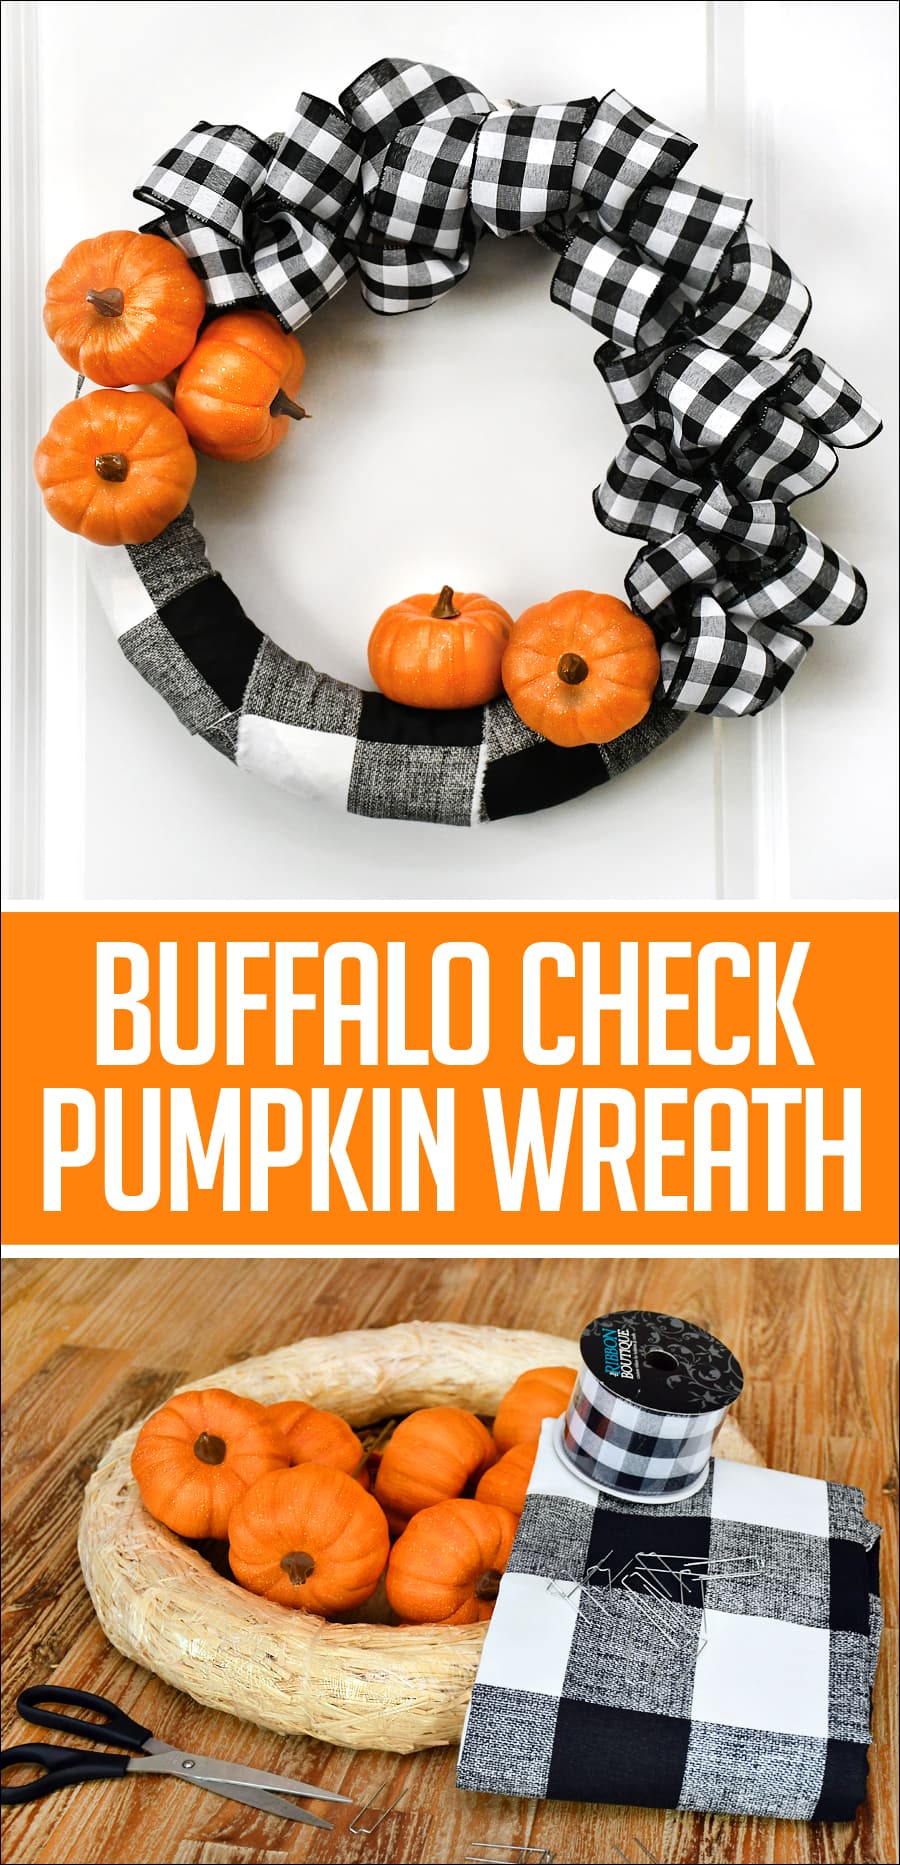
If you guys have seen my front porch, you might remember that I have two super cute black and white patterned outdoor rugs. Well I really do love them and decided this autumn I would incorporate them into my fall front porch design. Then I thought a cute idea would be buffalo check mixed in with orange pumpkins… So my first project for the Fall front porch makeover is a Buffalo Check Pumpkin Wreath!
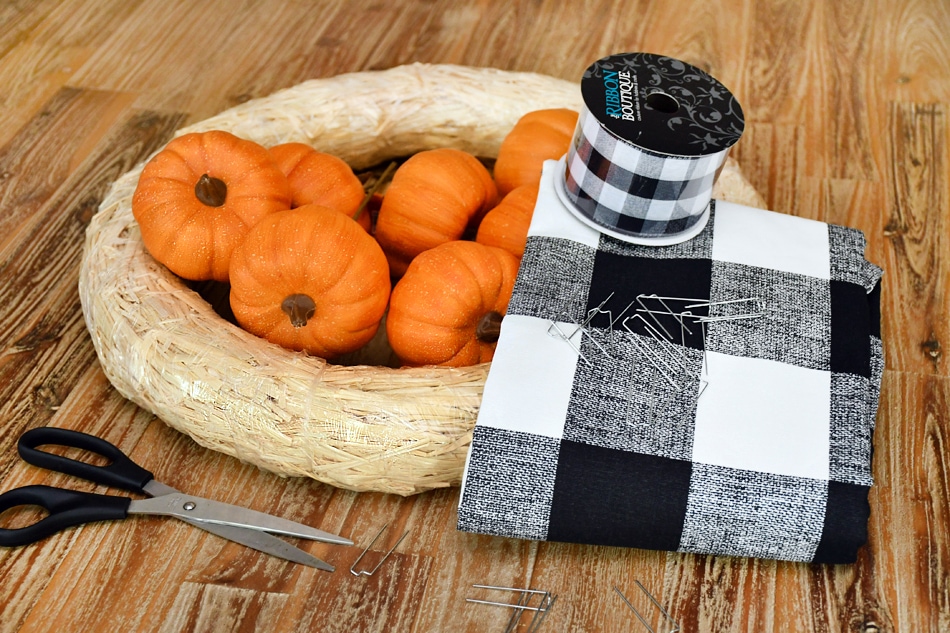
SUPPLIES:
- straw wreath form (still in plastic)
- buffalo check fabric, cut in 4 inch strips
- buffalo check ribbon
- greenery pins
- pumpkin picks
- scissors
- hot glue gun
DIRECTIONS:
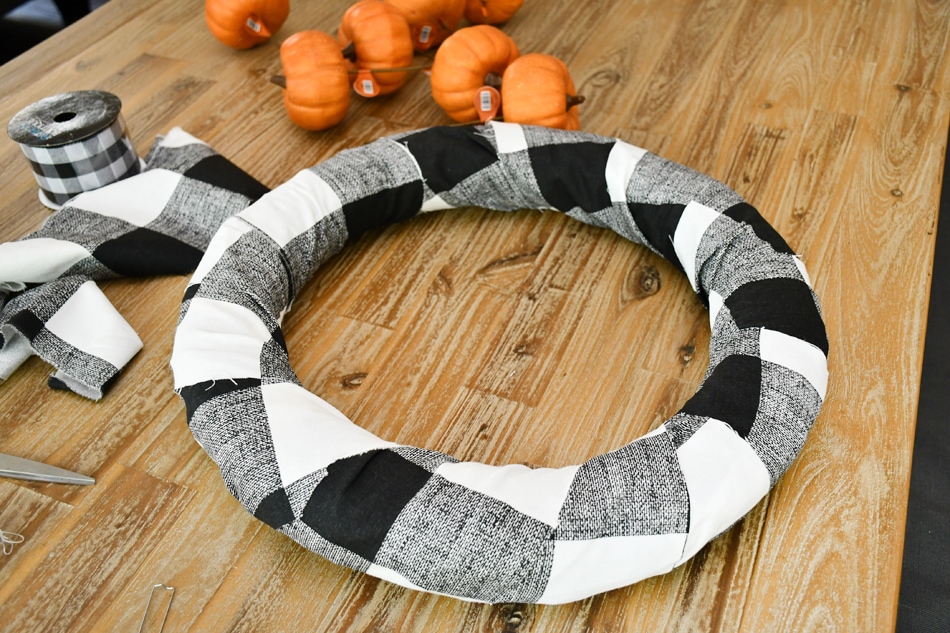
First thing I did was cut the buffalo check fabric into 4 inch strips. FYI… if you’re looking for some of this fabric, I actually purchased mine from Amazon. You can grab it HERE for $9 a yard with Prime shipping. For this wreath you’ll use about 1/4 of a yard, plenty left for other craft projects!
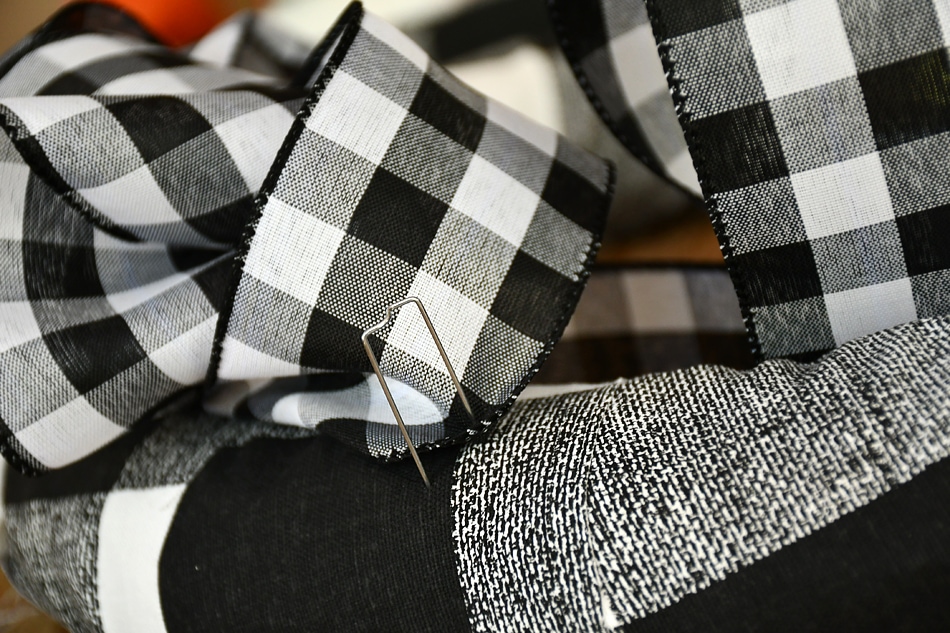
You’ll want to take those strips and wrap your entire wreath form. Adhere in place with greenery pins.
Then use the buffalo check ribbon and pin into loops around half of the wreath.
If you’re having trouble getting through the fabric, use a mallet or something similar to get it started.
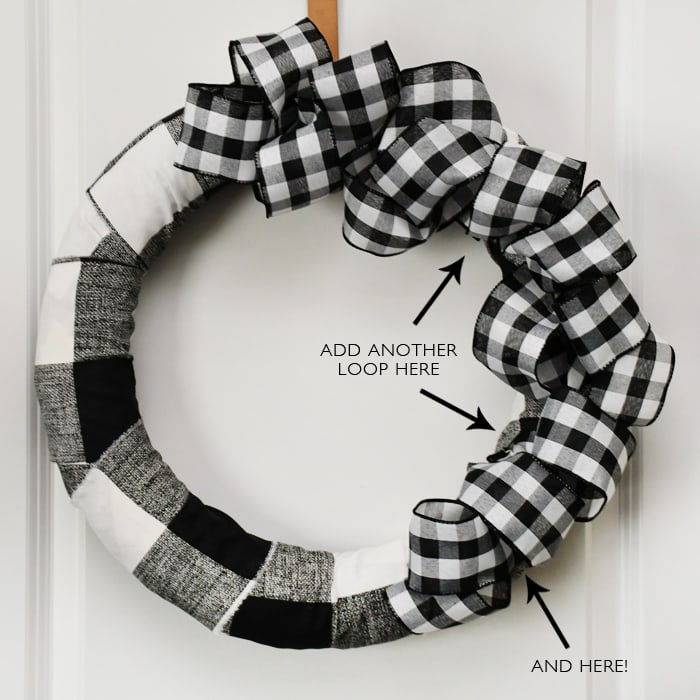
Once I have it at this place, I like to hang up the wreath to see if I need to adjust anything. As you can see below, I can easily see where to add extra ribbon loops. Also, I like to have the ribbon “set on the clock” at about 11pm and 5pm.
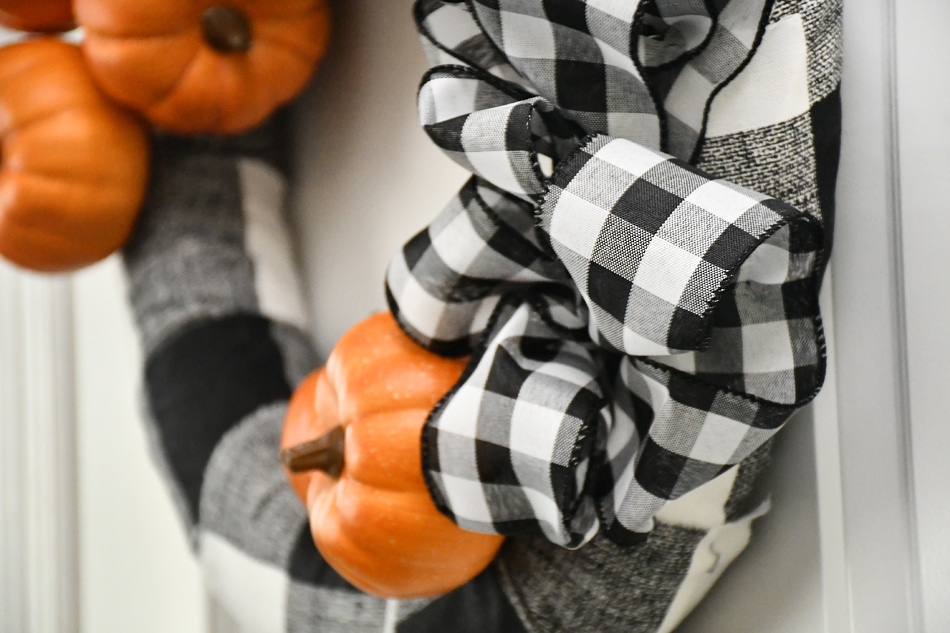
Next I added the pumpkins. These actually came with metal picks on the ends. I decided to keep part of the picks on the pumpkins to secure them into place. I just trimmed the metal picks down with wire cutters. To prep the wreath form, I actually pre-drilled tiny holes where the metal pick would go. Then I placed the pumpkin & metal pick in the wreath, and finally secured with a dab of hot glue.
And here’s the final holiday wreath!
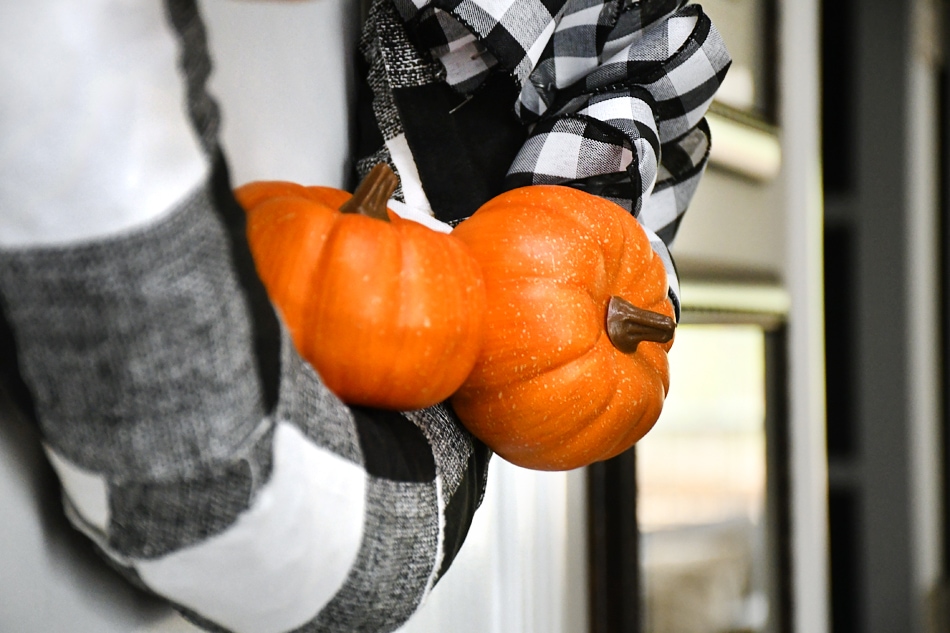
And there you go… a pretty buffalo check pumpkin wreath all ready for Fall!
Now I just have to get the rest of my front porch into place. Stay tuned!!
For more Fall projects, click HERE.

Donna @ Modern on Monticello says
I love wreaths of all kinds but this one is just so adorable and extra special. I have saved it to try a version of it one day. Great combinations of colors. Thanks for sharing with us at #HomeMattersParty
howtonestforless says
Thank you so much, Donna!
Noreen Burns says
Doona-I love this wreath. Where did you purchase the ribbon? Also how did you make the ribbon loop and attach them to the wreath?
Noreen
My Email address is. [email protected]
howtonestforless says
I purchased the ribbon from Hobby Lobby. To loop it, I just gathered about a 6 inch strip and tacked it down with a greenery pin, then repeat!
Maggie says
I just finished making this wreath and it is gorgeous. I plan to make another as a gift but,,,,
I think wired ribbon would be so much easier to work with. Thanks for sharing this with us.
carmen says
That’s great! You’re so welcome 🙂
Barbara says
Love that wreath! It’s simple, chic, and eye-catching. Love buffalo plaid, checks, and the pumpkins just pop against that black and white.
howtonestforless says
Thank you Barbara!
bibi @MBGblog says
so cute! where did you purchase the pumpkins?
howtonestforless says
Hobby Lobby!
Lisa says
Love this! I am using an 18” wreath form, and 1/4 yard of fabric is not enough. Will need 1/3 to 1/2 (and this is a nice stretchy fabric). Just FYI to others who may have a larger wreath form. Looking forward to the finished product; you can’t beat pumpkins+buffalo plaid!