• Home
  • Projects
    • Room Makeovers
    • DIY Home Improvements
    • Decorating Ideas
    • Organization
    • Furniture Makeovers
    • Crafts
  • Holidays
    • Winter
    • Spring
    • Summer
    • Fall
  • Printables
  • Recipes

How to Nest for Less™

DIY Beaded Sunburst Mirror {Guest Post from Setting for Four}

in Featured Friends on

Sharing is caring!

19 shares
  • Share
  • Tweet
Hello there How to Nest for Less readers!  My name is Heather and I blog at Setting for Four.  I am so excited to be invited by Erin to guest post today and to share one of my all time favorite tutorials with you, my DIY Beaded Sunburst Mirror!  Thank you so much Erin for letting me be a part of your fantastic blog today!
.
At my blog  Setting for Four, I share home decor DIY’s, tutorials, recipes and family friendly design inspiration from the viewpoint of an army wife and mom of 2 teenage boys.  Please swing by my blog sometime and say hello!
Today I am sharing with you an inexpensive way to brighten up your space with a DIY Beaded Sunburst Mirror made from scapbook paper, beads, a round mirror and a ceiling medallion.  This project will definitely add some sparkle to your home!
Pin It

.
.

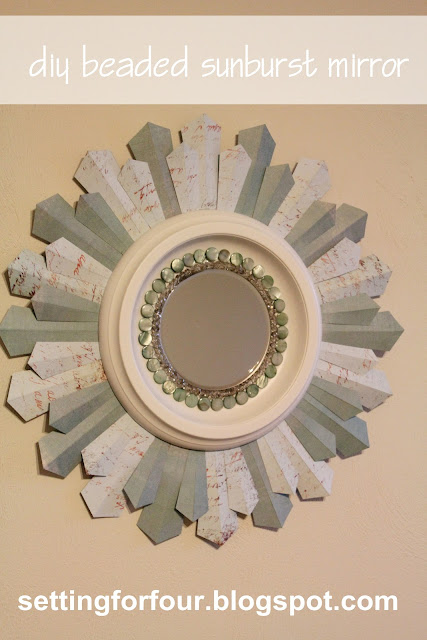
Isn’t it amazing what you can make from scrapbook paper??

Supplies:

.
  • 1 x 12 inch wooden ring – Michaels
  • 1 x 5 inch round mirror – Michaels
  • 2 x Crystal beaded bracelet, smokey grey color – Michaels
  • 1 pack of 14mm Aqua Shell Beads – Michaels
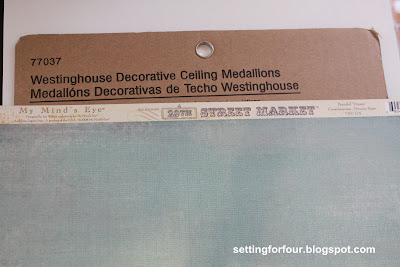
  • 1 x 10 inch Westinghouse ceiling medallion – Home Depot
  • 2 sheets of Scrapbook Paper:  ‘My Minds Eye, 29th Street Market’, each sheet features two coordinating patterns (this is the same paper I used to make my DIY Coasters) – Michaels
  • Hot glue gun
  • Scissors
  • 1 Sheet white computer paper
  • Pencil
  • 1 Command Hook or a nail to hang the mirror

Tutorial:

With the white computer paper make two templates for your sunburst rays.  Make one large and one small.  I just eyeballed the width and shape I wanted.  The large one is 4 inches long and the small one is 3 inches long.

Cut out each template.

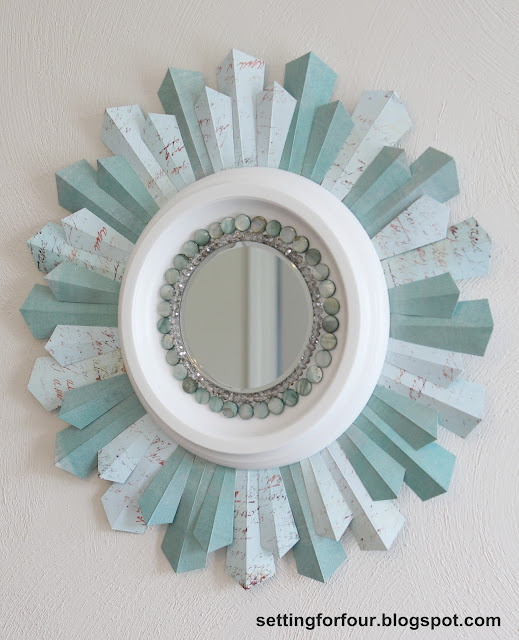
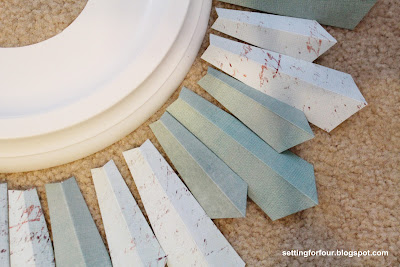
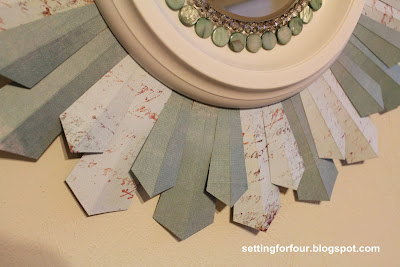
Using the templates, trace onto the scrapbook paper several large and small rays.  Just trace around the outside edge of each template.  Use both the back and front of the scrapbook paper to alternate the colors.  Cut out each sunburst ray. ( I made 20 large rays and 20 small rays).  Fold each paper ray lengthwise to give each ray some dimension so they do not lay flat.  You can see what I mean in the pic below and in the first pic in this post.   Lay each one around the ceiling medallion, in the manner you like, alternating small ones with the large ones, so you get an idea of how many to make.

.
 With hot glue, attach each paper ray to the wooden ring so the bottom of the ray is close to the inner edge of the wooden ring.  Sorry I don’t have a picture of this….my camera battery died and I had to recharge it then kept working on the project!  I attached the rays so that all the small paper rays were laying on top and all the large rays were laying underneath the small sized rays, like this.
 Attach the ceiling medallion with hot glue so that it is centered onto your ring of paper rays.

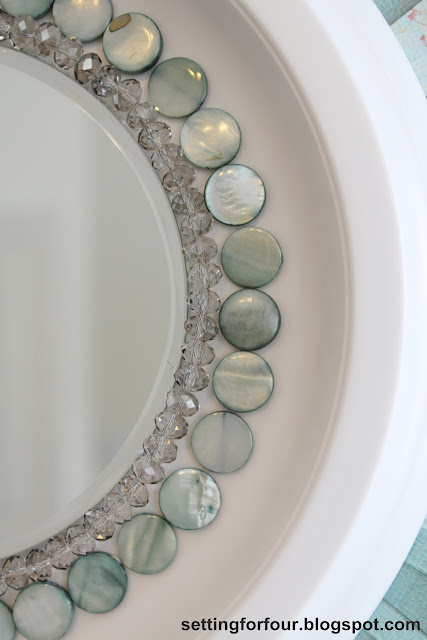
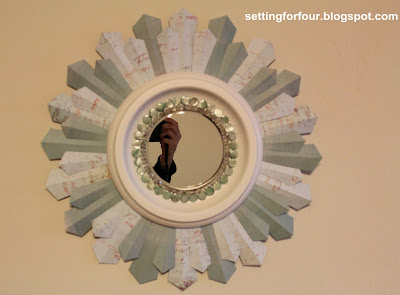
Attach mirror with hot glue onto the ceiling medallion so that it is centered too.

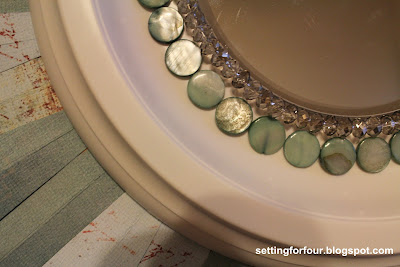
Cut the end of the elastic cord that is holding the crystal beads onto the bracelets.  Remove all the crystals from the bracelet.  Restring the crystals by reusing the elastic cord that is used in the bracelet. See below.  Add as many crystals as is required to go around the outer edge of your mirror.  I used 73 crystals.  Tie the elastic cord in a tight knot and cut the ends.  Gently pull one bead over the knot so that it is hidden.
Attach string of  crystal beads, using hot glue, around outside of mirror.  You do not need to glue down every bead…I glued the strand down in about 7 places.

Cut the strands of aqua shell beads to separate the beads, as above.  Attach individual beads with hot glue around outer edge of crystals.  I used 34 shell beads.  I had to overlap slightly the last 2 beads to make them fit, but don’t think it really shows too much.

 Attach a command strip to the back of the wooden ring and hang the mirror (or use a nail and hang the mirror with one of the holes in the wooden ring- to hang off the nail)

That’s it you are done!

This was so fun to make!!!
I love how it sparkles and the beautiful blue color of the paper.
(This would be a great homewarming, birthday or Christmas gift too!)
 Enjoy your one-of-a-kind DIY Sunburst Mirror!!
Pin It
 .

I hope you enjoyed this tutorial!  I love to make new bloggy friends, so please swing by my blog Setting for Four sometime to see my other tutorials and say hello!

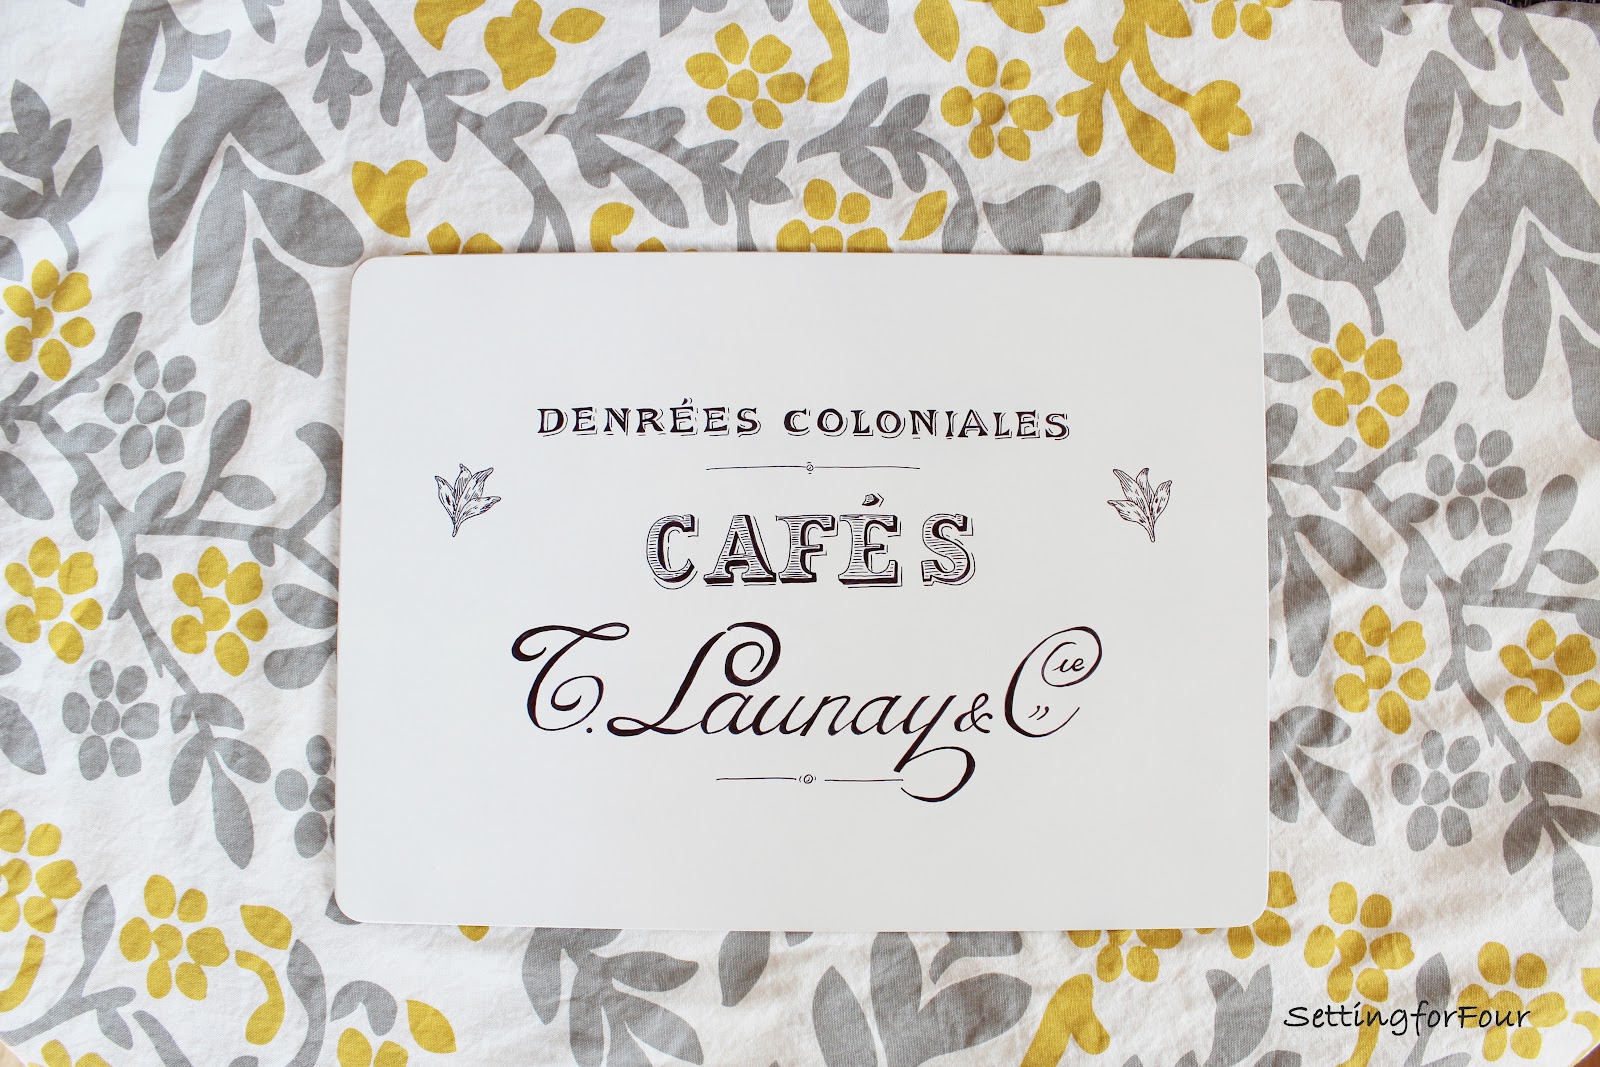
I just posted the tutorial for an inexpensive DIY French Label Trivet Hot Pad  made from a dollar store placemat that you might love to see!

Again, thank you Erin for inviting me to guest post at your inspirational blog today!  This was so much fun!

Heather

popular-projects
« Kitchen Cabinet Makeover {Guest Post from Fox Hollow Cottage}
Pallet Planter Box {Guest Post from Live.Laugh.Rowe.} »

Comments

  1. Heather says

    at

    Thanks Erin for inviting me to guest today! It has been so much fun for me to be a part of your amazing blog! Heather 🙂

  2. Jen @ Four Marrs & One Venus says

    at

    Oh Heather, you already know how much I adore this project and YOU! Love it! Great job lady!!

  3. Lisa says

    at

    Hey that turned out really cute! I would have never logically put those things together to come up with such a cute mirror.

  4. Laura says

    at

    LOVE this!! The sunbursts look like metal. Who would know it was paper??

  5. katie says

    at

    This mirror is gorgeous!!! At first glance I would have never known it was paper!!!

  • Facebook
  • Instagram
  • Pinterest
  • Twitter

We love to conquer DIY, home improvement projects, and room makeovers. We're not experts; we just try to design on a dime.

Follow us as we try to update our latest house one project at a time. Check out our archives for over 1,000 DIY and home-related projects. Enjoy! Read More…

ARCHIVES

Copyright Policy

All text and images on this site are copyright of How to Nest for Less, LLC. Unless otherwise noted, you may not use this content without written permission.

This blog accepts forms of cash advertising, sponsorship, paid insertions or other forms of compensation. The compensation received may influence the advertising content, topics or posts made in this blog. That content, advertising space or post may not always be identified as paid or sponsored content.

The owner(s) of this blog is compensated to provide opinion on products, services, websites and various other topics. Even though the owner(s) of this blog receives compensation for our posts or advertisements, we always give our honest opinions, findings, beliefs, or experiences on those topics or products. The views and opinions expressed on this blog are purely the bloggers’ own. Any product claim, statistic, quote or other representation about a product or service should be verified with the manufacturer, provider or party in question.

How to Nest for Less is a participant in the Amazon Services LLC Associates Program, an affiliate advertising program designed to provide a means for sites to earn advertising fees by advertising and linking to amazon.com.

Privacy

Copyright © 2026 · glam theme by Restored 316

Copyright © 2026 · Glam Theme on Genesis Framework · WordPress · Log in

19 shares