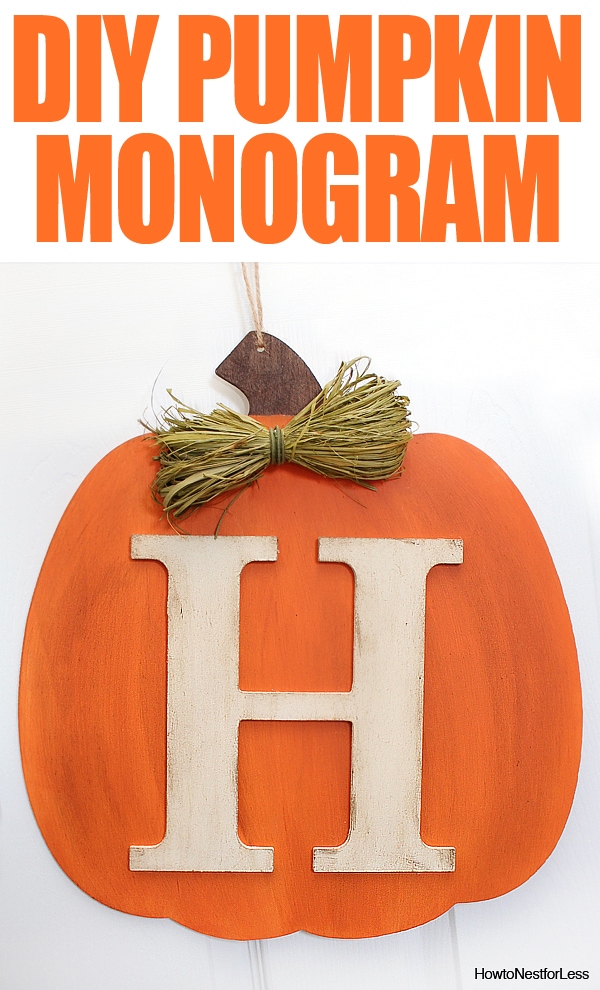
Check out this adorable DIY fall pumpkin monogram, looks amazing on the front door of your house!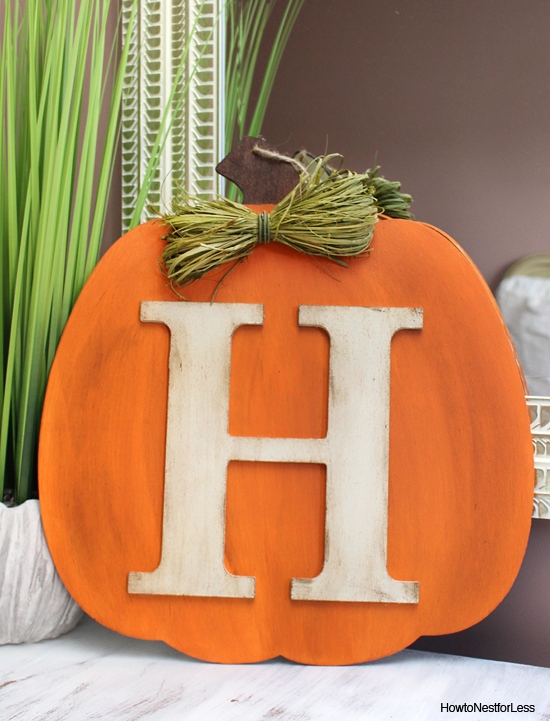
Sometimes I see one of those blank die-cut pieces of wood at the craft store… you know, the ones around the holidays, like a winter snowman or a heart or a shamrock… and I know instantly know what to do with it. That was this project.
I spotted a blank wood pumpkin on sale for $5 and knew I wanted to create a monogram sign for our front door. And here’s what I came up with…
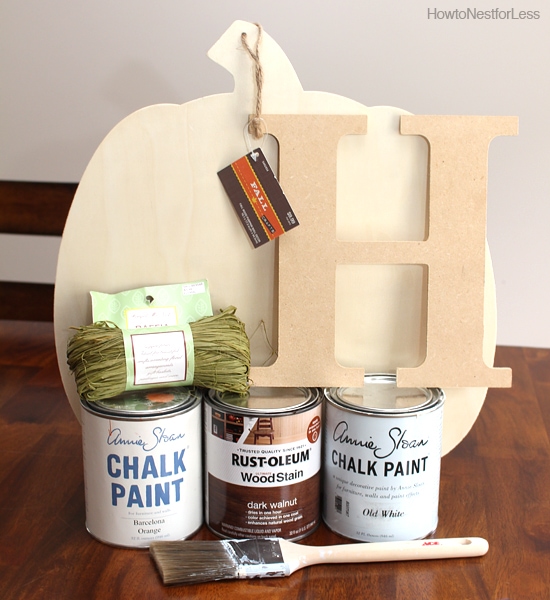
 SUPPLIES:
- Fall wood blank pumpkin
- Monogram letter
- Green raffia
- White and orange paint
- Stain or brown paint
- Wax (optional)
- Glue (E6000 or hot glue)
- Wire
- Paint brush
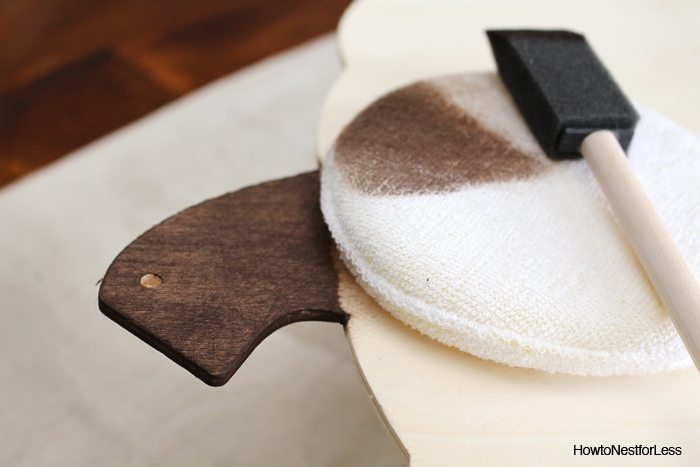
 So I started by making the pumpkin stem brown. I didn’t have brown paint so I just used a bit of brown stain instead. Actually, after I stained the stem I thought the entire pumpkin would look cool stained, but that’s another project for another day.
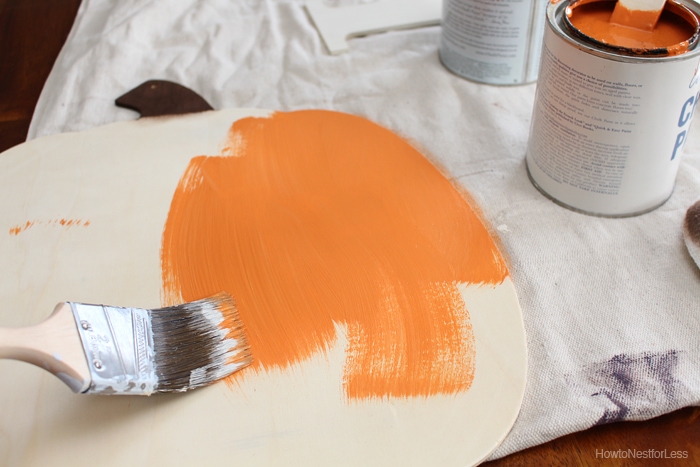
 Next I painted the main part of the pumpkin with orange paint.
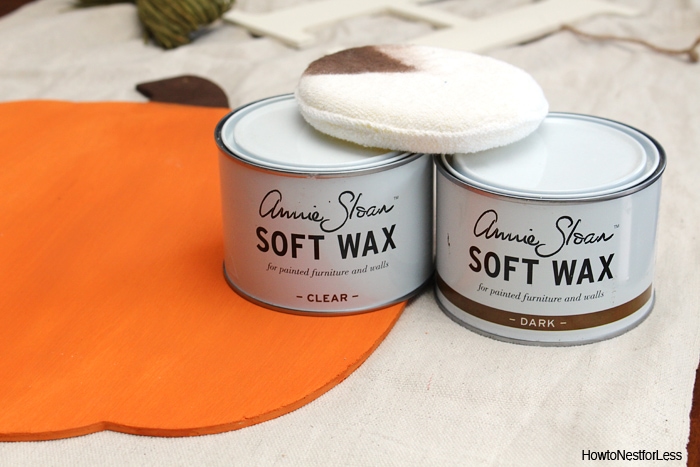
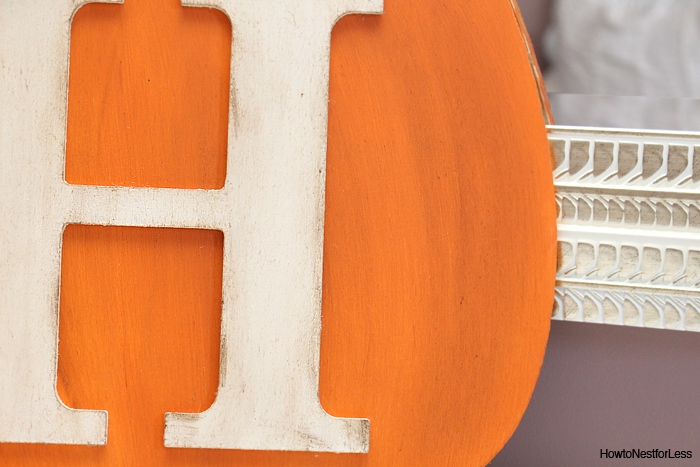
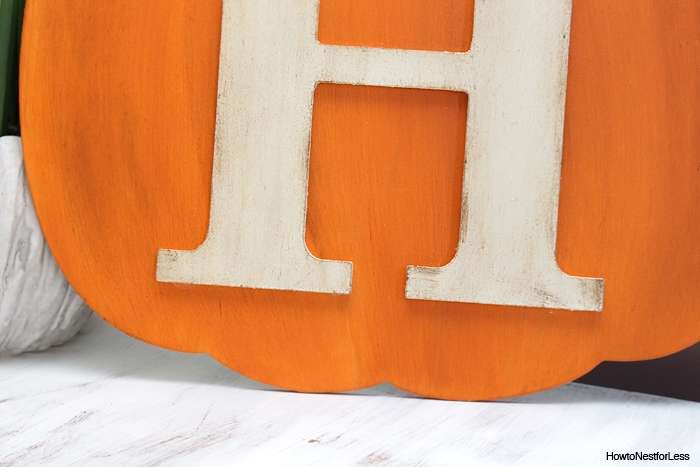
 While the plain orange paint looked just fine, I decided to take it up a notch and use some dark and clear wax. I started at the top near the stem and brushed the wax around the sides towards the bottom, basically following the outline of the orange pumpkin.
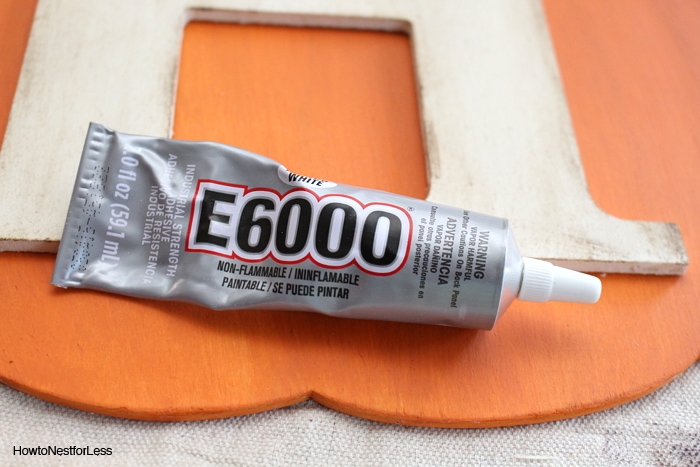
 While that dried, I painted the H letter in white and again used dark and clear wax to give it an antiqued look. Then I used E6000 glue to adhere the H letter to the pumpkin.
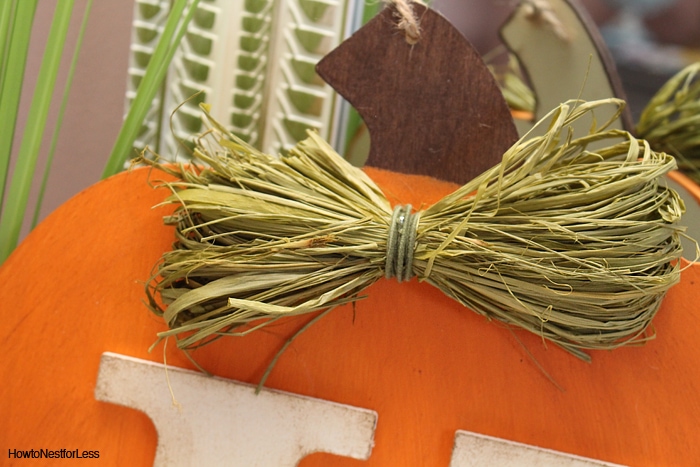
 And finally it was time to add a cute little “bow” near the stem using raffia. I just cinched the center with some green wire to make it look more like a bow and glued it to the pumpkin (use E6000 or hot glue).
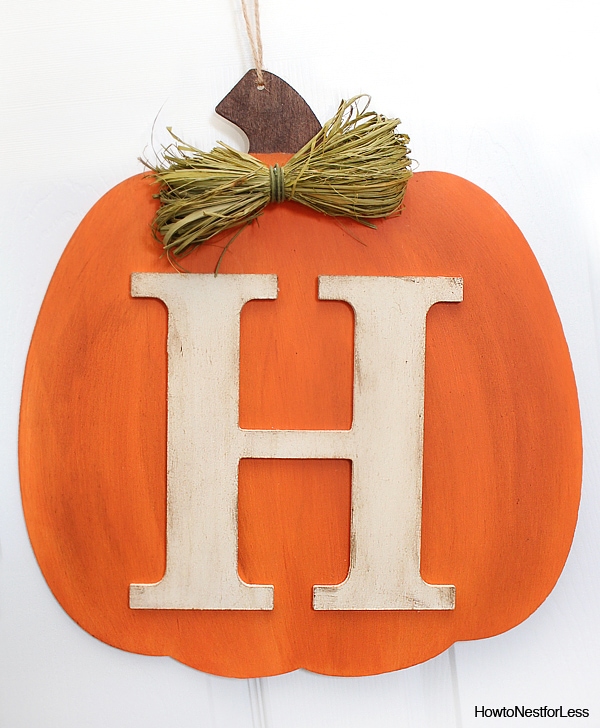
 And your final product should look like this…
While it would look totally fine without the wax shading,
I’m loving the final effect.
This is a pretty cost effective project if you have the paints on hand. The pumpkin was $5 on sale, and the letter was $1.25 on sale. Raffia was $4 at full price but I have plenty leftover for future projects. So under $10 for my new door monogram is a big deal in my book!

Brandy says
Looks great, I think the wax shading was a very good idea…nicely done!!
Tove Maren says
wow – that pumpkin is awesome! I wish I had the ability to walk through a craft store and get inspiration like that. I am normally the ditzy blonde with the screaming kids ping ponging between the isles – and then I end up with a bag of the past season’s pom poms and paint in some random non-matching color… but that’s just me!
howtonestforless says
HA! That sounds vaguely familiar 😉
Tiffany says
Where did you find the pumpkin?
howtonestforless says
Hobby Lobby!
Ashley says
How big is the pumpkin?
howtonestforless says
It’s about 12 inches wide.
Tania says
Love this!! Bought raffia at michaels and then found some at the Dollar tree for $1 later that day
howtonestforless says
No way! Oh man, I’ll have to head out there to check it out. Thanks for the tip!
Vanessa says
I love this and made one this weekend! How did you hang it? It’s so light, I’m afraid it will blow away.
howtonestforless says
I used a Command Brand hook on my front door and used the little twine loop from the wood pumpkin.