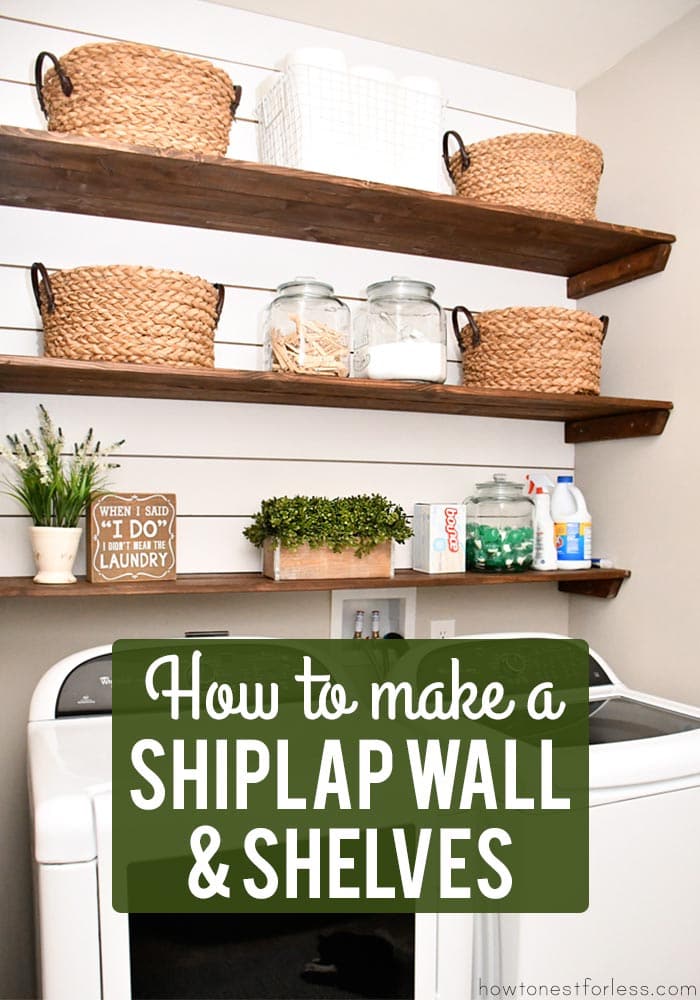
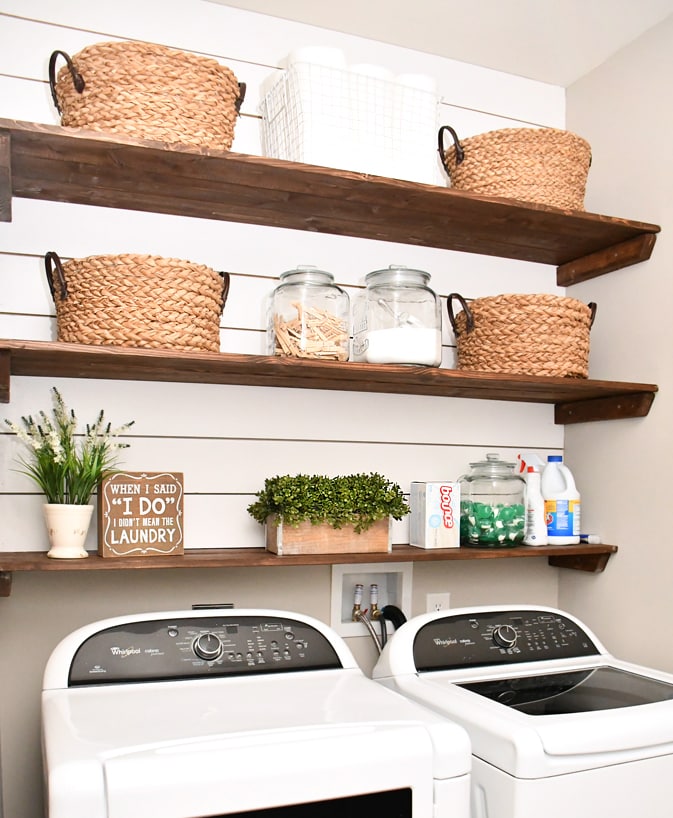
Our favorite part of the new laundry room is definitely the laundry room shiplap and shelving. It provides a lot of extra storage, plus the entire thing cost us less than $80. And it was super easy to complete!
First thing we did was measure the back wall of our laundry room above the washer and dryer. It ended up being roughly 67 inches across.
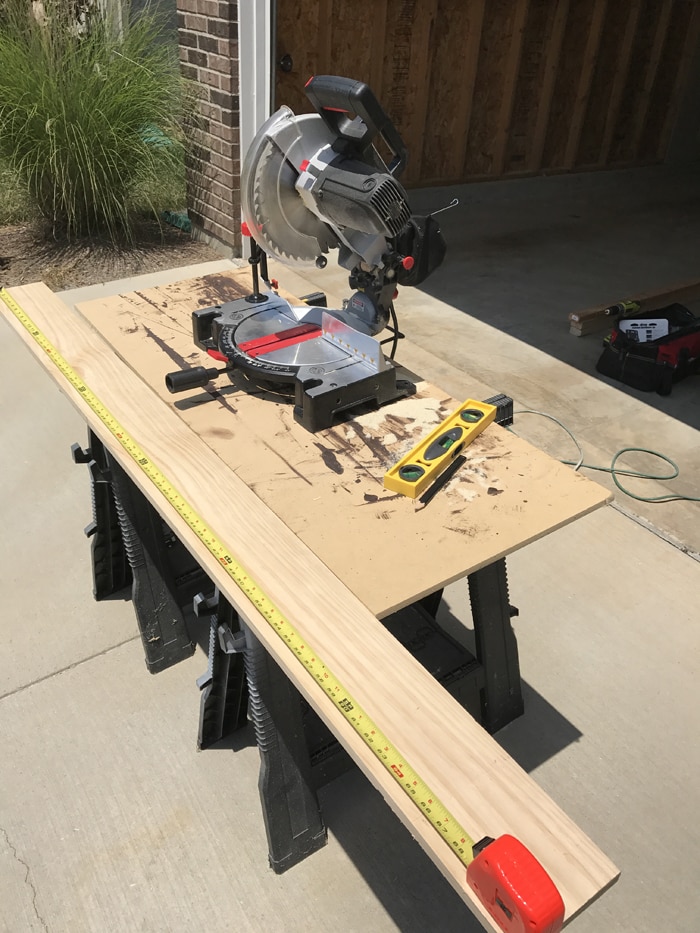
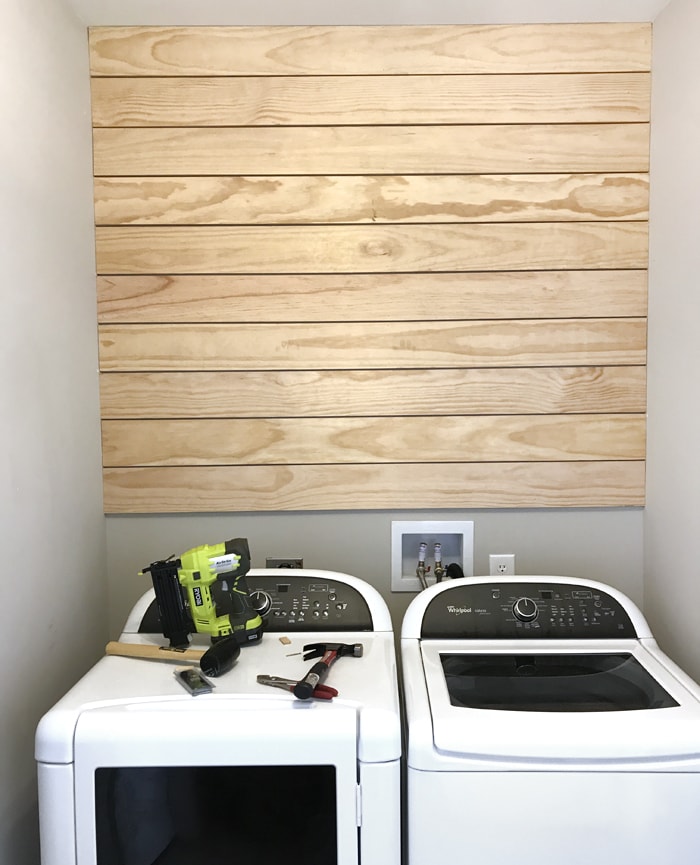
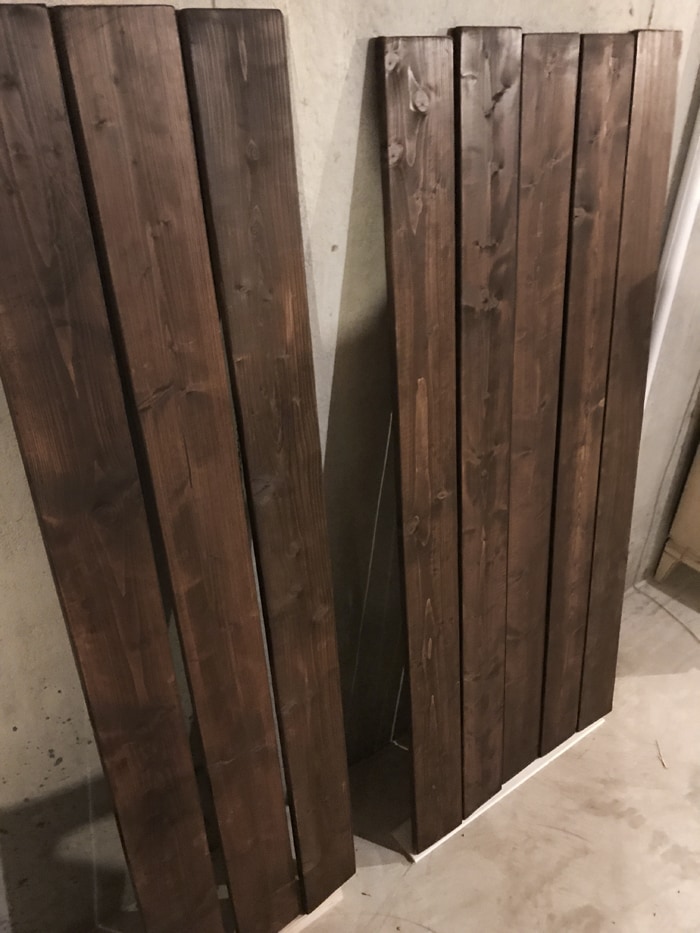
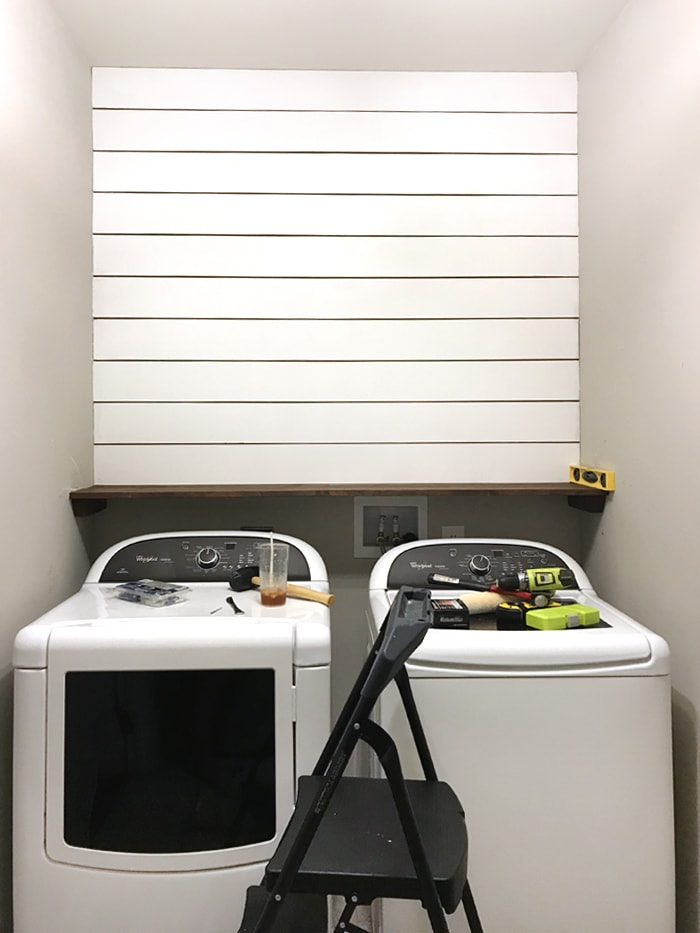
We cut 1×6 boards to fit that width perfectly for the Laundry Room Shiplap, then we tacked them up to the wall with our nail gun, just barely leaving a space between each board.
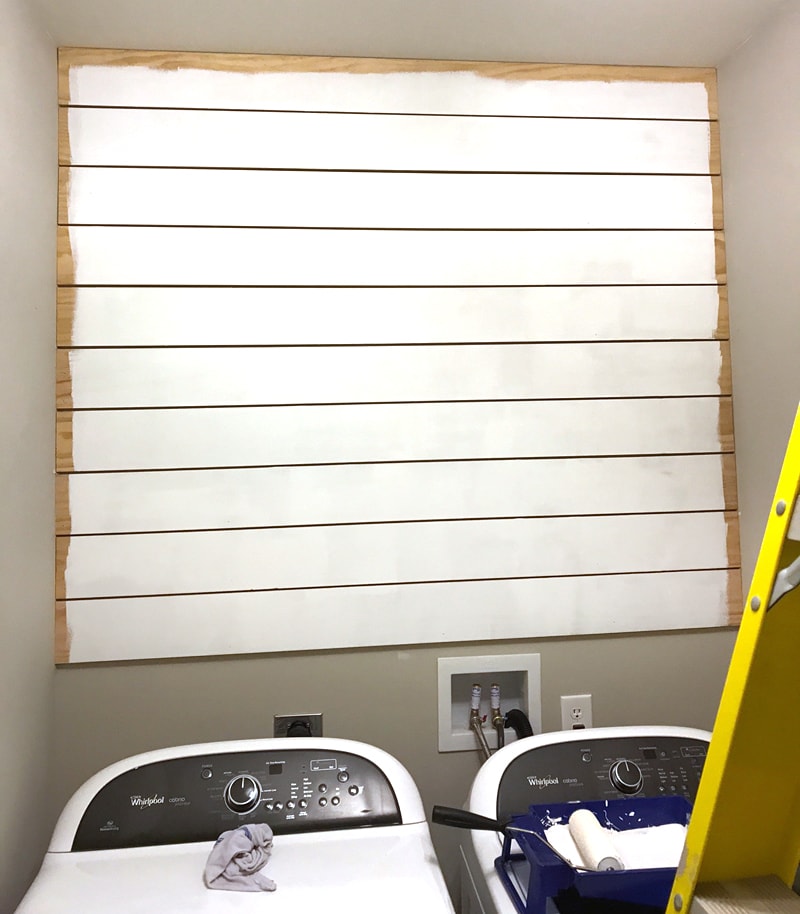
Once all of the Laundry Room shiplap boards were up we painted them with two coats of white paint.
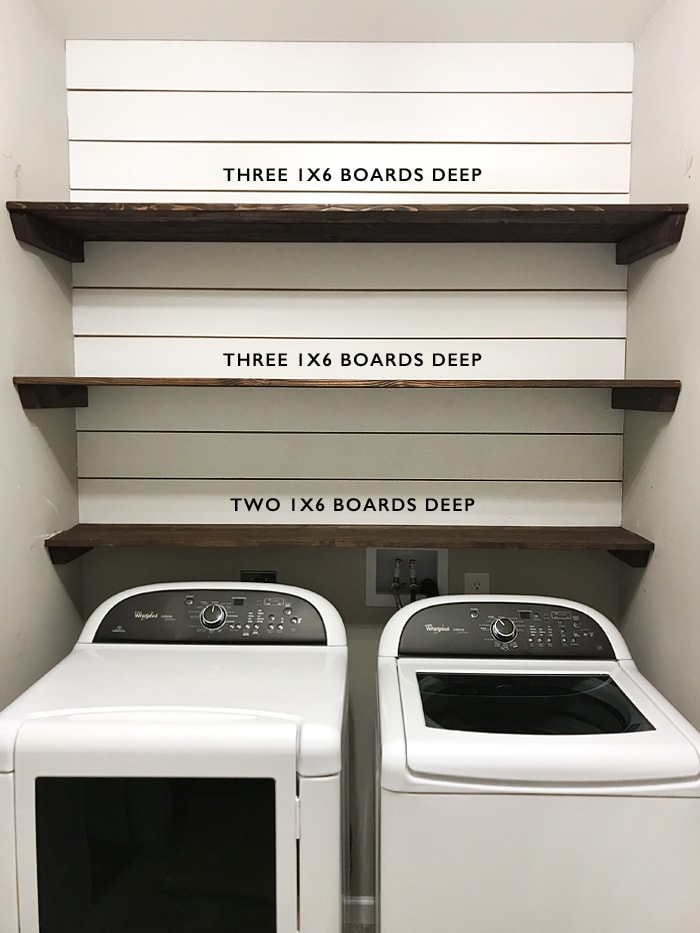
Next we cut the boards for the shelving. We used 1×6 boards again for the shelves and cut them the exact same length as the shiplap (67 inches). We used (3) boards edge-to-edge for the top two shelves and (2) boards edge-to-edge for the bottom shelf so we could still easily open our top loading washing machine (so overall we cut 8 1×6 boards just for the shelving).

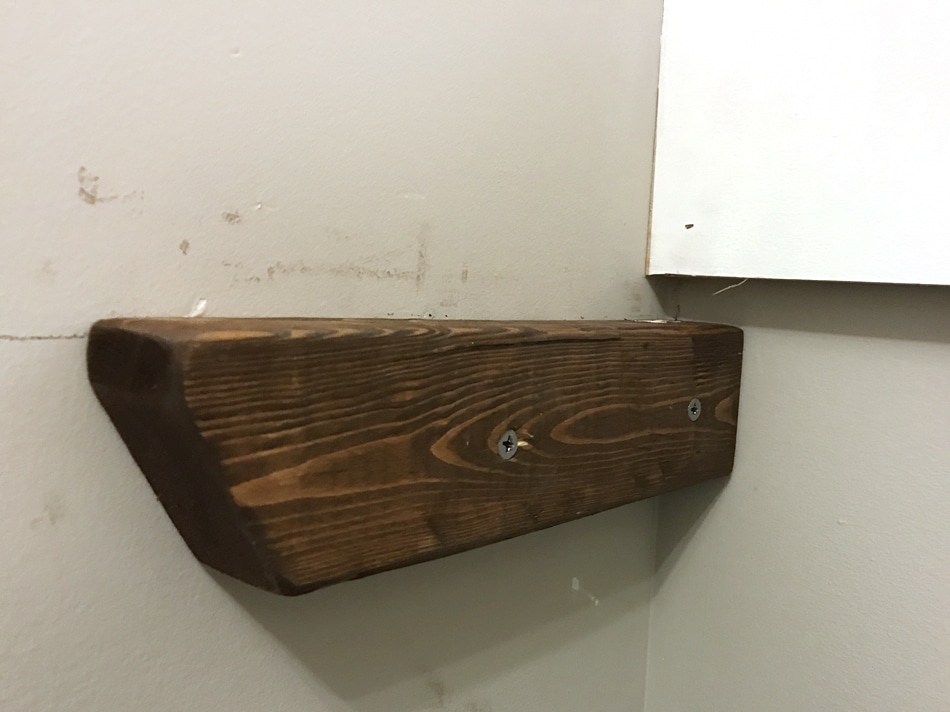
For the brackets we used 2x4s and we had to cut two different sizes since our shelving varied (remember three boards for the top 2 shelves and two boards for the bottom shelf). You can see in the little photo above we used a fancy edge to give them a nice, finished look. The bigger brackets have a 16 inch long edge and 14.75 short edge with the angle cut at 30 degrees. The smaller brackets have a 10 inch long edge and an 8.75 inch short edge.
We needed four brackets for the top two shelves (2 for each) and two brackets for the bottom shelf.

Next we sanded everything and gave it a coat of dark stain.
Now for the shelving installation… start with the bottom board. First we held up a stained 1×6 board flat to the bottom of the shiplap and marked the bottom of it. This mark was for the top of the bracket (see below). Then we put pilot holes into the wood and drywall, then drilled them into place with long screws into the studs.
Once you have both brackets up for the lowest shelf, you can then add your long boards and screw them into place from the top.
Then we spaced out the top two shelves (it will vary depending on your ceiling height or desired spacing). With these brackets you’ll just butt up to the shiplap directly. The shelf will still sit on top and you’ll screw it down when your brackets are set.
Super easy and super affordable!
We love the look and all the storage it provides.
We got the idea for this shelving from the The Wood Grain Cottage dining room. They used the shelving for their dining room and they are gorgeous! Her tutorial is awesome so check it out if you have additional questions, or leave a comment below. I’d be more than happy to help!

For more DIY projects, click HERE.

Miriam Ayala says
Does the 3 1×6 butt up to each other or are glued together?
howtonestforless says
Just butt up to each other, not glued.
April Driggers says
absolutely PERFECT! Great job.
howtonestforless says
Thank you!!
Terry says
Could you please tell me what kind of wood did you use for the ship lap & shelving?
howtonestforless says
We used pine from Lowe’s!
Jodie says
This really turned out GREAT! Super idea…it really changes a little space & makes even the smallest of space feel inviting.
Would love to have you share at Reader Tip Tuesday: http://www.jodiefitz.com/2017/09/12/reader-tip-tuesday-weeks-craft-recipe-party-3/
It’s up & growing all week – hope to see you there. xo
Sheena says
I love your shiplap wall and shelving!! I am currently doing the $100 Room Challenge and making over my laundry room. I am not adding shiplap to mine, but I am planning to add a floating shelf.
howtonestforless says
Good luck with your makeover!!
Jamie says
That is beautiful! I love that look, and wish there were places in my home to incorporate it. 🙂
Funky Junk Interiors - Donna says
As if the desire for shiplap and rustic shelves wasn’t enough, this post pushed me over the edge. I AM doing this somewhere! Don’t know where yet but I don’t even care. I want in. 🙂
I’ve featured this in this weekend’s DIY Salvaged Junk link party. Thanks for linking up!
howtonestforless says
Hahah!!! Thank you, Donna 😉
Dawn says
I’m following your tutorial do the shiplap & shelves in our laundry room right now…I was curious if you had the measurements on how far apart you spaced your shelves?
howtonestforless says
About 15 inches between the shelves!
Shob says
Nice make-over! What stain color did you use on the shelves?
howtonestforless says
We used Rustoleum’s Ultimate Wood Stain in the walnut finish!
Darleen says
Gorgeous! Where did you get those baskets from?
howtonestforless says
I purchased them from Kirkland’s a few years ago!
Dan says
Did you caulk the sides or the top of the shiplap?
Elizabeth says
Will 1×4 boards work for the brackets instead of 2×4 boards?
Thanks
Jodie says
What colour are your walls? We are doing a shiplap wall in our laundry room and cane accross this and I’d love to paint my main floor this colour!
Stephanie says
Hi there! This is such a beautiful project that my boyfriend and I will be replicating! Could you please let me know specifically which white paint you used?
Maria says
So beautiful…. I’m doing a laundry makeover just like yours since my space is just like yours. Could you please tell me the depth of each shelf you installed. Thanks
Kaylei says
This is stunning. We have a smaller laundry room and I’ve been debating on what to do with the space. Thank you for the inspiration. ❤️
carmen says
You’re welcome. I’m so glad it was inspiring.
Sophia Grace says
Where did those wicker baskets come from? I’m in love!!
carmen says
They were from Kirkland’s a while ago!
Bobby says
Great idea!! My wife loves this style! We’re not gonna do the shiplap. With that said how did you get the boards to not bow in the middle?
carmen says
They’re solid wood and we don’t put things that are too heavy on them either since it’s a laundry room. Hope that helps!
Mary says
What color are yours walls surrounding the shiplap? Ours are eggshell and I’m questioning if I should also paint them white. Thanks
carmen says
BM Revere Pewter.
Blair says
What size screws did you use to attach the brackets to the wall and the shelves to the brackets?
Kimberly says
Since you don’t have a center bracket do the shelves now in the middle?
Stephanie Lolo says
Thank you for inspiring me to do something with the mess called our laundry room/closet!
What size screws did you use…so it made it all the way into the wall studs?
carmen says
It just needs to be thick enough to go through the wood and an inch or so into the stud.
Steph L says
I’m excited to do this this weekend! What length screws do I need to secure the 2x 4’s into the wall/studs?
carmen says
It just needs to be long enough to go through the wood and an inch or so into the stud.