I’m a Photoshop girl. I graduated from college with a degree in Graphic Design and have been using the program for over 14 years (wow, that makes me sound OLD!).
Today I thought I would share some of my favorite tips and tricks for any beginner out there that will be switching over to Photoshop. I’ll just share a couple of my greatest tools & uses this week and if you’re craving more, just let me know and I’ll do another post!

______________________________________________________________________________
LEVELS
Adjusting the levels through Photoshop will add brightness and contrast to your photograph. Simply go to Image > Adjustments > Levels (or Apple/Control L for the shortcut).

The photo below is my raw image straight from the camera with no adjustments. When I bring up the Levels, you can see the histogram is focused in the center, or midtones. To help even out the brightness and contrast of your photograph, simply move the black and white sliders to the ends of the histogram (or until you find your desired level).
 If you look below, I moved in my black and white sliders and there’s already a huge improvement!
 Remember, when you move the white slider to the left, you’re adding in more whites. When you move the black slider to the right, you’re adding in more blacks.
If you need to remove some blacks or whites from your photograph, use the Output Levels at the bottom of the Levels window. Pull the white slider to the left to remove brightness, or pull the black slider to the right to remove your darkest blacks.
_______________________________________________________________________________
SHADOWS/HIGHLIGHTS
Another option for adjusting your photograph’s contrast is to use the Shadows/Highlights tool. Simply go to Image > Adjustments > Shadows/Highlights.
 This tool is absolutely amazing! It will automatically set your Shadows to 50% and your Highlights to 0%.
 You can play around with the settings, but I often find that the automatic Shadows/Highlights tool is quite amazing! Just see the difference in the photos below! Even the colors seem to have more saturation!

_______________________________________________________________________________
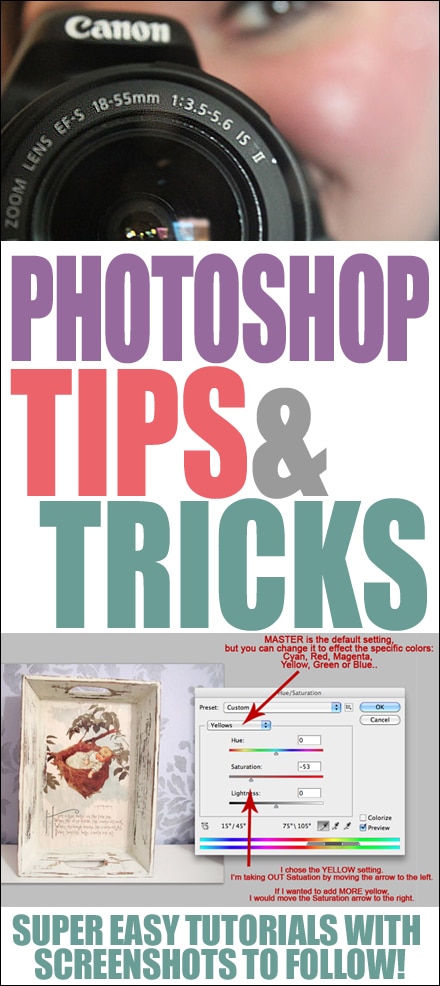
HUE/SATURATION
Ok, speaking of saturation… Let’s talk color! To find this tool simply go to Image > Adjustments > Hue/Saturation (or Apple/Control U for the shortcut).
Hue/Saturation is going to help you control the color output of your photographs. Hue will allow you to change colors, saturation changes your color’s dullness and brightness.
So as we learned before, the Shadows/Highlights tool can work wonders in bringing life back to your photograph! BUT my whites seem to have a tint of yellow. The Hue/Saturation tool can help fix that in a jiffy!
 Since the white tones have a yellow cast on them, I changed the default MASTER color preset to YELLOW. I then chose to Desaturate (or pull yellows out) of the photograph.
 You can see the before and after shots below. See how the photo on the left has the yellow tint to the tray and the tabletop? Pulling out the yellow tones created a bright white end result on the right.
 This tool is pretty fun to play around with and will take some time to learn how to use it properly. But TRUST ME, you can do some pretty cool things with it! Wanna see?…
I painted this end table last year and photographed it in the corner of my dining room (one red wall, one tan wall). By selecting the red wall (minus the flowers) I changed the Hue/Saturation setting to RED and moved the Hue and Saturation sliders until I matched my wall colors perfectly. Pretty cool, huh?

_______________________________________________________________________________
DODGE AND BURN
Another way to play with your photo’s exposure is with the Dodge or Burn Tool! The Dodge tool is going to add highlights to a specified area, and the Burn tool is going to add shadows to your specified area. These tools can be found in your toolbar (on the left side of the photo below).


_______________________________________________________________________________
CLONING
Do you ever take a photograph and when you’re ready to post you see something sticking out like a sore thumb that you REALLY wish you could get rid of? Yeah, happens all the time to me. BUT I have a way to fix it in Photoshop! The Clone Tool. You can find this in your toolbox (or use the shortcut “S”).
You can see in the photo below that there’s an electrical outlet just to the left of my table. It’s ugly and an eyesore and I want it out NOW! Again this tool uses a paintbrush to make your changes.
 Alt-click (option/alt key and click) with your brush in an area that you want to CLONE. This means if you want to duplicate the tan wall with the subtle shadow, you aren’t going to Alt-click on the red wall or in the middle of the end table. For me I chose an area just below the outlet since the shadow is necessary to duplicate in order for this photo to look authentic.
 Just allow your brush to make the changes and go slow while you “paint” in the clone! I suggest using a softer brush so your edges blend in. Remember, it’s going to exactly clone from your source where you Alt-click (option/alt key and click). Look for structure in images (shadows along the side of a table, patterns in fabric) and work with the grain.
 Also, you only use the alt key when selecting the source area for the cloning (you don’t have to hold it down the whole time!).
PRACTICE MAKES PERFECT! Experiment with different photos and different brush sizes/hardness. You will LOVE the end results!

_______________________________________________________________________________
MAGIC ERASER
OK, here’s my last tip of the day… and one of my favorites! The Magic Eraser Tool can be found in your toolbox under the normal Eraser. I mostly use this tool if I need to change out a sky on a gloomy day.
 Simply click in the sky with your Magic Eraser Tool to get rid of it in a SNAP! And I truly mean that. Click and BAM! The sky is gone!


Kelly says
YAY! So glad that you’re offering these tips and tricks… I’m still leaning photoshop, so I hope to find some time to sit down and tinker. Thanks for putting this together 🙂
howtonestforless says
Thanks Kelly!!
Lynn @ Scrapity Anne says
I LOVE this, and YES I want more!!! I’m so clueless when it comes to the program and I would love to learn more. Thanks so much!
Lynn
howtonestforless says
Thanks so much Lynn! I’ll get some more tips together 🙂
Mary Smither says
Thank you so much! I just found your blog on Pinterest! My daughter and I just purchased Photoshop. She took a class but there’s so much more to learn. I love the way you break it down….this will be so helpful!
howtonestforless says
Thanks so much Mary! Glad to have you here. Just let me know if you ever have any questions 🙂
Kari says
As always Erin this is awesome! Thanks so much for sharing this with Photoshop Newbies like myself.
Kari
kelly@refresheddesigns. says
Erin this is fantastic and very timely, as one of my goals this year is to get better at both photography and Photoshop. I’m a beginner and would love to get more tutorials from you progressing through making pictures better to watermarks to collages, and other cool stuff that is useful for a blog. Thanks so much for this!
howtonestforless says
Thanks Kelly! Good tips too on what to feature next. I’ll have another session next Monday!
maria says
Thank you for this tutorial. I took a graphic arts class about 12 years ago and had become a pro on photoshop, but didn’t use it after the class finished, so now it’s like learning a new program. I would definitely like to see more simple tutorials like the ones you posted. Most other tutorials I see have too many steps, but yours were just right.
howtonestforless says
Thanks Maria! I’ll post some new Tips & Tricks every Monday! Just let me know if there’s something you wanna see that I don’t feature!
ritajoy@harbour breeze home says
I just discovered you and this great series through Pinterest. Thank you so much! I’ve been plugging away trying to learn Photoshop, but I so love to have (and need!) tutorials. (I also love your blog design, BTW. I just recently switched to WordPress (Thesis theme), and I’m plugging away trying to figure out how to design it, too… Your “Pretty Young Thing” theme was one that I contemplated buying…and my, you’ve made it work beautifully!)
howtonestforless says
Thank you SO MUCH Rita Joy! I’m hoping this series will help some ladies out (especially now that Picnik is going away). I’ll have more tips next Monday!
Diane@InMyOwnStyle says
Hi Erin-
This is the best tute on Photoshop I have ever read. Easy and understandable. I feel so enlightened – Thank you soooo much! xo
My best- Diane
howtonestforless says
Aww, thanks so much Diane! I’ll have more tutorials on Monday!
Lanie says
Hi,
I keep hearing about using “actions” in photoshop, but can’t figure out how to apply them. i even bought photoshop for dummies and there is nothing in there about adding “actions”. I have downloaded a couple of free ones and wanted to use them. BTW, I have a Mac computer. I loved Picnik, sad it’s going away as I’m still such a newbie in photoshop, Please help!
howtonestforless says
Hey Lanie!! I’ll post about the Photoshop actions on Monday! Sorry, hope you can wait but I’d like to make it a clear tutorial for everyone since they can be SO HELPFUL!! And I’m a Mac girl too 🙂
Lanie says
Thanks so much, I can definitely wait for you to post about using actions on Zmondsy. Thanks again for sharing, it’s greatly appreciated for a photoshop newbie, who’s not new to photography.
kim says
Thank you for sharing your photoshop tips to all of us who are new to it! I need all the help I can get and your tutorial is certainly a great help! Would love more!
howtonestforless says
Thanks Kim! I’m going to have some more tips on MOnday!
Mrs. Delightful says
This is a very informative post. Thanks for sharing.
Mrs. Delightful
http://www.ourdelightfulhome.blogspot.com
howtonestforless says
Thank you!!
Lindsey {SimplyStylish} says
This is such a great post and so incredibly helpful!! Thank you for taking the time to write this. I have PS Elements and I’m learning things quickly but this helps a TON!!! Thanks again and fabulous blog! 🙂
howtonestforless says
THanks Lindsey!!
Angie says
Fabulous post! I have Photoshop, but I’ve never been able to properly use it. I’ve pinned your post, so maybe I can finally make my pictures look decent!!
howtonestforless says
Good luck Angie! Let me know if you have any questions!
Debbie says
I was a picnik user and I loved how easy it was to learn. With it going away, I went ahead and purchased Photoshop Elements 10. I really want to create my own headers and buttons. Can you do a quick tutorial on that? I know I am asking for a lot!!!!!
howtonestforless says
Wow Debbie… I’m actually working on that RIGHT NOW! I’m going to have it ready for next Wednesday if you can wait just a couple days 🙂
Morrisa says
Great tips & tricks! Thanks!
howtonestforless says
Thanks Morrisa!
Lizy B says
Thanks so much for this! I always hear how great photoshop is and how you can do so many things…..but I never really knew exactly what! Now I just really wish ou lived next door so you could come over and teach me all these great things in person!
howtonestforless says
Haha!! You’re gonna love it Lizy!! Good luck 🙂
Rachel @ Lines Across says
Thanks this is so helpful! I really wish I knew more about photo editing and your tutorials are so easy to follow.
howtonestforless says
Thanks so much Rachel! I appreciate it!
Gen says
Great tutorial!! Some of these I already used (levels, hue/saturation), and some I didn’t (the Shadows/Highlights seems awesome!) and I learned the clone tool by accident. Great to have all these tutorials at the same place! Will definitely be sharing and pinning! I’m surprised you didn’t put curves/ white balance in here, though, (maybe it’s later? I gotta keep reading…) it’s my #2 go-to photoshop trick. Thanks so much for these wonderful tricks!!
howtonestforless says
Thanks so much Gen! Yes, I have a bunch more to come, including the Curves. There’s just so many awesome tips & tricks to cover 🙂
Judy says
Thanks for the tips today. I love Photoshop but am not an expert so I think your tips are just great.
howtonestforless says
Thanks Judy! I hope they help 🙂
chrisse says
I definitely need to get to grips with this (I just followed your link where you told me how “crappy” your photos started out!).
Very useful stuff!
Jodi says
Im a photoshop beginner and this was great! thank you !
howtonestforless says
Thanks Jodi! Glad you learned something from it 😉
Jess says
Hi
I love your posts on photoshop! which one do you use?? I am thinking about getting photoshop but I don’t know which one to get, please can you help!!!
howtonestforless says
Hey Jess! I currently use Photoshop CS4 but it can be expensive. You could easily try Photoshop Elements!
Emily says
Very Helpful! Thank you so much!!!! I find that I get into a habitual way of doing things, and this really reminded me there were other alternatives that are much simpler. Back to the basics is a MUST!
-Emily
http://www.facebook.com/gritstonestudios
howtonestforless says
Thanks so much Emily! Glad it helped!
Tom Nguyen says
In the image where you change the color of the wall, what tool are you using to select it? The pen, the magnetic lasso, or the quick selection tool?
To select the wall without select the flowers, I would zoom in and use the pen tool, but that is a little tedious in time consuming.
I just wanted to know if you had a better method. Thanks for posting this tutorial.
howtonestforless says
I love using the magic wand to select… just play around with the tolerance to get it just right. Sometimes I’ll use it around the detailed area, and then change to tolerance to select more. Also the lasso to grab anything else I may need. Hope that helps!
Tom Nguyen says
Thanks for the quick response. I guess I can use magic wand for general areas, and then zoom in to use the lasso? There might times where the flowers are similar in color to the wall, so do you think changing the tolerance level on the magic wand would take care of that?
Hussain says
Nice tips for bignners , really glad to see these tips .
jem says
Awesome tips.. Please keep them coming! Thank you.