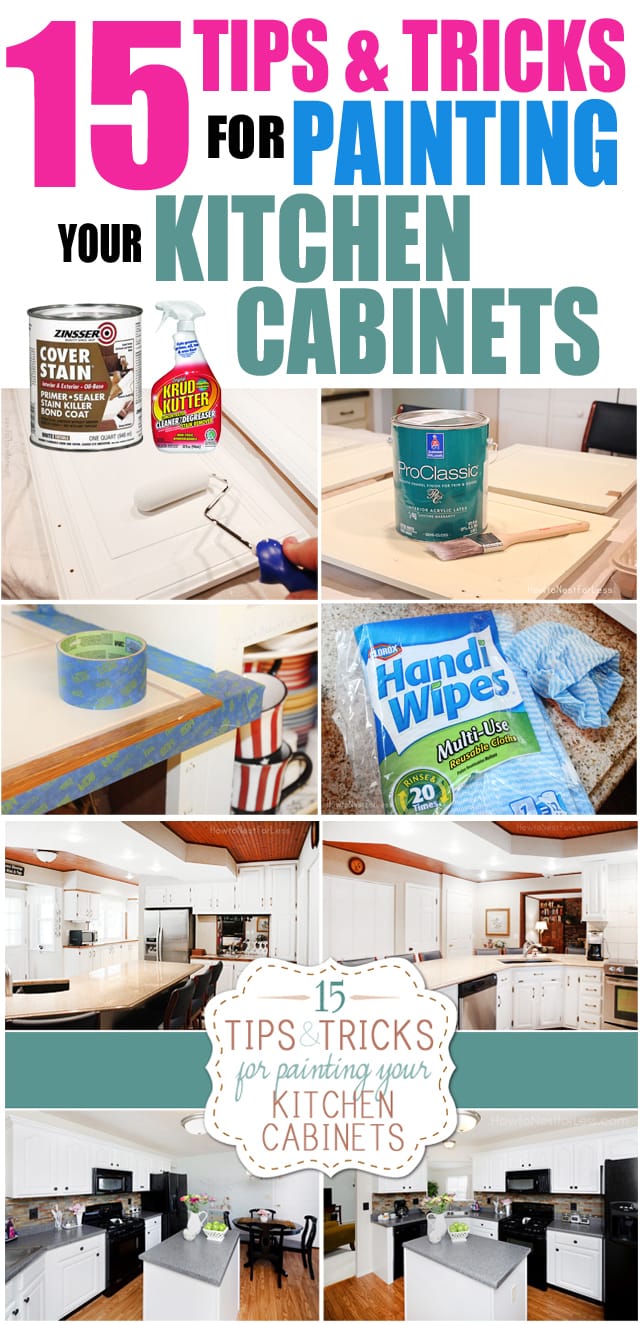
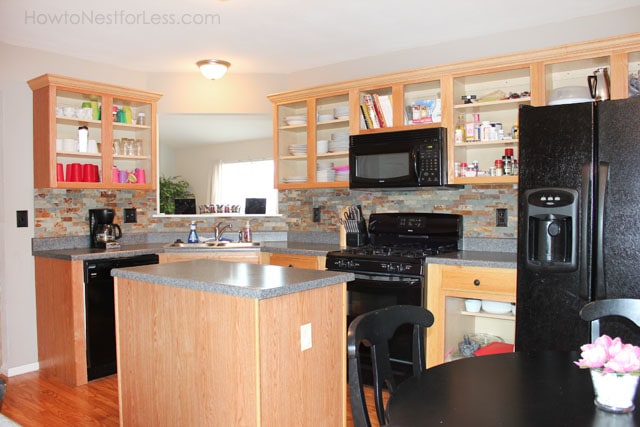
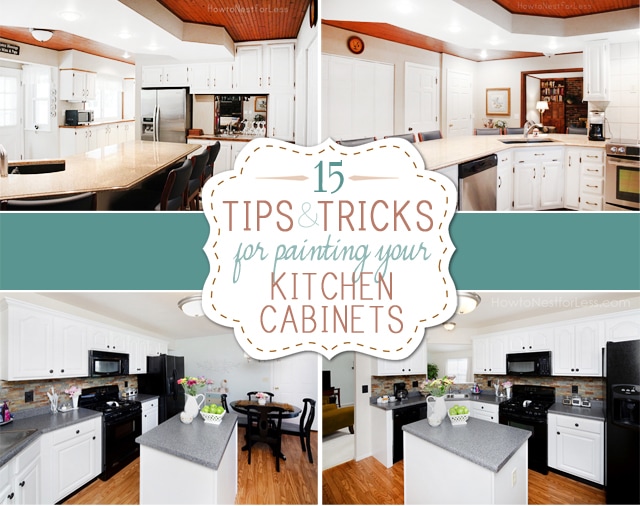
So now that I’ve painted the cabinets in our old home and my parents’ kitchen, I kind of feel like a pro now. Ok… not really. But I’ve learned some tips along the way that I thought might help you when you muster up the courage to transform your own kitchen with a coat of paint. And here we go…
1. REMOVE ALL DOORS FROM THE BASE AND WALL CABINETS.
Working on a flat surface will save you from getting the dreaded drip marks.
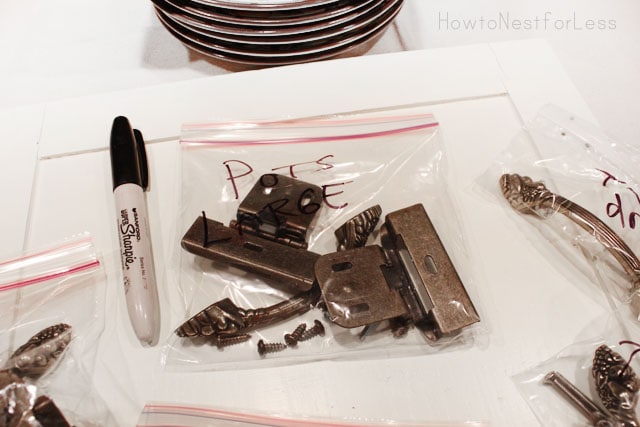
2. ORGANIZE YOUR HARDWARE.
Place hardware from each cabinet door (including the hinges) in a separate plastic bag and mark on them with a permanent marker. Then place a sticky note next to the coordinating cabinet door. This way you will know what screws, hinges and knobs/pulls go with each door and they will perfectly align when you screw them back on.
3. CAREFULLY CLEAN YOUR SURFACE.
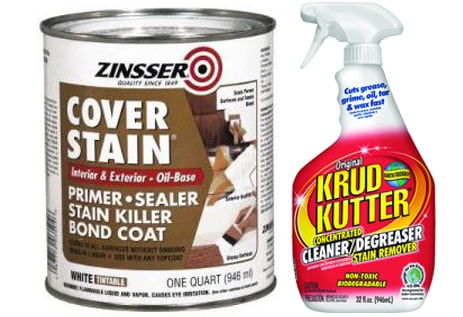
Trust me on this: prep work is key. When I painted my kitchen cabinets from builder grade oak to white, I first used a degreaser to clean each cabinet door (front, back, and sides) plus the base of the cabinets. You need a perfectly clean surface for the paint to adhere.
You might also want to sand the surface of your cabinets with light sandpaper to give them a little grit. This will also help the paint smoothly adhere to your surface. Just make sure you properly clean up all of the dust before you begin painting.
4. PRIMER IS YOUR FRIEND.
When I painted my cabinets, I gave each door and base TWO COATS of primer, plus I sanded between each coat. Again, prep is key to long-lasting cabinets.
Now your first coat of primer will not entirely cover the cabinets. In fact, it might look like you white-washed them instead. Do not worry. Your second coat will make them look a lot better! Your cabinets might not even be 100% covered until you add your first coat of paint.
Just remember that primer will help the paint adhere better, give more durability to your cabinets, and give added protection in the long run.
5. TAPE IT UP.
Urgh, this is another prep step that takes a lot of time and gets a little tedious, but it is necessary!
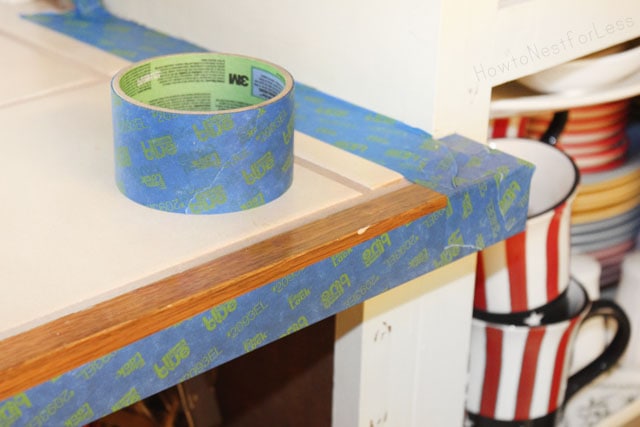
You don’t want to be touching up your wall color or scraping little bits of paint off your floor and countertops when you’re done with your cabinets. Take the time to carefully tape up everything before you start painting.
Also make sure you really press the edge of the tape down so you don’t get any bleeding of the paint.
6. HAVE A GOOD WORK SPACE.
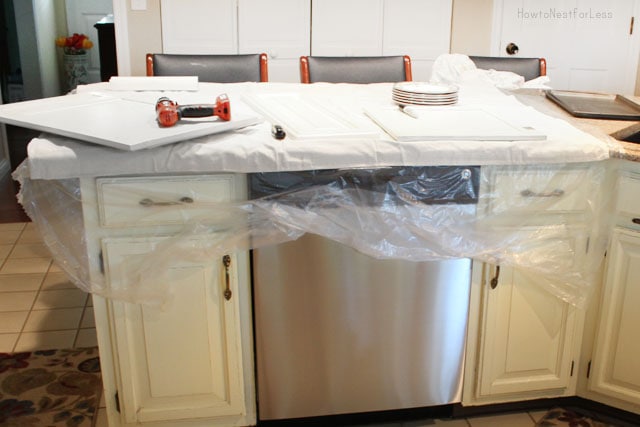
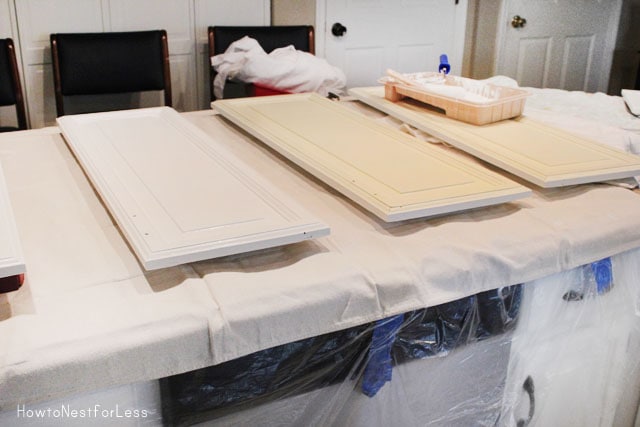
Both times I painted kitchen cabinets it was too humid outside to paint so I had to find indoor options. When I painted my cabinets, I used my dining room table. At my mom’s house, I used her granite peninsula. To protect the surfaces, I first put down a plastic drop cloth. On top of that I put a canvas drop cloth.
Why both? The canvas is a nice surface that won’t budge much since the drop cloth is quite thick and durable. BUT paint can easily seep through the textile.
The plastic drop clothes are great for stopping paint, but they can easily tear and get moved around. Yeah, any little gust of wind while opening a front door can fly a little corner into the air if not properly taped down. So, I’ve learned to use the plastic and canvas together and LOVE it. Yeah, it might be an extra $3 in the long run, but oh-so worth it.
7. HAVE LOTS OF NATURAL LIGHTING.
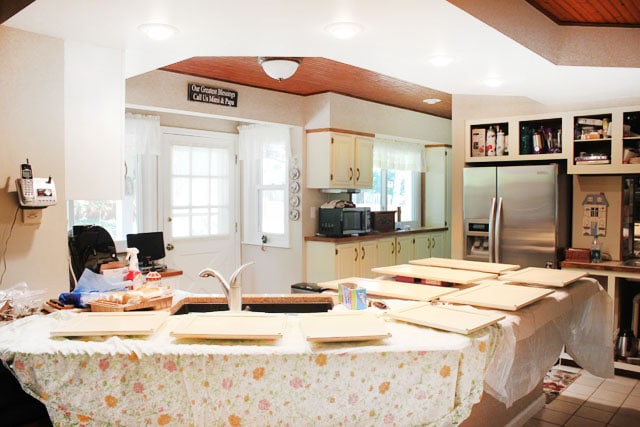
Speaking of good work space, make sure you have proper lighting. I love being near windows so you can have some natural light flowing in. This will help you see any runs, drip marks, or areas that you may have missed.
8. BRUSHES AND ROLLERS.
When I paint kitchen cabinets, I use both a 1.5 inch angled brush (preferable Purdy) and a cabinet/trim roller.
I first use the brush to paint around the inside beveled edges. Don’t lay on the paint too thick, and work the brush back and forth so you don’t get build up and drip marks.
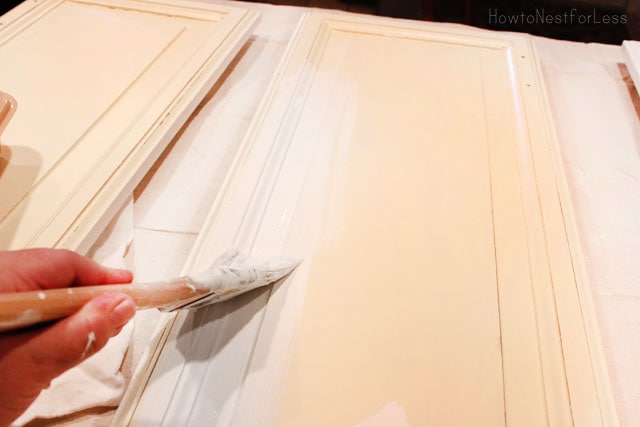
Once I had the niches and bevels painted I switched to a 4 inch trim and cabinet foam roller. I first painted the inside of the brush strokes, then worked my way around the sides and edges. This really helped give me a smooth finish with no brush strokes.
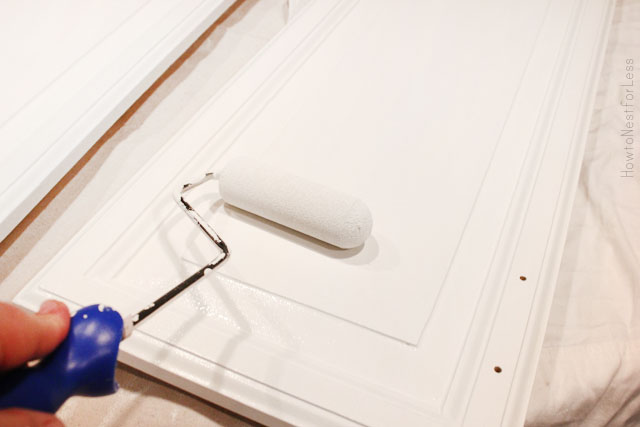
9. ELEVATE YOUR CABINET DOORS WHEN PAINTING.
To easily paint the edges of your cabinets, elevate them a couple of inches off your work space (I use cookie sheets and stacked plates).
10. HANDI-WIPES ARE LIFE SAVERS.
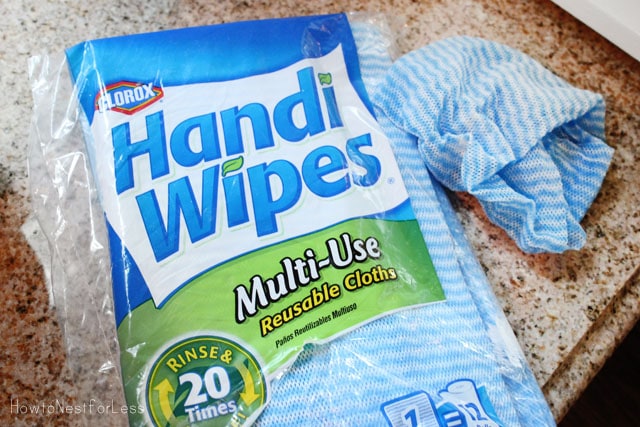
So let’s say that you drip a little paint on the floor or you accidentally paint the ceiling, or just need to clean all of the dirt and grime off the cabinet doors… well, Clorox HandiWipes will save your life.
I bought a 36 pack of these puppies for $6 and they are awesome. Just keep a wet one by your side for those quick clean ups. You can rinse them out or pitch when they get too gross.
11. LATEX vs. OIL PAINTS.
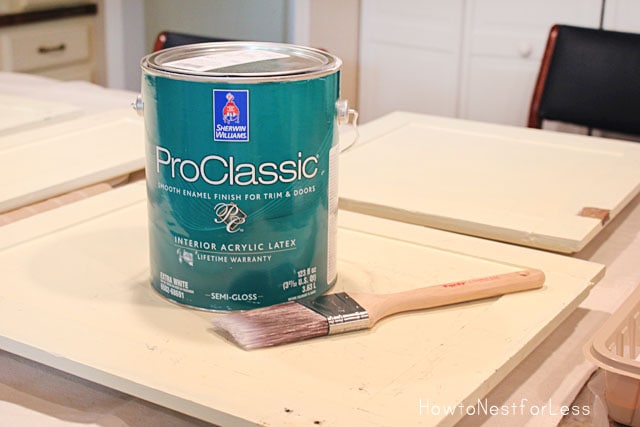
This is only a personal preference here, but I’m a huge fan of latex paints on kitchen cabinets. They don’t yellow over time, have quick drying times for your second or third coats, and it’s easy to clean your brushes after each day (just a little water and dish soap).
Plus the ProClassic Interior Latex finish I used from Sherwin Williams is simply amazing.
- – Excellent adhesion and a uniform finish make ProClassic® an ideal choice for doors and trim – as well as cabinets and furniture.
- – Provides excellent flow, leveling and sag resistance – and leaves no brush or roller marks.
- – A unique wet and dry hide allows you to apply fewer coats – saving valuable time and money.
12. REUSE YOUR PAINT TRAYS.
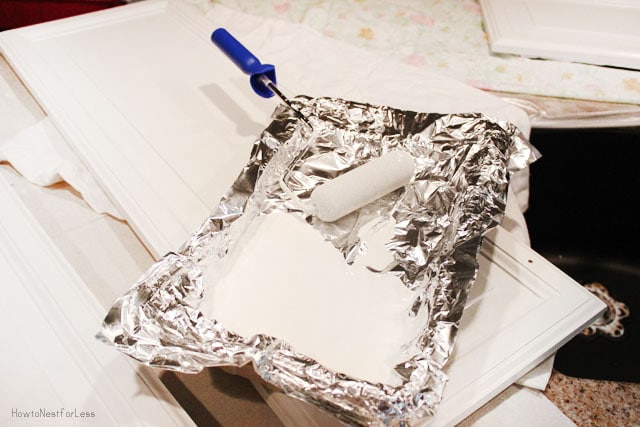
I only bought one paint tray, but easily reused it the entire 5 days that I spent painting my mom’s cabinets. How? I simply used a small piece of foil as the liner and pitched it at the end of every day.
When I painted my own kitchen cabinets I used plastic bags. Both work great and are a cheap solution to those pricey paint tray liners.
13. REFRIGERATE YOUR PAINT BRUSHES.
Did you know you can refrigerate your paint brush overnight so you don’t have to clean it out? Yep! Just stick it in a ziplock bag and you’re good to go the next day.
14. GET THAT SUPER SMOOTH FINISH.
I know you’re going to hate me for this, but you have to sand your cabinets after every coat! And by this I mean…
- Degrease, SAND
- Prime, SAND
- Prime, SAND
- Paint, SAND
- Paint
Yep, that’s right. If you’re going from wood to painted cabinets you will need to sand your cabinets 4 times. This takes forever! BUT your cabinets will be silky smooth. You don’t have to sand them so hard to where you’re distressing the edges, but just light enough to get some of the grit out of the finish. Yes, it’s a mess. Yes, it’s annoying. Yes, they will turn out beautifully if you do this!
15. BUDGET YOUR TIME.
Yes, it will take a LONG TIME to paint your cabinets. I think I did mine over a 30 day period (in phases of course).
I completed my mom’s kitchen in 5 days, about a total of 48 hours! YES, you read that right. 48 hours. Three 12 hours days, and two 6 hour days. Yes, my feet hurt afterwards and I may have needed an adult beverage at the end of each day, but the outcome is worth EVERY MINUTE! Just remember that.
 GOOD LUCK TO YOU!
Linking up here:
Serenity Now, The DIY Showoff, Between Naps on the Porch, Carolyn’s Homework, Sugar Bee Crafts, Uncommon Slice of Surburbia, Shabby Chic Cottage, Beyond the Picket Fence, House of Hepworths, The 36th Avenue, Today’s Creative Blog, Not Just a Housewife, Monday Funday

yurrabazain says
You have such amazing patience. I consider it a miracle if I get through sanding a project once. 🙂 I’m too lazy and impatient, something I am working on… in my own time. =D
howtonestforless says
Haha, I totally feel you!
Anne Molloy says
Do I understand this correctly: the LAST step is SANDING????? I always thought the very last step was painting! Please clarify! LOVE the finished product!!
howtonestforless says
You’re right Anne! Unless your last coat isn’t super smooth. Then you would want to lightly sand the flat front and back surfaces (just a once over with your sanding wedge). You would need to stay away from the edges though as you wouldn’t want to accidentally give them a distressed look.
Anne Molloy says
Thank you so much for your reply!! Now I understand. Love your site! Sorry you won’t be posting more about your family!! Those posts made me feel like we were long-distance friends of your family. Love your articles and tips!!
howtonestforless says
OH, I know!! I feel such closeness with all you guys! It still tugs at my heartstrings about that whole situation 🙁
Laura says
Do you paint the back of the cabinet door as well? Do you let the front dry one day and then paint the back? I’m itching to do this but it looks hard and like it would take over our townhouse! We aren’t too handy either!
howtonestforless says
I would paint one side continuously until all coats were finished on that side. Then flip it over. With latex paint it doesn’t take very long to paint per coat so by the time I got to the end of the section I was working on, I took a small break and went back to the beginning of that phase.
Also, with my mom’s cabinets, I did it in sections (4 total). It took me about 1 day per section (priming and painting, then flipping to the back with priming and painting).
I hope that helps! and YOU CAN DO IT!!
Lauren says
Yes I paint the backs of doors and I also spray them! It’s really hard to get a smooth finish when you don’t spray but I am a professional painter that the only way to do it if you ask me . They are ALOT of work! I honestly don’t recommend anyone painting their cabinets and less they are professional painters I’ve seen too many messed up by people that were not painters ..
Jill says
Hi Erin,
I have a durability question…do you have any minor chipping occuring after living with your painted cabinets for a while? We both work full time and decided to hire out for the painting of our oak kitchen. I know we could have done it ourselves, but it just came down to the time vs cost, and time won! Anyway, the painters used a 2-step pre-catalytic lacquer paint(I think that’s what it was called), along with Zinser BIN primer and sanding. It’s only been a few months and we have had some minor chipping. Some of it was due to the hinges, so I touched that up and stuck some felt pads on the hinges to prevent it from happening again. But a few of them are in totally random spots. The overall look is awesome, but I worry about the long term durability. Just curious how your latex is holding up in case I ever decide I need to paint cabinets or any other wood again…Thank you!
Brooke says
I’ve never tackled cabinets before, but I’ve got your post pinned for future reference. So many great tips! I love the white! Have a wonderful day!
Elizabeth @ Real Inspired says
Great tips! We will be painting our old wood cabinets soon so I’ll be pinning this for sure!
Amy@HomeRemedies says
Thank you for the great tips; I’ve been trying to work up the courage to paint my kitchen cabinets. I will definitely be following your advice!
Lynn says
With two coats of primer, did the oak grain show through? I’m tackling mine next summer, can’t wait!
howtonestforless says
Yes, the grain still showed through the paint and primer. The only real way to get rid of that would to be using a light layer of wood putty before you paint. Wasn’t worth the effort for me. Plus the grain wasn’t super noticeable. Just in certain light! Hope that helps 😉
Barbara says
Hi, if you greased it and sanded it correctly it will REALLY not matter if it shows through when priming . When you apply the Paint it will not show through. Just remember not to go over the primer to many times to get it to not show through and not to apply it to heavy. Prime is only to get the paint to stick better to the paint and is not for hiding.
Lisa Paul says
Thank you for taking the time to post this excellent tutorial. The cabinets look beautiful. I am pinning now and will be tackling this project soon. Did you poly or wax to protect the paint?
howtonestforless says
No poly or wax! The Sherwin Williams paint I used has a great protective finish to it already. They assured me I wouldn’t need any top coat. Over a year later and my kitchen cabinets are chip free!
Lusine says
Fantastic tips, thank you! I have some bathroom cabinets I’m tackling in the coming weeks and these are super useful (for almost any paint project really).
howtonestforless says
Awesome, glad to hear!
Yvette webster says
My cabinets are already painted an ivory color. I want to make them a distressed tan/brown color with paint. Tips?
howtonestforless says
Wash first, then go ahead and paint right over your painted cabinets! I just did that with my mom’s and they turned out beautifully. Good luck to you!
Alice says
Now i feel confident enough to tackle our kitchen this winter, keeping this article printed out by my side!
howtonestforless says
Awesome Alice. Good luck!
Megan says
What about the inside of the cabinet? Do you paint the inside too? It seems like the blogs I find about painting cabinets don’t address the inside. In my mind it would look odd if the inside is not painted, but maybe not?
Also, my older home has tiled counter tops with the wood finish around the edges that matches the cabinets (similar to your photo regarding taping), did you not paint that wood finish?
Thank you for the post, GREAT information! I have been working up the courage to paint mine for two years now!
howtonestforless says
Yes, definitely paint the inside of the cabinets! Use the same method as the fronts. As for the wood trim, we left it as wood since we have the desk area that has the matching wood top that we did not replace with granite. I wanted some things to match. It’s really your call on whether or not to paint! GOOD LUCK with yours! I know you can do it 🙂
sherry says
I painted my kitchen cabinets several years ago like maybe 3 and now they look gross, I didn’t follow these steps, other than painting them what can I do? Is there a easy way to make them look distressed? I kinda regret painting them.
howtonestforless says
What type of paint did you use before, Sherry? And how do they look gross now? My mom’s cabinets before were distressed and they looked fabulous! Just take sandpaper to the edges. I recommend a sanding wedge for the broader areas, then paper to get into any niches if needed. Hope that helps, and good luck to you!
Ainnir says
Thanks so much for this; it makes the process realistic yet doable, so THANK YOU. I’m going to tackle my 20 year old cabinets soonish (after some other projects). I did want to know what grit sandpaper you used, and if you just hand sanded or what? Also…if you were going to paint walls as well as cabinets in your kitchen, which would you do first? I have wallpaper that needs to come off and be replaced with something.
howtonestforless says
I used a fine sanding block (one of those black thick squares from any hardware store). If I was also going to paint the walls and cabinets, I’d do the cabinets first. It will help you get a nice feel of the rest of the room. You might realize you need something lighter or darker on the walls after seeing the painted cabinets in the light at different times of the day. Hope that helps!
christine says
Reading all these methods and comments…I just painted my 10 yaer old, stained cabinets to white. I used ANNIE SLOAN CHAULK PAINT…….no sanding…just clean with degreasser, paint three coat of white paint, then lightly sand and used 2 coats of miniwax polycrylic…..and the results are awesome!….I did my kitchen in 4 sections, and each section took me 5 days. I allowed 24 hours between each coat of paint/varnish. I did it in the summer ( summer in Richmond, VA are hot and humid) and there was no oder or any fumes at all. I have lived with my white cabinets 6 months now and they are beautiful, clean up with just a little soap and water, and not a chip or ding. I did dresses, them a little, but just the edges cause I like the antique look, and could not handle pure paintd white. I have built in bookselves in my family room flanking the stone fireplace and did them also, SCORE!…so updated and so easy! Annie Sloan all the way!…
howtonestforless says
That’s great to hear Christine! I was always wondering how well ASCP would turn out. Might have to try this at some point!
Allison Lopez says
I just finished painting my bathroom vanity and I am about to tackle my kitchen. On my bathroom vanity, the paint from the drawers want to stick to the base. Did you have to use felt or rubber buffers to ensure the paint from the cabinet doors didn’t stick to the cabinet frame? If so, could you please recommend a material and brand or size you went with?
howtonestforless says
Yes, I did use felt buffers that I purchased at Lowe’s (the pack came with a bunch of different sizes). At first I had the clear plastic ones but they fell off too frequently and made a weird noise when the cabinets closed. Hope that helps!
Rosaleen says
I have been all over the web looking for how tos and tips on painting oak cabinets and I could shout for joy in finding your instructions. One clarification please. You said degrease sand, prime sand, prime sand, paint sand, paint. Now one of the commentators asked if sanding was last step and you said yes but instructions show paint as last step.beautiful job, your mom must be proud of you.
howtonestforless says
THanks Rosaleen! I would lightly sand when you finished painting the last coat ONLY if you have some little rough patches from your foam roller. I personally did not need to sand any spots. Hope that helps!
Becca says
Thank you so much for posting this!!! One quick question, did you use a brush AND a foam roller when priming with oil base? Cleaning them is always such a pain but I
don’t want brush marks. Thanks again!!!
howtonestforless says
Yes, I used a brush and foam roller for the primer!
Tami says
So, my cabinets were painted years ago with a lacquer, then I touched them up with a primer and paint in one a few years later. Now they need an overhaul. Any experience or recommendations for me? Don’t tell me to strip anything…it won’t happen. 😉
howtonestforless says
Haha! I know, the idea of stripping cabinets gives me hives. I would sanding them down a bit, then use a good primer like Zinnser. Then try the Ace Hardware cabinet and door paint (or called something along those lines). I’ve heard it’s the absolute best paint for coverup. I would suggest trying this on one cabinet door first!
Cheli says
I just painted the backs of my first set of doors and after the using the roller they got a tacky, not smooth finish. I don’t know what I’m doing wrong. However can I sand it? I used latex
howtonestforless says
The roller will cause it to have a bit of a textured finish, but as the paint dries it should settle and dry evenly. Then when you sand you will get the super smooth finish! You also need to make sure you are working quickly between the brush and the roller. You dont want the paint to start drying otherwise you will start “pulling” the paint. I hope that helps a little. Let me know if you have any other questions!
Ash says
You’ve just saved me about $5,000! Thanks so much for the detailed instructions. I’m going to attempt this over Christmas break. Did you consider sealing the cabinets with a top coat? How have your (and your mom’s) cabinets held up without it?
It looks like your cabinets are the same as mine in terms of the design on the front–I’ve read humidity levels can cause the door frame to contract and expand to reveal unpainted bits, but that caulking the inside edges will prevent this from happening. What’s been your experience? Would you say this is an unnecessary step? I don’t know if I’d be able to get the caulking exactly right all the way around.
howtonestforless says
YAY! Both of our cabinets have held up beautifully. My mom was actually talking about that over Thanksgiving! I honestly don’t think a top coat was necessary… IF you use a good brand of paint. Also I haven’t noticed contracting or expanding, especially to the point where unpainted parts would be revealed. I don’t think you need to caulk at all!
Machell says
What grit of sand paper did you use?
Thank you
howtonestforless says
I used a Fine sanding wedge.
Christi w/ A Full Time Keller says
This is the first Tutorial that I actually understand. Thank you for spelling it all out. I would read other tutorials and be sooo confused. I plan on painting my cabinets in the spring.
howtonestforless says
Good luck to you!
Lesa says
How have your cabinets held up? I’m planning on tackling this same project this week… Thanks!
howtonestforless says
Well we’ve moved since I painted my old kitchen cabinets, but I also did my mom’s a few years back and they still look wonderful! No regrets in painting!!
Diana says
I painted my kitchen cabinets following your steps, and they look awesome! So glad I tackled them. However, I am now getting chips around the hardware. I have tried touching them up by lightly sanding and repainting, but they continue to appear. Any suggestions? Thanks! I am new to Pinterest and loving it…I know, where have I been?!
howtonestforless says
Oh no! Did you wait a couple days for the paint to cure before adding the hardware back on? Depending on what paint you use and if you primed, that could be the issue. I had that happen to me on a dresser once when I added the knobs back on… no fun! I would sand that area down, prime and paint again. Then wait a few days before adding the hardware back on. Hope that helps! And have fun with Pinterest! You’re going to lose some hours out of your day now 😉
Cat says
Hi Erin! I’m about to tackle my kitchen cabinets and was wondering which finish you used for the Proclassic paint (satin vs semi gloss vs high gloss etc). I went to our Sherwin Williams the other day and left totally confused because they cannot mixup darker colors in ProClassic! I’m hoping to do darker on bottom cabinets and white upper. Anyway the “deep base” that must be used with darker colors only comes in low-luster satin OR high gloss so I left the store without buying anything! Any thoughts? The associates weren’t much help. Thank you for the awesome tutorial!
howtonestforless says
Oh bummer on the mixup with darker colors! I used the semi-gloss for my cabinets. Much easier to wipe down! But for the darker I would use the low-luster satin. You can always add an extra wax or poly coat afterwards if needed (but I highly doubt you’ll need it). Good luck with your cabinets. I would love to see a pick when you’re done!
Cristina says
I painted my oak kitchen cabinets with Rustoleum Cabinet transformations in pure white about a year and a half ago. At first they looked beautiful. After about 6 months I started noticing some yellowing. After a year the it was very noticeable. I contacted Rustoleum and they told me the yellowing is caused by tannins that for some reason start to surface after the top poly coat is applied. Their suggestion is to de gloss and apply 1-2 coats of their bond coat. I’m wondering if I should reprimer and follow your instructions. I used a purdy brush the first time around and I do dee brush marks. I love te results you got. What do you recommend? Have you ever used or know anyone who used the rustoleum Cabinet Transformations?
howtonestforless says
Yeah, I’ve heard bad things about Rustoleum Cabinet Transformations. Ange from The Blooming Hydrangea had the same issue. She ended up painting them with Ace Hardware’s cabinet and trim paint. It’s self-leveling and really opaque. I might suggest you try that!
Guy Gardener says
Number three is a great tip! So many forget to clean and it just ruins the entire kitchen. At that point, depending on what you used and what you used it on, you will probably have to replace the cabinets. Won’t you feel silly when that happens to you.
Ms.Toni says
I absolutely love how detailed you are. Thank you. I have been doing home renovations for a few months by myself and I am a bit OCD about directions. Yours were perfect. Thank you! Looking forward to this project now. Did you have any problem with the cabinets sticking after? People keep warning me about sticking after you paint them. I would like to avoid that, if possible!
howtonestforless says
Thank you so much! And nope, I didn’t have any trouble with sticking! I would recommend not painting during really humid weather. It can affect the dry time and tackiness on your cabinets.
Sara O'Dell says
Hi. I just came across this post, hopefully you’ll still get the comment! I live in Houston, TX… it is about to be summer we are already sitting at 80% humidity most days, that is probably too much to paint outside or in the garage with, yeah? This is my first time painting cabinets and I want to get the best area to paint the doors in that I can.
Is Killz primer okay to use as the primer for stained oak cabinets being painted with high gloss latex paint?
Thank you
howtonestforless says
Kilz primer is OK but I definitely prefer Zinsser. It sticks to almost anything even if you miss properly sanding a spot. And when I painted my old kitchen cabinets, I used my dining room! Just put down plenty of drop cloths 🙂
Painting in PA says
My husband and I just finished painting the boxes of the cabinets about three weeks ago. We let them dry while we tackled painting the doors and drawers in the garage. Now three weeks later I just so happen to run my hands over the cabinet boxes and some finish coats are incredibly smooth and some are very rough! We did follow the instructions of sanding between every coat. I’m wondering if the textures are different because some of the cabinet walls we needed to roll over with a foam brush after we sprayed them with a gun, and others we sprayed just fine so we left them alone. I saw you mention we can sand the final coat of it still feels rough. Will that not dull the paint surface and make it look different from the cabinets that turned out smooth? It’s driving me crazy that the surfaces are all different textures! But I’m nervous of messing up the look if I sand some and don’t sand others! Thanks for your help and great post!!
howtonestforless says
I honestly didn’t notice any different from the areas I sanded and the ones I didn’t. It all looked smooth and consistent in the end. Good luck to you. I know it will turn out great!!!
Meg says
These directions are fantastic. Thank you for the detail and tips. I see that someone else asked about cabinets that are already painted and you said wash and paint. Does that mean I don’t need to sand them? Do I still need to use a primer or no? Thanks for your help!
howtonestforless says
I did not sand the painted cabinets that I did for my mother before I repainted them. I only cleaned really well (I suggest Simple Green). You should sand in some areas if the paint is chipping or cracking so the new coat of paint goes on smoothly. Hope that helps a little!
howtonestforless says
And don’t paint latex over oil! Otherwise you will definitely need a primer. Latex over latex or oil over latex is fine.
Primer-coat-too-thick says
I’ve painted my cabinets frames & drawers and they turned out beautifully. For the doors I purchased a paint sprayer… bad news is the seal-grip primer went on too thick. It was a quick job but now I have more work ahead of me to sand them down again. When sanding, the paint is coming off in rolled strips, not like regular sand dust. Is it necessary for me to sand these down? What’s the harm in a thick primer coat? My gut tells me I need to sand them.
howtonestforless says
Unfortunately I would recommend sanding completely and starting over. I know it’s probably not what you wanted to hear but it’s better to have it be 100% right from the beginning and possibly not peel down the road
Sarah Suhm says
Hello! There are so many White paint colors out there. What color did you end up choosing?
Thank you!
howtonestforless says
We used Pure White by Sherwin Williams.
Ana says
This was so helpful! A few questions.
1. What kind of sanding paper did you use?
2. My cabinets were sanded down to the wood, primed them painted. The paint, however, looks so thick and chunky. Is that because I didn’t sand between coasts? What do you recommend I do now? I would hate to start completely over but I’d hate to look at them every day and hate them!
3. How do you keep the paint from slowly peeling off? I’ve seen it happen already!
Someone recommended rubbing paint thinner on a cloth all over the cabinets. What do you recommend?
howtonestforless says
I just used fine sandpaper, but oftentimes will use sanding wedges as well. Just depends what you feel comfortable with.
If the paint is looking thick and chunky, I would think it’s the paint, not your cabinets. What brand did you use? Did you stir vigorously before use?
I’ve never had an issue with paint peeling right away. I would think something is still on your cabinets then… some type of coating. Try cleaning with Simple Green or a type of degreaser. Again though, I would check the paint. Something doesn’t seem right.
I wouldn’t recommend rubbing with paint thinner afterwards. If anything I would use something like Floetrol mixed in with your paint to get a smoother finish. Or try a self-leveling paint like Ace Hardware’s trim and cabinet paint. It’s amazing!
Rachel says
Love this! I am going to be doing this next week to natural oak cabinets and am so happy to come across your tutorial! One quick question on the sanding…
Do you recommend FULLY sanding down the doors/drawers/base OR just simply sanding down enough to rough it up before priming? Just trying to avoid doing more sanding than actually necessary!
Thank you!
howtonestforless says
Just enough to rough it up before priming. If you prime and use good paint you should be just fine!! I would also suggest cleaning with Simple Green first to get any gunk or grime off the cabinets. GOOD LUCK!
Rachel says
Woohoo!! Music to my ears. Thanks for the quick reply 🙂
Shadrick Brown says
I used the proclassic paint but I use a paint sprayer do I need to sand cabinets after first coat. I did not prime the cabinets.
howtonestforless says
I would feel with your hands to make sure you have a completely smooth paint job once it’s dried. If so, no need to sand!
Angela says
I have honey maple cabinets that I want to paint white with ProEnamel Satin. Should I sand or is deglosser sufficient (or both)? I should prime too right? Want to do this right to avoid any chipping down the road.
howtonestforless says
I would suggest cleaning really well with a deep cleaner like Simple Green. I would also recommend sanding before you prime to ensure the primer sticks well to the surface of the cabinets. Also don’t skimp on the primer!! I recommend the Zinsser cover stain with the brown label. Hope that helps!
Beth says
Thanks for your great instructions and answering all our comments!
I’m painting our cabinets a few at a time while my husband installs new flooring. We have honey oak 90’s cabinets, and are painting with SW ProClassic semigloss Alabaster, walls are SW sea salt, counter will be Cambria quartz kelvingrove or Montgomery.
I first clean cabs with TSP, then fill grain (fronts only) with 3 coats aquacoat gel woodgrain filler, prime with Zinnser 2 coats, paint 2 coats (back) & 3 coats (front), sanding between every coat of everything! It’s slow going, but hopefully worth it.
I’m not sure how long I should let the paint dry between coats. It’s winter & pretty dry here. Any suggestions?
Raquel says
Thank you so much for your instructions. I agree with the other comments that you are very clear and make the process seem less daunting. However, I came across this AFTER I have already primed my powder room cabinets with Sherwin-Williams extreme bond primer. I waited 24 hours between the first and second coats of primer. I’m now ready to paint, I think. I didn’t sand at all between coats of primer because the primer from SW claims that sanding isn’t necessary. Should I sand before paint anyway? Also, I bought the SW pro classic in semi gloss ( I’ve used it all over my house for trim and doors). I haven’t had it tinted yet because I wanted to test the color first using a sample. Is there any problem with painting with a “Color to go” sample in satin to test the color? Lastly, I plan to paint cabinets in three bathrooms and my kitchen. How long must I wait between coats?
Britt says
Ahhh… finally instructions that make sense and fills in gaps of “what the heck do I do now $^&#*!”. Such as primer…. there are conflicting ‘must use’ opinions out there. Mainly SW Extreme Bond vs ProBond Primer. Even the SW guys were arguing so I went with ProBond Primer. To my horror it went on like pudding and didn’t level out – and looks completely white washed. Thankfully I found your post and you put my panic at ease. I’m getting ready to sand and apply 2nd coat of pudding, I mean primer. I’m using the SW Urethane Enamel in satin for the top coat in cyberspace gray (as recommended on ‘Brittany Makes’ blog – another great resource, no relation to me though same name). I’m crossing my fingers it’s silky smooth like buttah… time will tell. thanks again for the great instructions.
Nosulire says
Keeping the design simple will make your kitchen more spacious. You don’t really need complexity in this area of your house. A simpler and cleaner kitchen will give you a much more comfortable feeling.