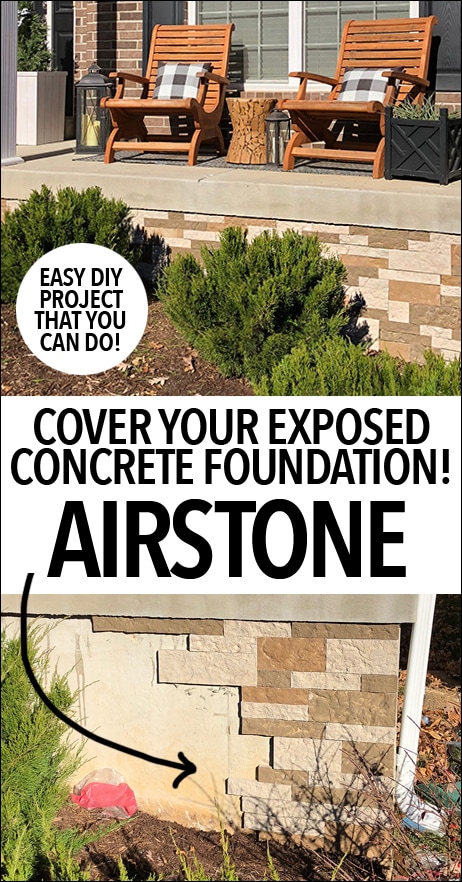
I am super excited to share with you my faux Airstone veneer that covered up my concrete foundation!
A couple weeks ago I told you guys I was about to give AirStone a try on the front exterior of our home. I have always hated the look of our exposed concrete foundation so I thought fake stone veneer would be a good option. We finally got around to completing the project and I’m happy today to finally reveal our Airstone concrete foundation coverup!
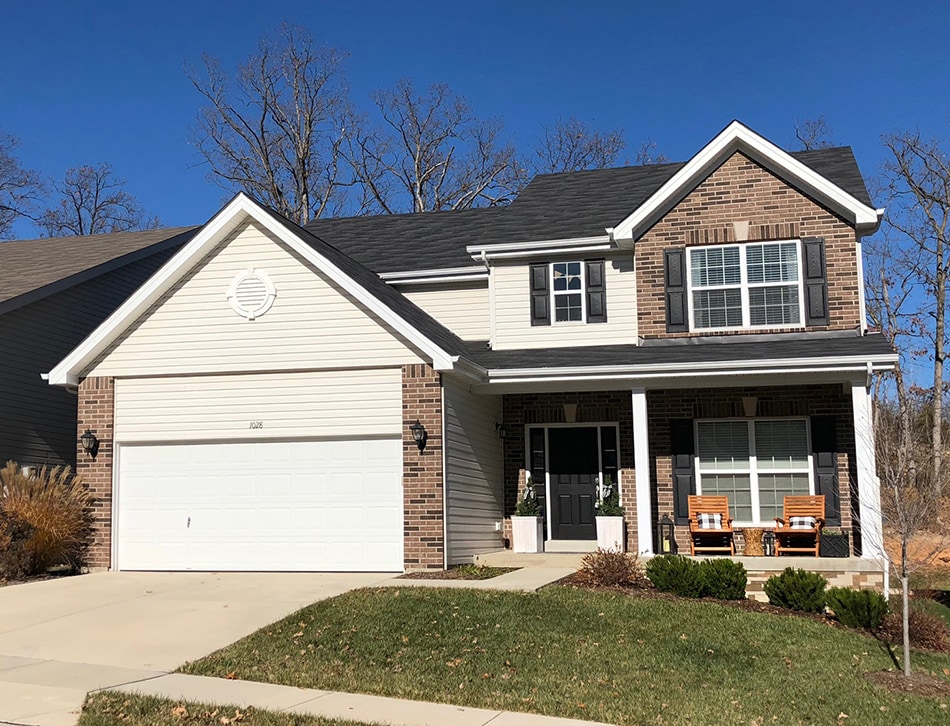
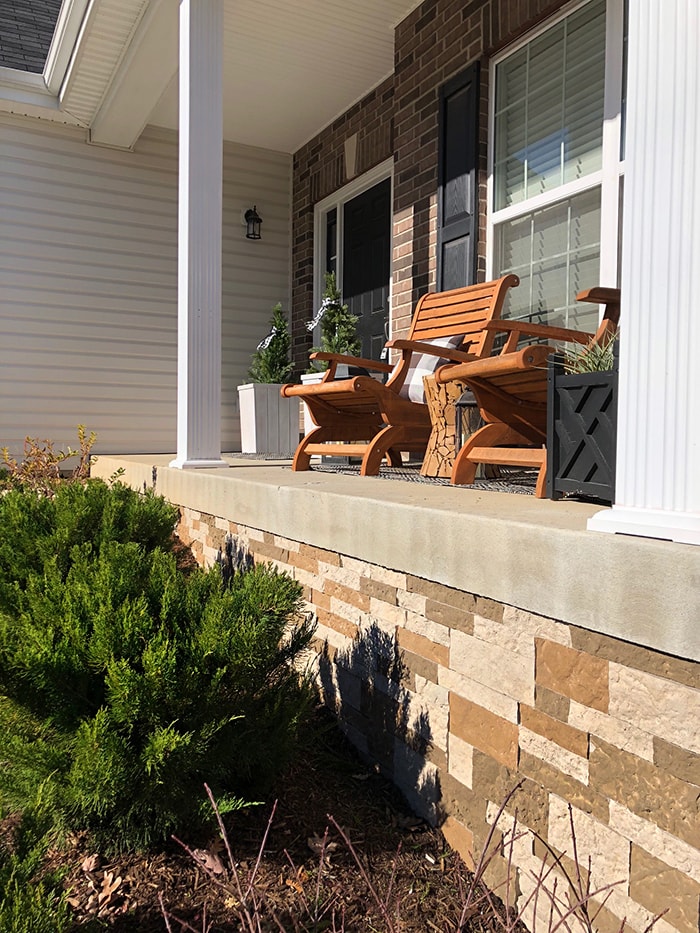
In case you don’t remember what our exterior looked like before, here’s a quick pic, note the concrete slab.
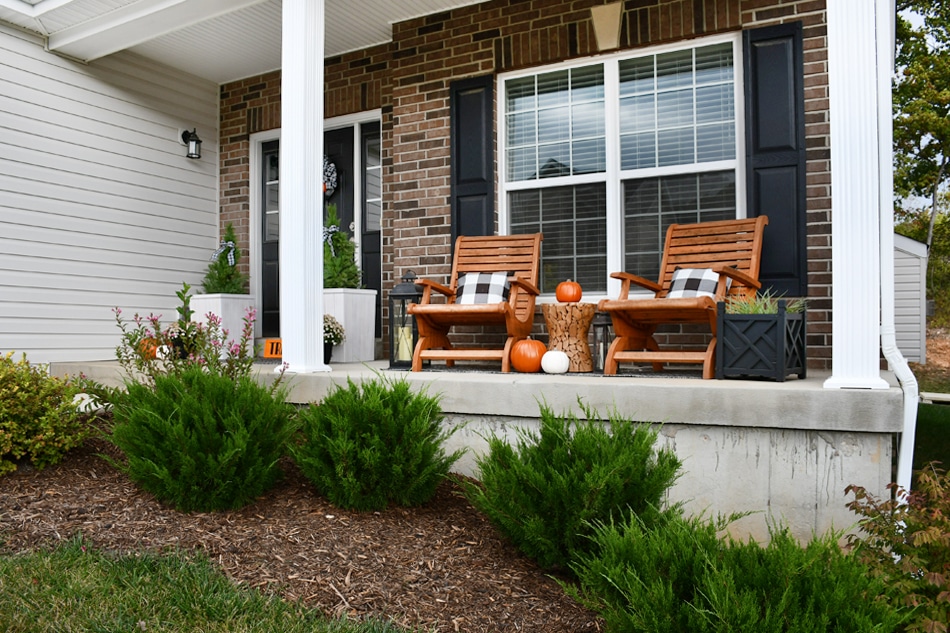
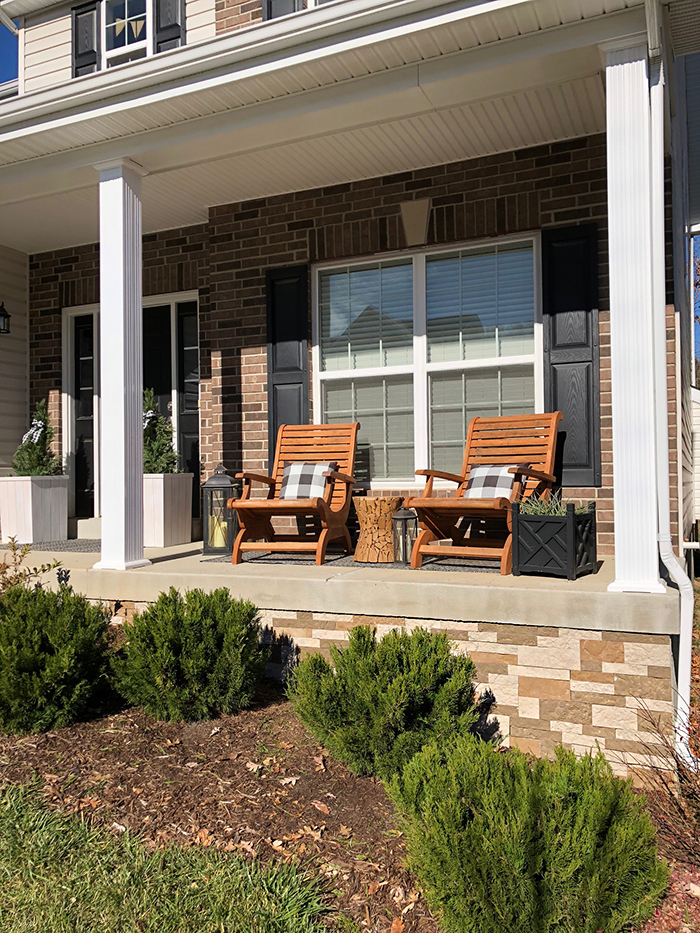
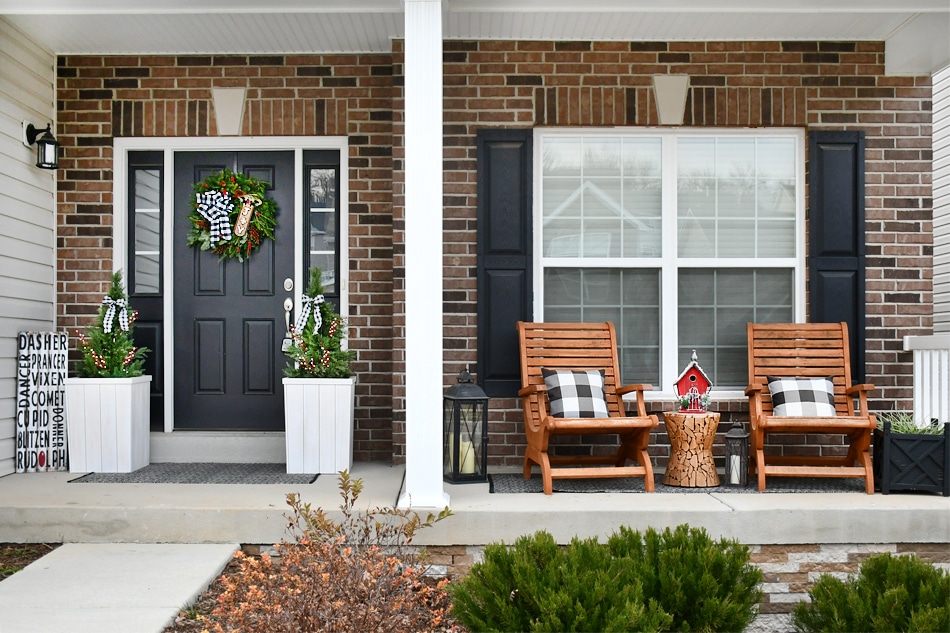
And here’s what it looks like now!
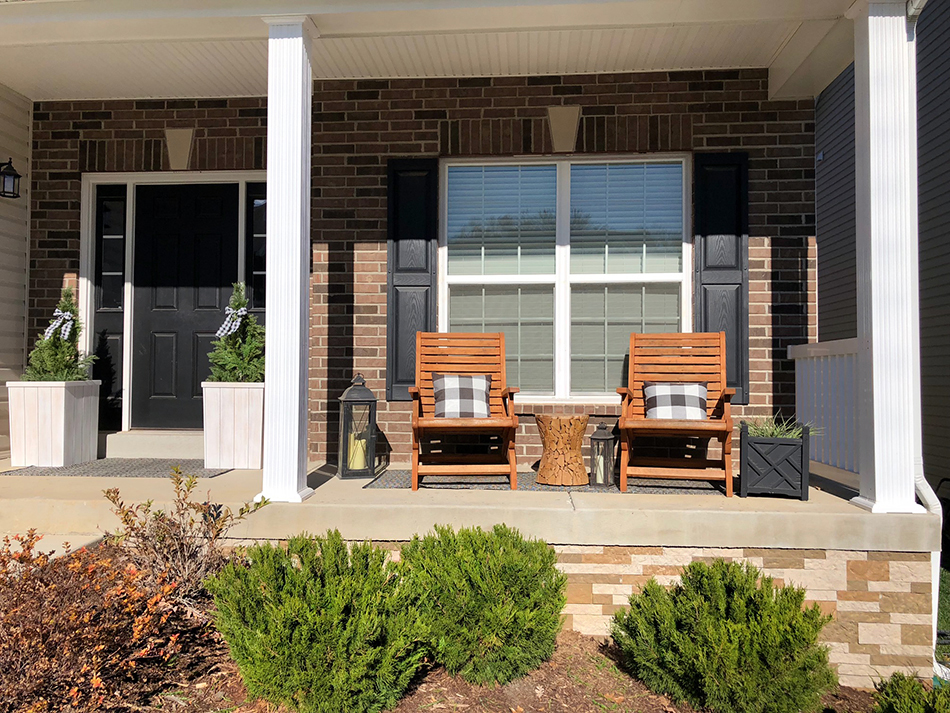
I’m so in love with the new look! And the best part? It only took two and a half hours to complete the entire DIY project! And I promise you… ANYONE can do this.
At first I was afraid to try faux stone veneer product because I was a novice, but luckily it was a breeze to work with.
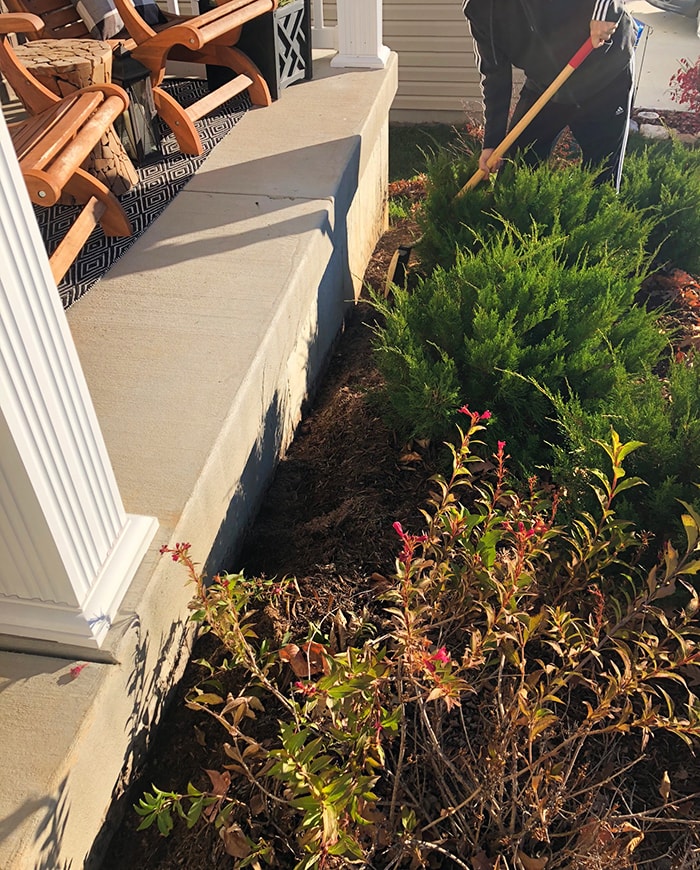
The first thing we did was pull back the mulch a little bit from the exposed concrete foundation on the front exterior of our home.
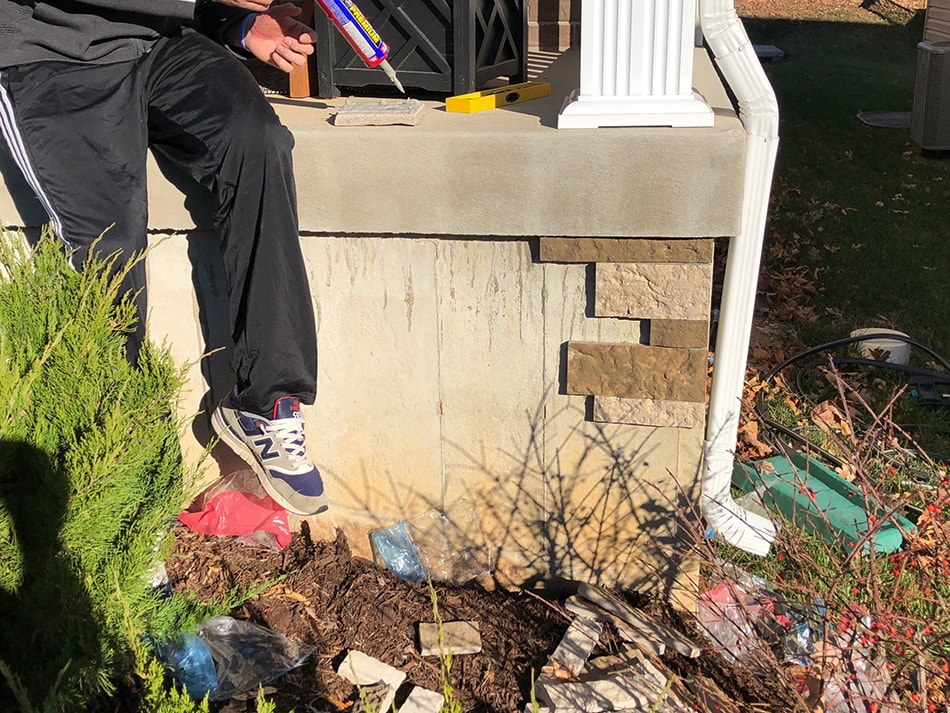
Next, we decided to work from the outside of our home towards the front porch. Because the front elevation of our home slopes, the far right side needed much more stone. I figured the fewer pieces of faux stone to cut on the shorter side would be easier.
Now the directions do say to start from the bottom, but I really wanted a nice clean line right under the porch and (again) didn’t want to cut a million pieces. So instead we started from the top and worked our way down, but worked fast so the pieces wouldn’t “slip” down. Luckily we didn’t have that issue at all; the adhesive we used was AMAZING. I highly recommend Loctite PL Fast Grab Premium adhesive.
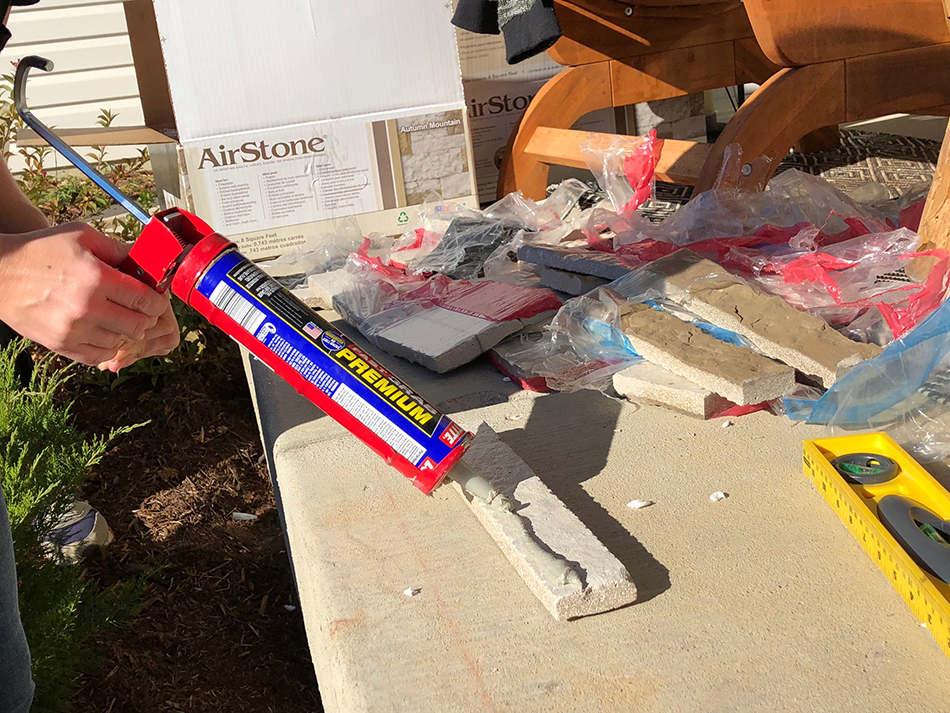
Another awesome thing about using these faux stone tiles is that the packages are color coded. It was often hard to see the difference of the stone colors in the bright sun, but the color coded packages made the whole design process go so much faster!
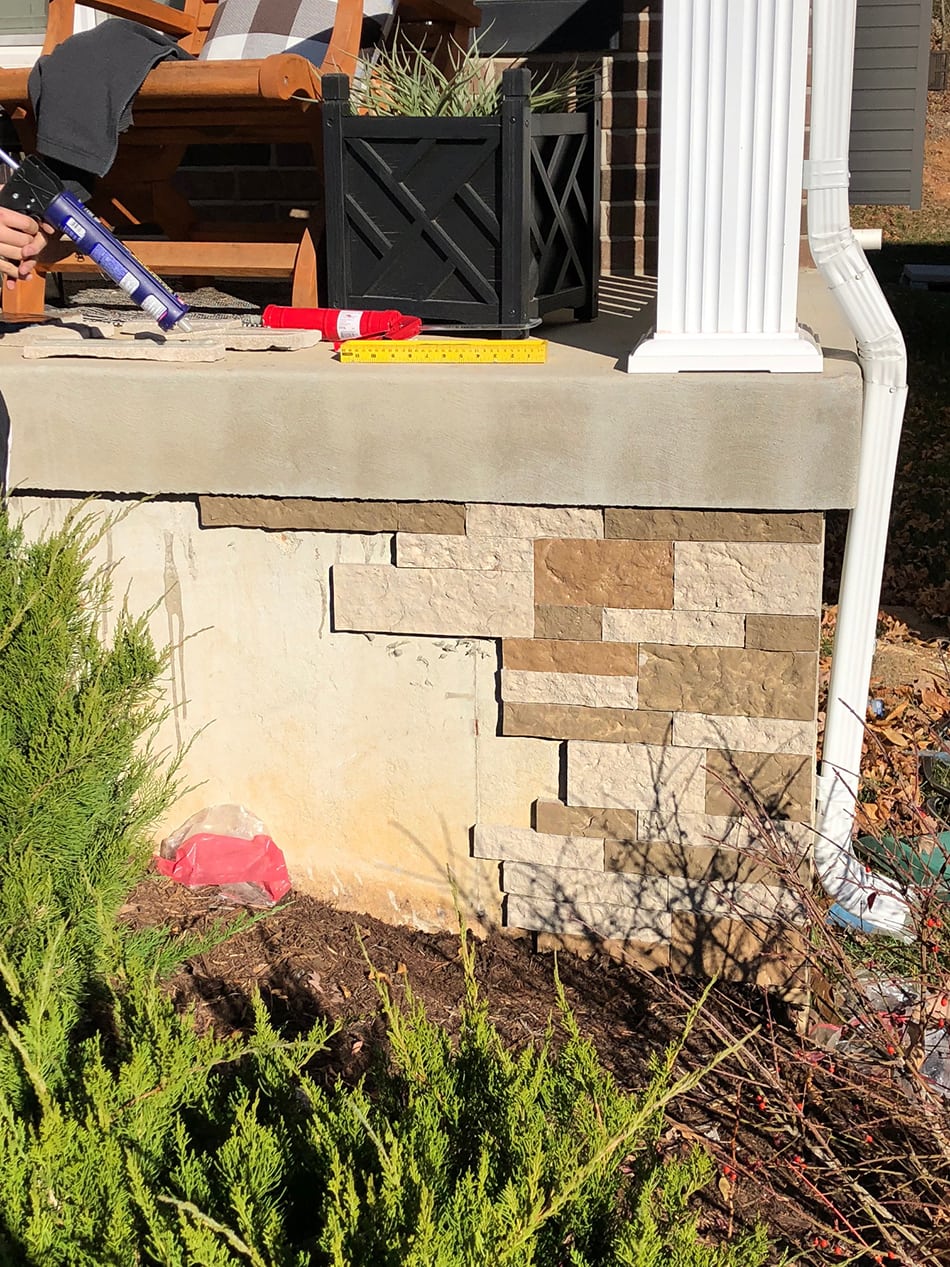
We just basically mixed and matched the stone as we went… didn’t really plan anything out before we stuck it to the exposed concrete foundation! I would just yell “Ben, give me a thin cream piece” or “hey, give me a fat light brown piece”. Yep, our technical terms really helped the process of this concrete foundation coverup!
Now for cutting the pieces… luckily we only had to cut about 5 pieces total. Along the bottom we didn’t cut anything; we just dug down deep before placing the lower pieces and then covered it with mulch once the adhesive dried.
To cut the AirStone, it’s super simple. Basically just use a hacksaw… yep, that’s it! A couple strokes and the stone cuts right in half! So simple, I promise you’ll be amazed.
As I mentioned, the entire process (gluing, cutting, adhering, etc) only took us 2.5 hours. We were amazed at how fast we got it up!
And afterwards I bet we had 10 different neighbors drop by while we were cleaning up the boxes and plastic bags to tell us they were amazed with the final results. Many couldn’t believe it was faux stone veneer, and most couldn’t believe how fast we finished this DIY project!
As for the cost, it took us just under 3 boxes of the Autumn Mountain color to do the entire front. We do have a lot leftover since we were picky with the color selections (we mostly have a lot of gray stones since our normal brick has more neutral colors in it and we wanted it to closely match the brick).
We did go through a lot of adhesive! I would say we used about 8 tubes. Yes, be VERY generous with the glue! Trust me, it’s worth it to have it stay up there forever!
We’ve had no issues with any falling Airstone since we installed it, and we’ve even had some seriously cold weather.
And we love this so much, we’re actually going to do an faux stone concrete foundation makeover makeover on my sister’s house! She has gray siding on her home so we’re thinking of using the Spring Creek color scheme. Can’t wait to see how it looks!
If you have any questions on the process, please ask away! I’d be more than happy to help.
Also, you can buy Airstone at your local Lowe’s or online. And don’t forget the adhesive and a hacksaw! But again, that’s all you need for your own concrete foundation coverup!

Angie says
I was leaving my house when you were still putting it up, and it was all finished by the time I got home. I was shocked at how fast it went. And it does look fantastic – every once in awhile I’ll catch a glimpse while backing up and think about how nice it looks.
howtonestforless says
Thank you Angie!! Surprised how fast we got it done. Now we just need to work on the rest of our yard, lol!
Michelle - Happy Heart Made says
Wow, great job on the home improvement!!
Valincia says
Can it be used on the part of the porch that you walk on?
Tracy says
Could you use the air stone on the sides and risers over concrete stairs? I’m your opinion. 🙂
Regena says
Hey just saw your n post on this project from 2017 and was wondering g how this help up two years later? thinking about trying this on My home.
Carin says
We’ve thought about using Airstone. A few years later, how has it help up outside in the elements?
Donna says
Did you add a clad on the top where it met the concrete patio? I cant tell. Is the patio painted? I am wanting to do this on the sides of our poured patio deck that is 2 ft tall. But know that there will be a lip at the top where the stone meets the top of the patio.
Nippon says
It’s nice when you see such a great work! Continue writing