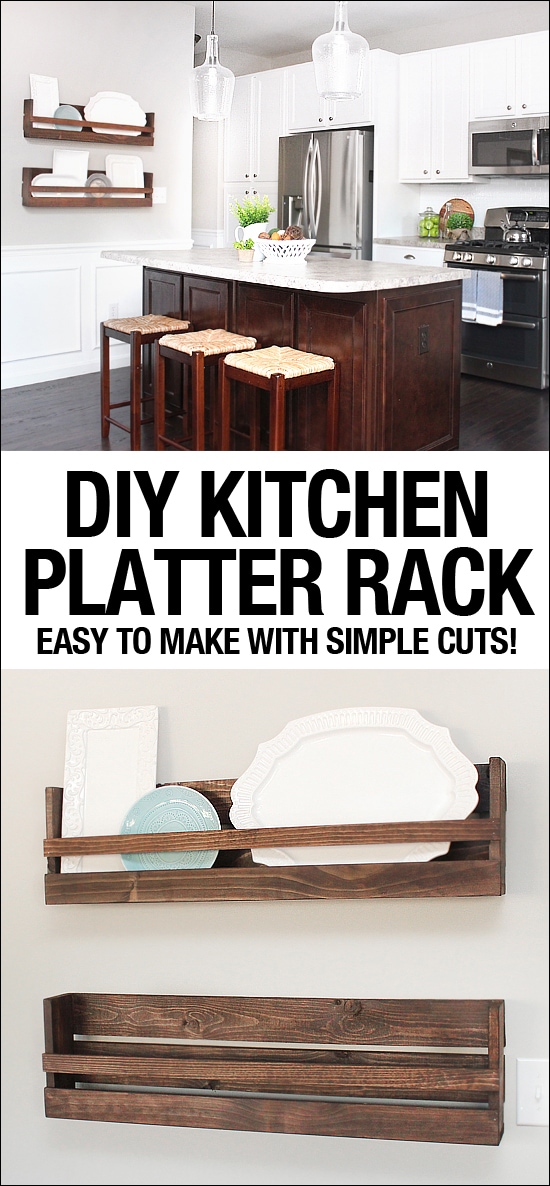
I will show you how to make this DIY kitchen platter rack!
Over the weekend I finally finished a DIY Kitchen Platter Rack project I’ve been dreaming of since the day we moved into our new home. It only took me about 15 months to finally get around to making this kitchen platter rack 😉 You know the feeling, right? Good, glad I’m not the only one!
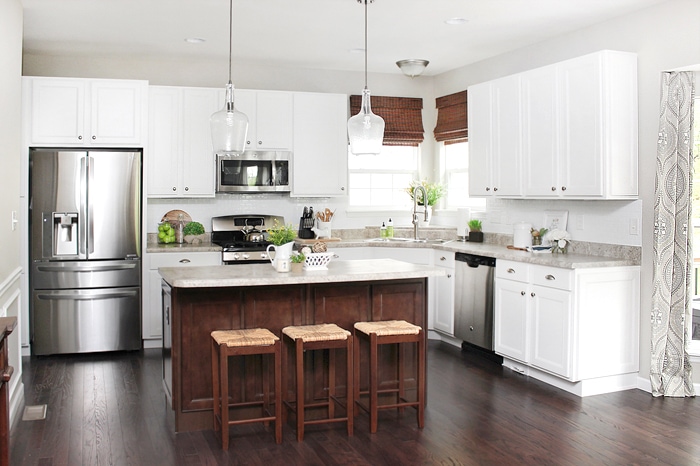
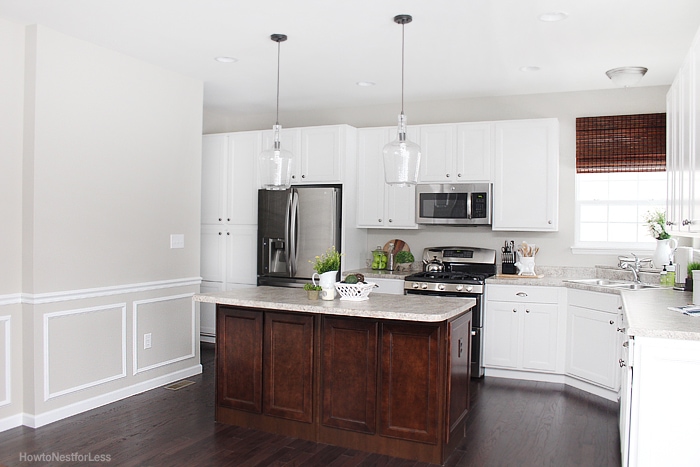
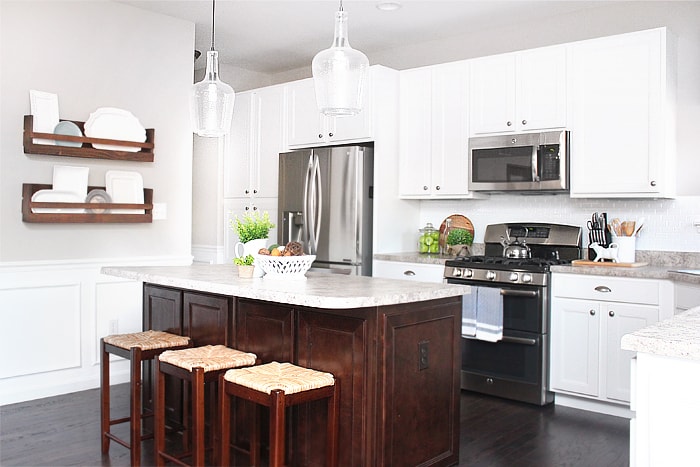
So to the left of my wooden kitchen island there is a big blank wall. It’s really been an eye sore because it makes it feels like my kitchen was incomplete.
So we had the idea to make a DIY kitchen platter rack to fill in the space and bring all of the wood elements together in my kitchen. We liked the result so much that we decided to make two!
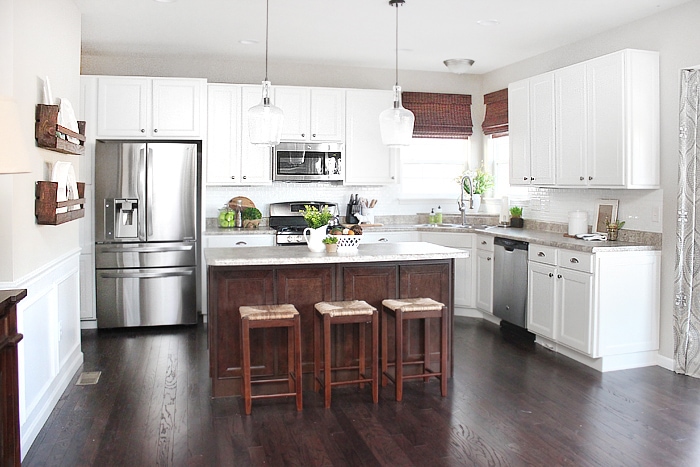
The wood from the island, bar stools, woven roman shades and now the platter racks seem to bring some visual organization to the kitchen.
So here’s how we made the kitchen platter rack:
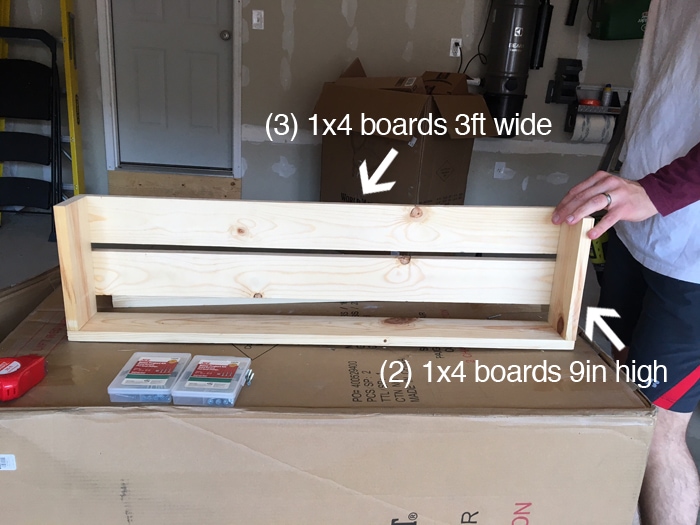
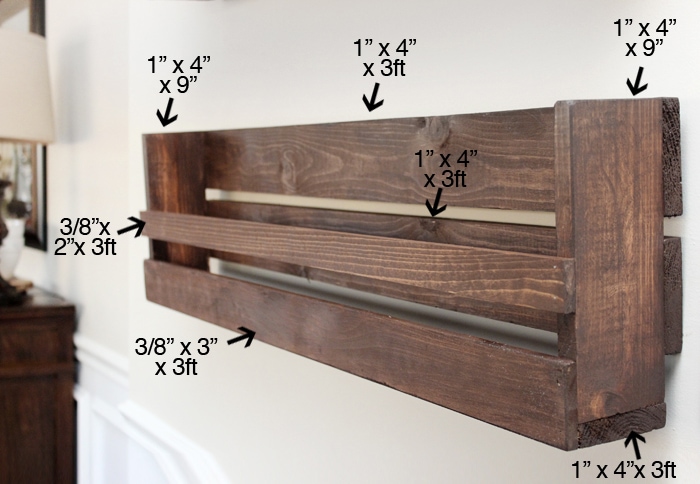
- (3) 1×4 boards, 3ft each (for the bottom and two back boards)
- (2) 1×4 boards, 9 inches each (for the sides)
- (1) 3/8″ x 2″, 3ft (for the front)
- (1) 3/8″ x 3″, 3ft (for the bottom lip)
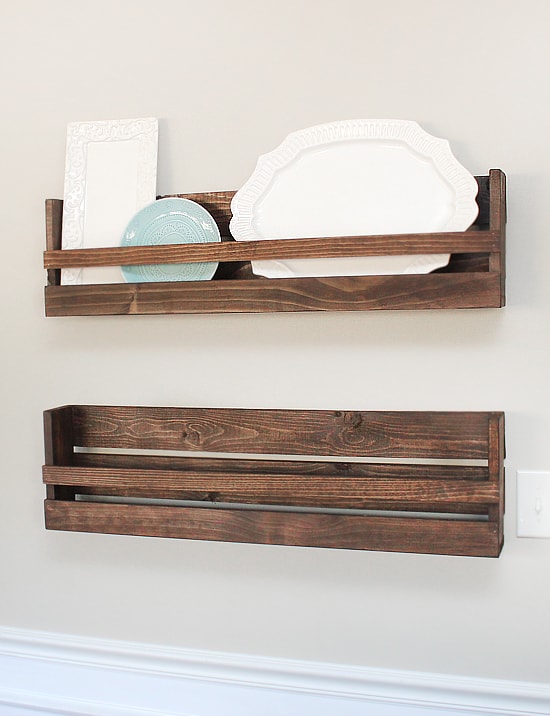
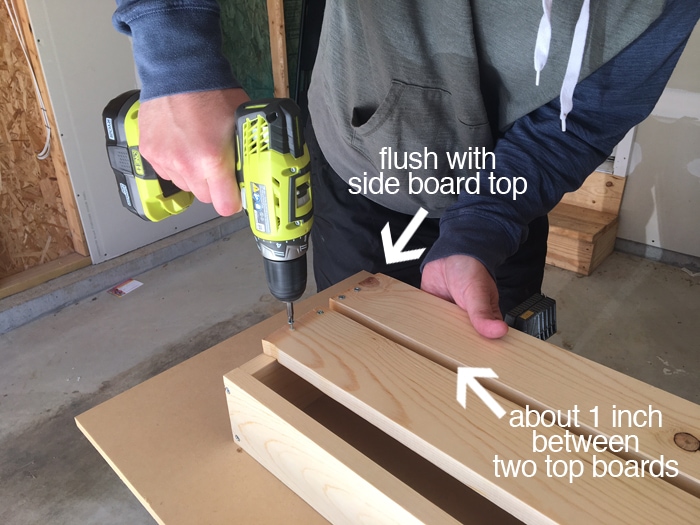
We screwed in the two 9″ side boards into the bottom board. Next we screwed in the top back board flush with the top of the wooden side boards. The next board along the back went on just about an inch lower than the top board on the back side (see photo above for all these steps).
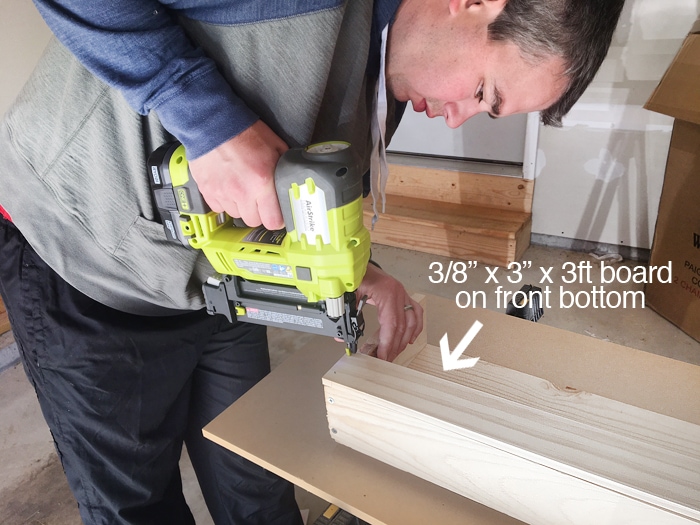
Next we nailed on the front board (the 3/8″ x 3″ x 3ft board) with our nail gun. This create the front lip so your platters don’t slide out. We also nailed on the second front board (the 3/8″ x 2″ x 3ft board) that holds the platters in place, about 2 inches above the bottom lip.
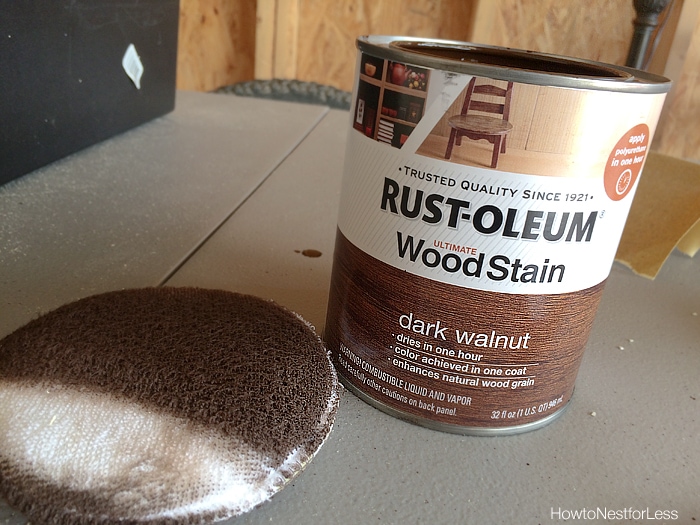
When the kitchen platter rack was all screwed and nailed in place we stained both of the finished products. You can definitely do this before but with this particular stain I don’t ever fear doing it at the end of my project. It’s definitely my go-to stain since it goes on with one coat and dries quickly.
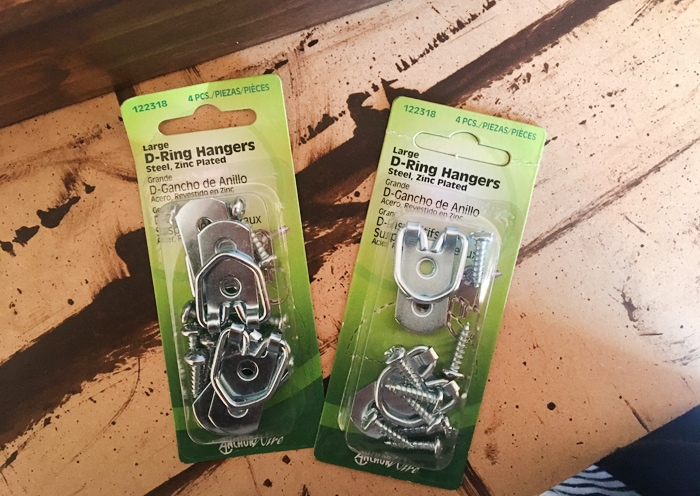
For the finishing touches we added some d-hooks to the back so we could hang these suckers!
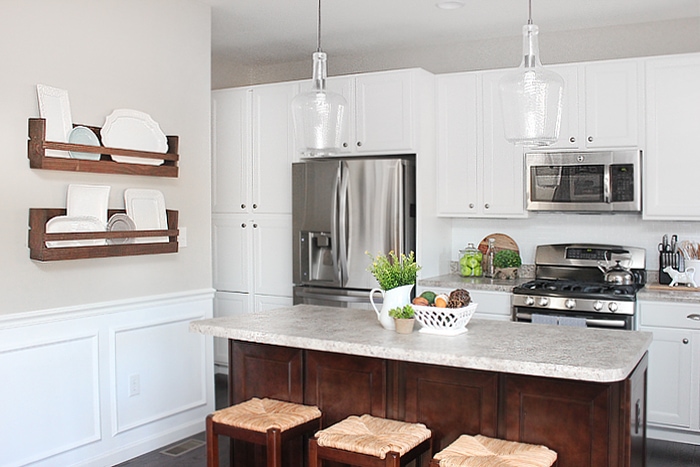
And here’s how it looks on the wall!

And in case you want a better diagram of the wood cuts…
I’m loving how this finished off our kitchen and provides storage for some of my serving pieces. We actually created a third DIY platter rack but I’m not quite sure I need it. Might end up giving it to one of my sister’s instead or finding another spot in our home… maybe add some hooks for a bathroom shelf?
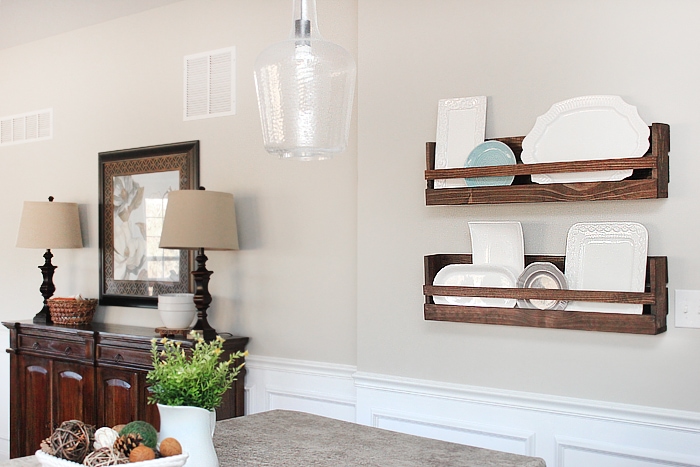
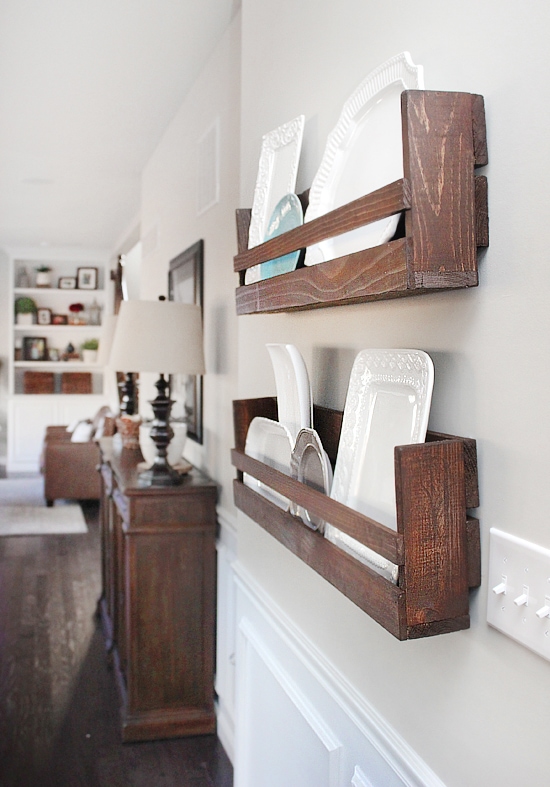
Now my kitchen is feeling complete with these new DIY platter racks
and building all 3 cost less than $30!
For more great home DIY projects check out Easy DIY Bookshelf Ledges

Cecilia says
Ooo! You’re right! They really finish off your kitchen. Love them! And hey, I get the taking a long time to do a project thing. Happens all the time to me, ha! Better late than never, I say! ????
howtonestforless says
Hahah! Apparently that’s my motto too 😉
Emma says
Such a simple thing but so effective!
howtonestforless says
Thanks Emma!
Heather says
I love them, and I love your kitchen. It’s the perfect blend of white and wood- my favorite combo!
howtonestforless says
Thanks! Me too 😉
Patty says
Absolutely just what was needed in that space! Have to love it when function and beauty work together!!!
howtonestforless says
Thanks Patty!
Cindy M says
Hi Erin! What color paint is on your kitchen walls? Beautiful!
howtonestforless says
Thank you! It’s Revere Pewter by Benjamin Moore!
Wendie says
Love this and could really use it. Now I’ve got to figure if I have a place for it! Thanks for sharing.
howtonestforless says
You’re welcome Wendie. Hope you’re doing well!