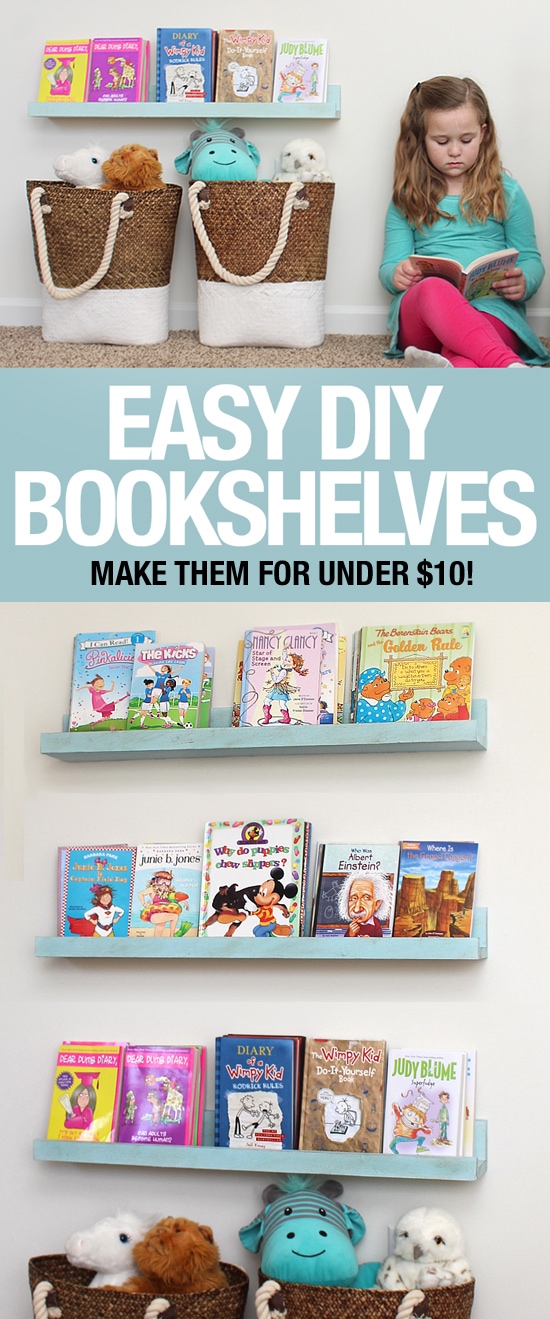
This tutorial will show you how to make easy DIY bookshelf ledges!
Make sure you follow me on Instagram and Pinterest for a sneak peek into my recent projects!
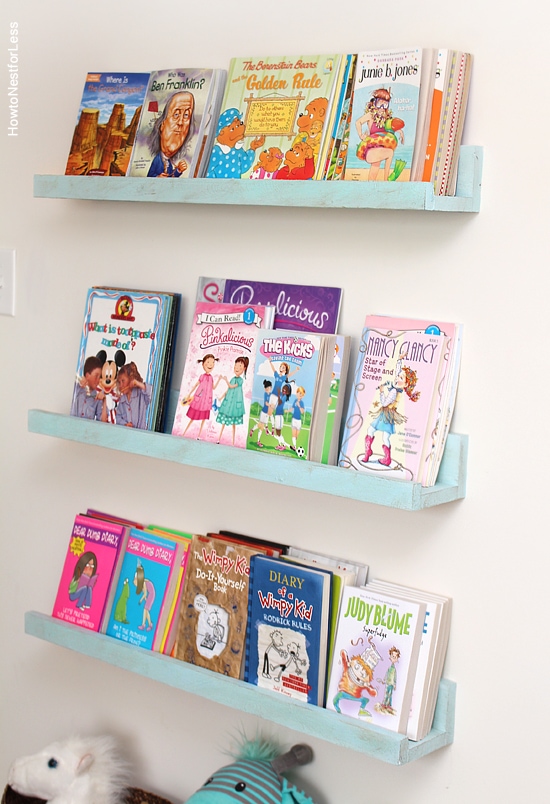
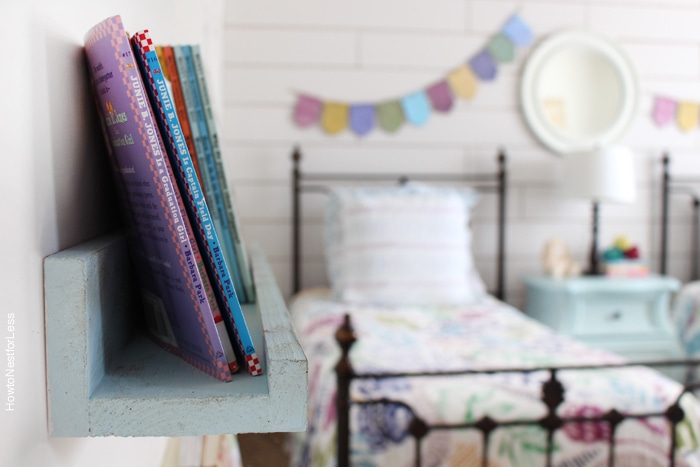
I think my favorite part of Ellie’s new bedroom is her new DIY bookshelf ledges. I actually got this idea from Ana White when she displayed a bunch of family photos on them, but for Ellie’s room I thought it would be a great place to display some of her book collection.
The best part? They’re super easy to make!
And cost me less than $10 for all 3.
WHAT YOU’LL NEED:
- 1×4 boards
- 1×2 boards
- 2 inch screws
- drill
- nail gun or 2 inch finish nails & hammer
- wood glue
- wood filler
- sandpaper
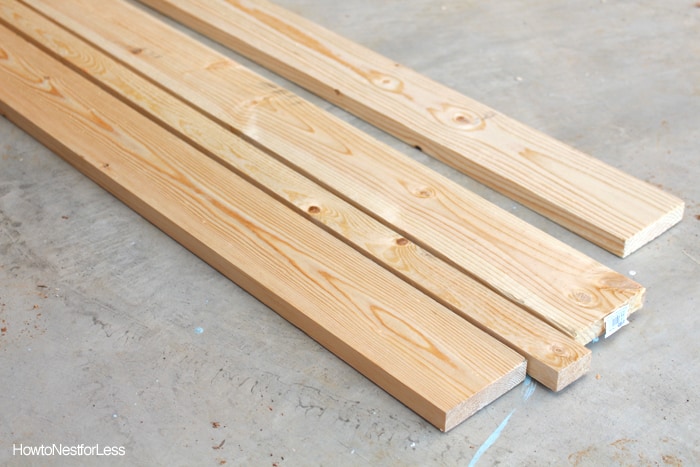
To start, you need to decide how long you want your bookshelf ledges to be. We opted for 2.5ft wide shelves.
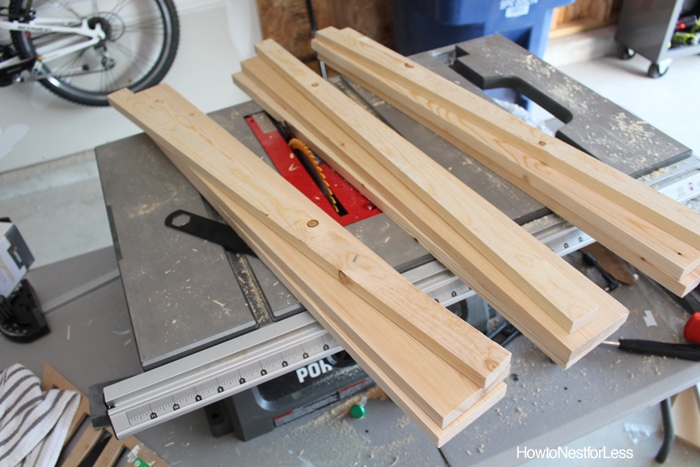
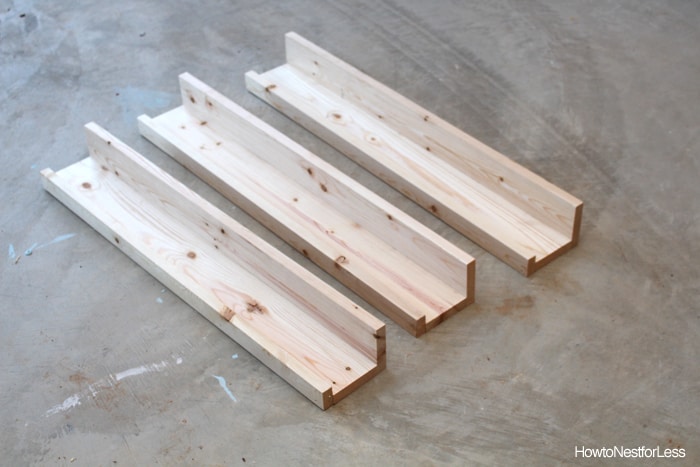
Then for each shelf you’ll need to cut the following in that exact length: (2) 1×4 boards and (1) 1×2 board for EACH shelf. We made 3 shelves total so you can see the boards that we cut below.
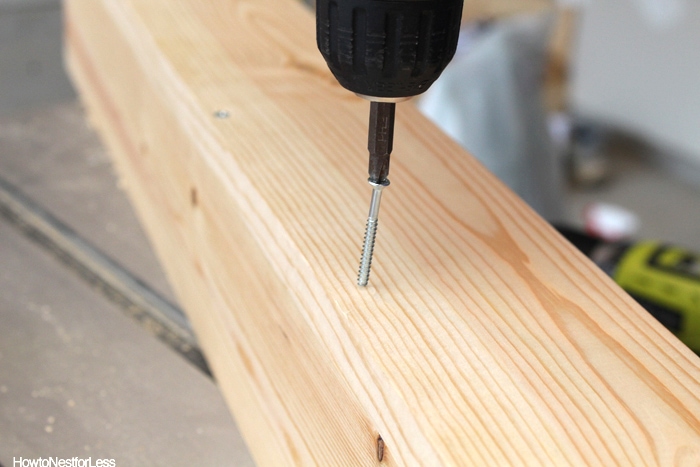
Next you’ll want to pre-drill the holes lining up your two 1×4 boards in an L-shape.
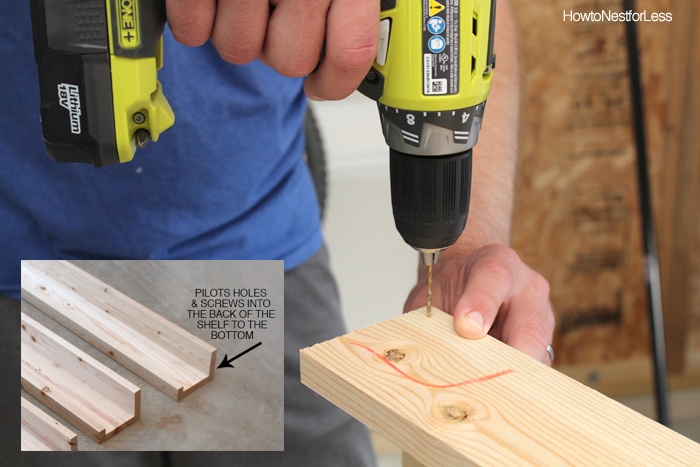
Then use a little wood glue and counter sink your screws into those holes.
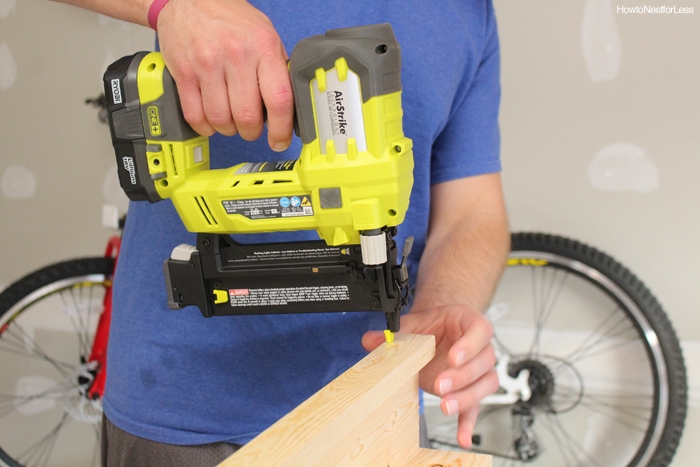
Next you will attach the front of the boards using wood glue and your nail gun (or just prefinishing nails and hammer).
Your wooden bookshelf ledges should look like this then…
all ready for sanding, then some paint or stain.
Use a stud finder to locate your studs and screw the bookshelf ledges directly into the studs for solid support. Make sure you use a level!

I had actually painted the shelves white but once they were up on the wall they looked a little bland. Then I added some lovely Amy Howard at Home paint, the same blue color I used on Ellie’s nightstand and 5 drawer chest.
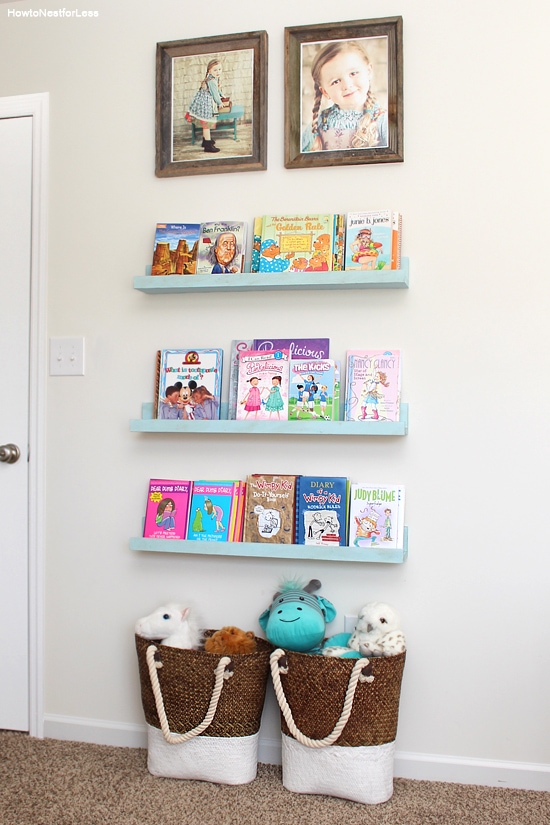
I finished them off with a little clear and dark wax. My favorite!
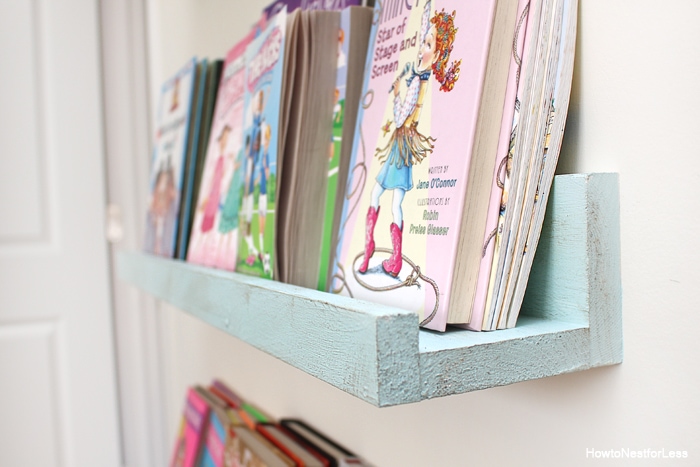
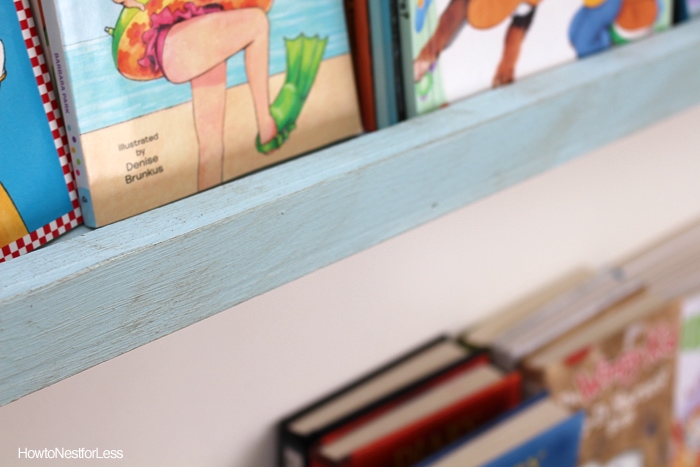
These bookshelf ledges are nice and deep so I can stack a couple books together. The best part? These ledges only cost less than $10 to make!

Jessica says
I love this tutorial! I love these bookshelves and have been trying to find some to our exact measurements, but we could just make them instead! Thanks for the inspiration!!
Jessy @ The Life Jolie says
I love this tutorial- I can’t wait to make some! Pinned!
Kristi says
I saw these earlier when your daughter’s room reveal caught my eye and now looking at the tutorial!! These would be perfect for our basement play area!! Thanks for the tutorial..as one married to a not as handy husband, I must get up the courage to start making these things myself. Maybe these would be a good start as they don’t have a big investment up front.. 🙂
howtonestforless says
I promise, super easy!! Next week I’m showing a different version I’m in the process of making for my nephew… cloud shaped bookshelf ledges. Once you get a hang of the first one, any variance is easy to follow! Good luck to you 😉
Morgan @ Morgan Manages Mommyhood says
LOVE this! We have a few of those Ikea spice racks that I hung and made into book shelves, but they’re too small now. I can’t wait to force my hubs to make me these!!
Jeanne Grunert says
Very professional-looking bookshelves. These could easily be adapted to many styles and locations like an office, retail store, living room, sunroom, playroom. Great ideas! Visiting from the #HomeMattersParty
howtonestforless says
Thanks so much Jeanne!