The last week of August is totally a legit time to bring up the Fall decorations from the basement, right? I know it’s 105 degrees outside but I just can’t help myself.
Well while digging through the basement boxes I noticed I needed a new wreath for our front door (I somehow lost our old one in the move). So here’s my first Fall craft, just in time for Labor Day weekend HA!
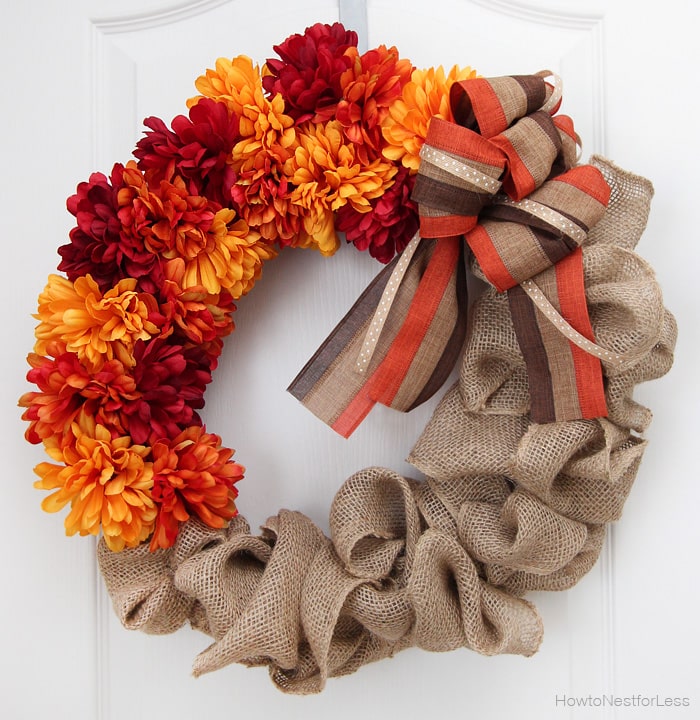 This wreath was SUPER EASY to make. Trust me.
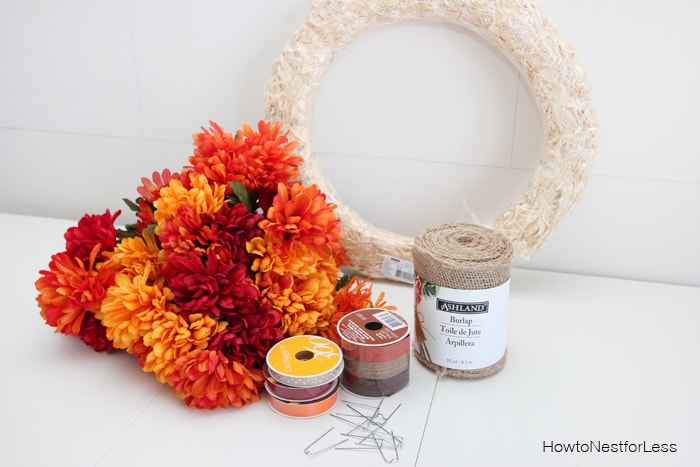
- Fake flowers
- Straw wreath still in the plastic
- Greenery pins
- Roll of burlap
- Fall ribbon
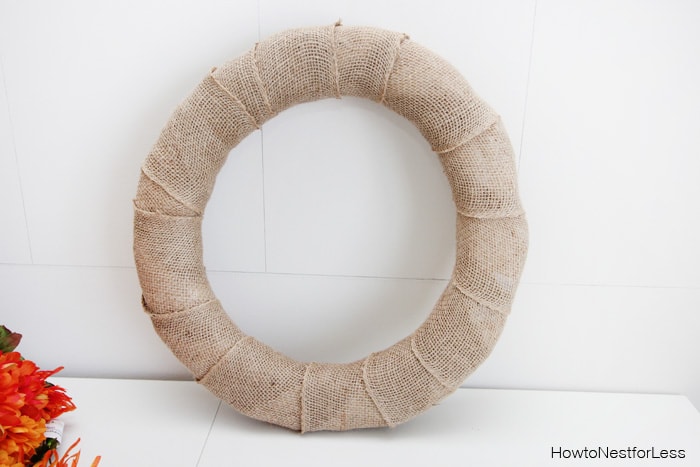
 First thing I did was cover the straw wreath that was still in the plastic with a quick layer of burlap. I used greenery pins to keep in place.
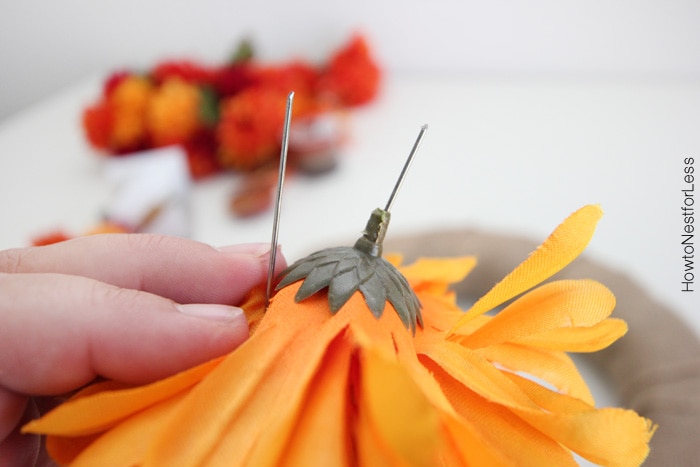
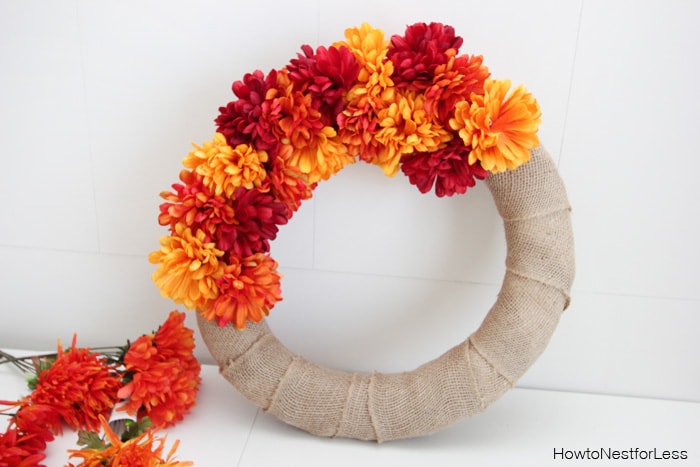
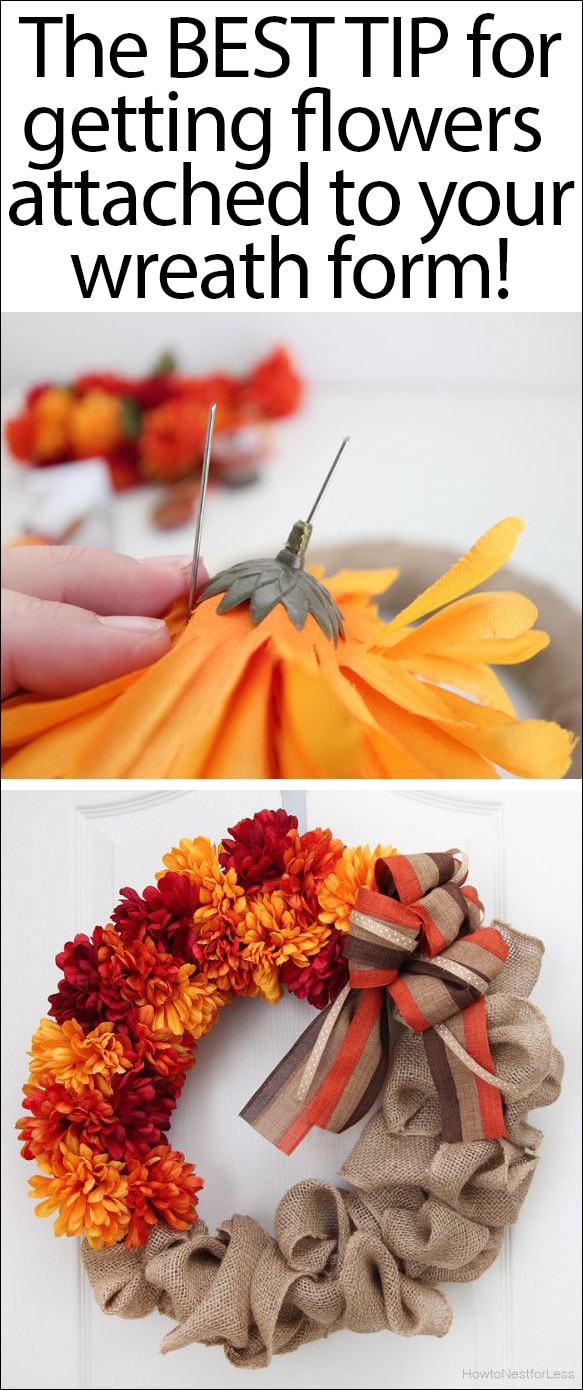
 Next come the cheap fake flowers. And here one of my secrets in making flowered wreaths… Separate the flowers from the stems. Then you then have the hole where the stem once fit inside the flower. Stick one side of a greenery pin through the flower hole and attach to the wreath. So much better than trying to hot glue!
 And in no time your wreath will look like this!
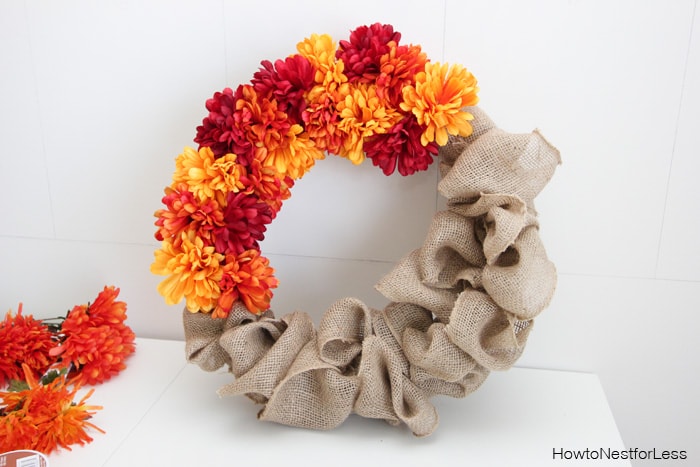
 Next I added the burlap. For this part I did not cut pieces; it’s just one long stream from the roll. I just twisted and bunched, then pinned in place every so often. You really can’t mess this part up, I promise. Just stand back every minute or so to check your work.
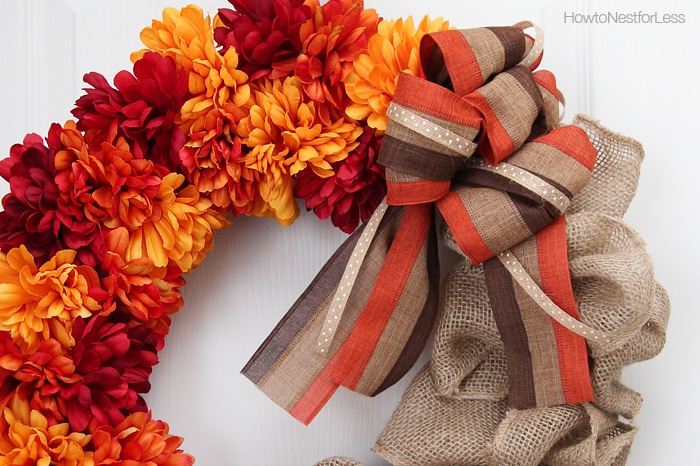
 The last thing I did was make a huge bow out of ribbon. I’m not going to give you instructions on this since I’m not an expert, but I do find that mixing thick wire ribbon and a piece of thin ribbon together look pretty fancy.
 And that’s it!
I bet this entire wreath took me less than 30 minutes.
Now it’s time to start working on adding some Fall bling to my hearth room, then my front porch. LOTS of Fall projects coming down the pike! This might be the most wonderful time of the year in my book!
Also, I’m visiting Chelsea today over at Two Twenty One for her mom series.
Head over there now for some fun Q&A!

Melissa says
LOVE, LOVE, LOVE that tip about the pins and the flower. I love wreaths on my door all year, so that little tip will be so helpful any time of the year!
howtonestforless says
Thanks Melissa!
Kim says
My favorite things….quick and inexpensive. I wonder how much you spent for the supplies altogether?
howtonestforless says
Burlap roll $3.50 from Walmart. Straw wreath form $5 from Michael’s (on sale from $8). Flowers from Dollar General (about $5 total). Ribbon I think around $4 from Michael’s. And greenery pins I buy in bulk!
Danielle says
Do you find greenery pins at the Michaels as well?
howtonestforless says
Yes! Near the wreath holders.
Brandi Simmons says
This wreath was so easy and fun to make. If you don’t know how to make a bow ask someone at Michael’s or watch YouTube video. It only took me two hours while watching the Voice on my DVR. I used the burlap with the geo-mesh combined for a little more flare. Thanks again for sharing this easy door project. I can’t wait for the neighbors to ask where I bought it from.
howtonestforless says
Awesome Brandi! And thanks so much for the tip!!
Jamie says
this is an amazing wreath! Do u happen to remember approximately how many flowers you used? The nearest dollar store/ micheals is a two hour drive I wanted to make sure I had enough.
Thanks
howtonestforless says
I think I used about 4-5 bunches. It will depend on the size of the flowers you use though. The fuller the flower, the better the coverage. Good luck!
Allison says
Hi there!
I am generally not a wreath person, but this is lovely!
And you made it look so easy!
howtonestforless says
Thank you!
Cosy says
Beautiful wreath! Thanks for showing how to use pins. I have always hot glued but since I moved & my front door faces west, it’s been a disaster. My wreaths melt, particularly this time of the year. I thought I’d have to give up on wreaths but yay! now I’ll just pin them. Thank You So Much!
howtonestforless says
You’re welcome 😉
edith says
Love this wreath, and what a great tip for the flowers. Do these (or any) flowers hold up in full sun without fading? Thanks!
howtonestforless says
I use cheap flower so they always seem to fade over time. With the pinning in place method though they’re VERY easy to replace years down the road!
edith says
thanks! Gonna go for it!
Theresa @DearCreatives says
I love how this wreath turned out. Pinned for later.
Katherines Corner says
Wonderful tip, your wreath is lovely. I invite you to share at my Autumn Wreath Roundup
Kate Auclair says
So pretty!!!
Pinned & Tweeted!
Thanks for sharing at the Merry Monday link party!
We hope you can join us next week!
Kate | TheOrganizedDream.com
Michelle says
Super fun!
I love the burlap!
Thanks for sharing!
Michelle
Anna says
This is such a great idea! I will be sharing! You have great ideas and I enjoy seeing them! Thank you!
Gina says
Love this beautiful wreath
Jane says
What did you use to hang it? Is there anything on the back of it?
carmen says
Depending on the hook, you don’t have to put anything on the back to hang it because you can let it hang on the wreath itself or even stick the hook in the wreath form itself.