• Home
  • Projects
    • Room Makeovers
    • DIY Home Improvements
    • Decorating Ideas
    • Organization
    • Furniture Makeovers
    • Crafts
  • Holidays
    • Winter
    • Spring
    • Summer
    • Fall
  • Printables
  • Recipes

How to Nest for Less™

DIY Halloween Decorative Plate

in Crafts, Holidays on

Sharing is caring!

674 shares
  • Share
  • Tweet

This DIY Halloween decorative plate is the perfect addition to your festive decor!

White plate with trick or treat in a black pumpkin on it, on a plate stand in front of pumpkins.

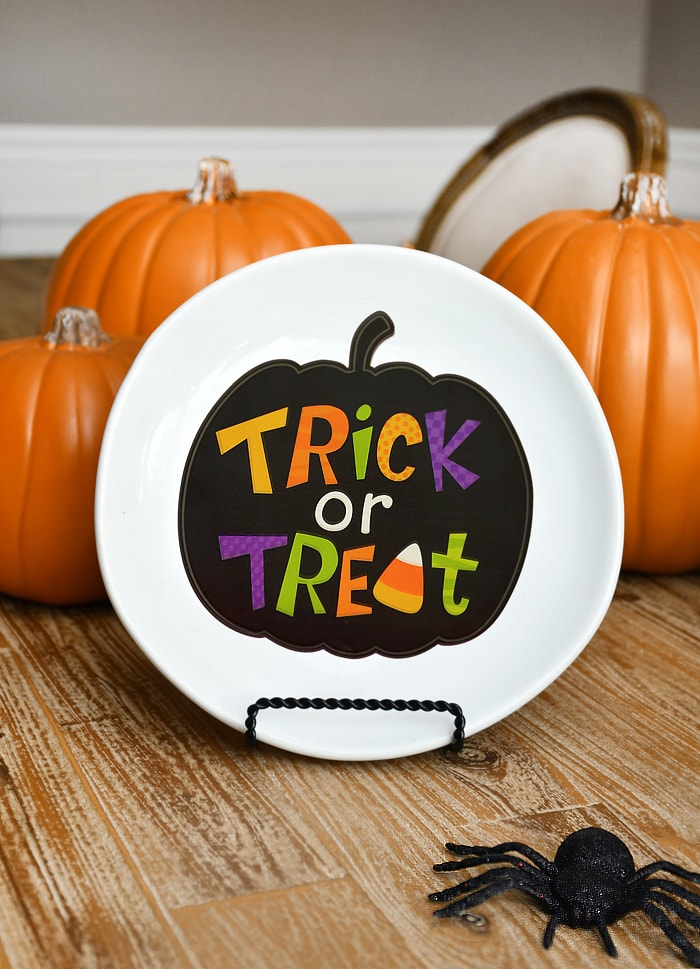
A couple weeks ago I showed you guys the Fall decorative plate I created for under $2. Yep, UNDER $2 using a white ceramic plate I found on clearance and some clear sticker paper! Well since I had some leftover sticker paper (and I ran back to Hobby Lobby to grab some more plates!), I decided do one of these babies for each season. So today I’m sharing with you guys my creative Halloween decorative plate!

The Pumpkin Tutorial

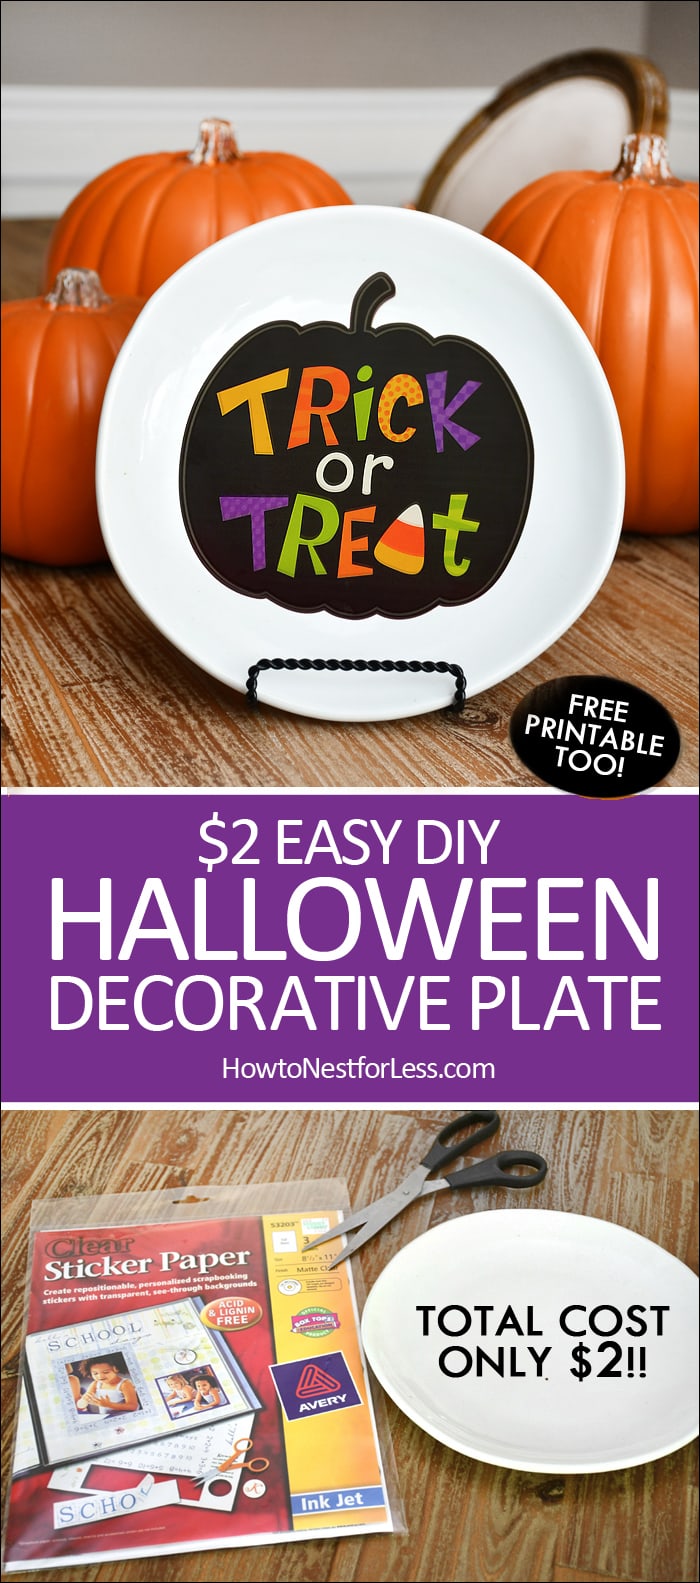
All you need for this project is a cheap white plate, clear sticker paper, an ink computer printer, and some scissors.

A white plate, stickers and scissors on a table.

So you can download the printable above for free. Just right click on the pumpkin image above to save the image to your desktop, or click HERE for the JPG to open in a new window. Again, I recommend saving to your desktop first then sizing the JPG in Microsoft Word to print (or something similar so you can get the perfect size to fit your plate).

A black pumpkin with the words trick or treat sticker.

Then just print it out on your normal inkjet printer at home on the clear sticker paper! I recommend setting your printer quality on HIGH so the black prints really dark and opaque. You don’t want to see little printer lines on it or the pumpkin turning gray due to light ink.

Cutting out the black trick or treat sticker.

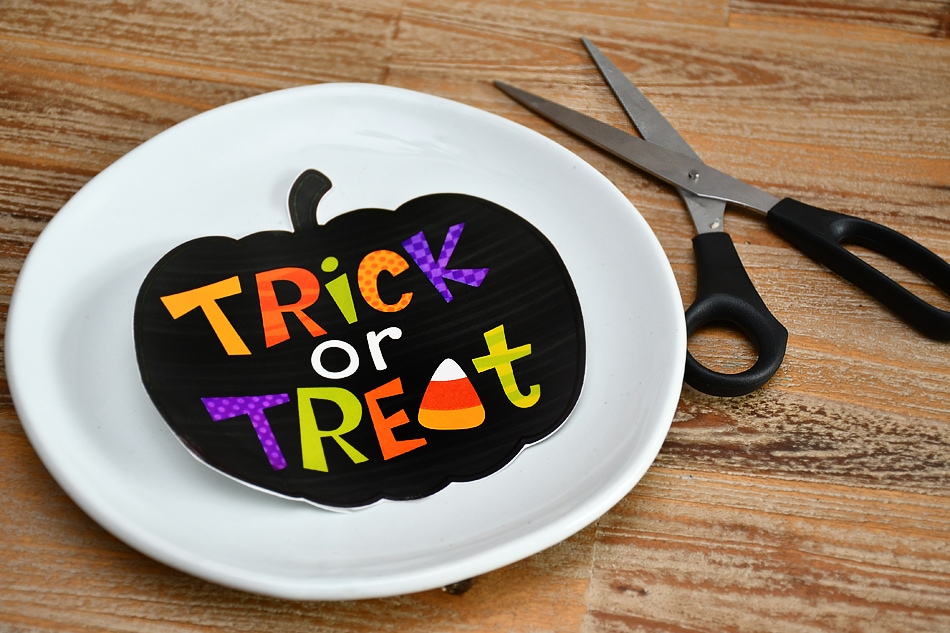
I always leave just a small outline of white when I trimming out my designs from the sticker paper. Then just peel off the backing and stick it to the plate. Make sure you smooth out all of the bubbles. Note: make sure the design is dry before you smooth out otherwise you’ll rub off the design from the paper!

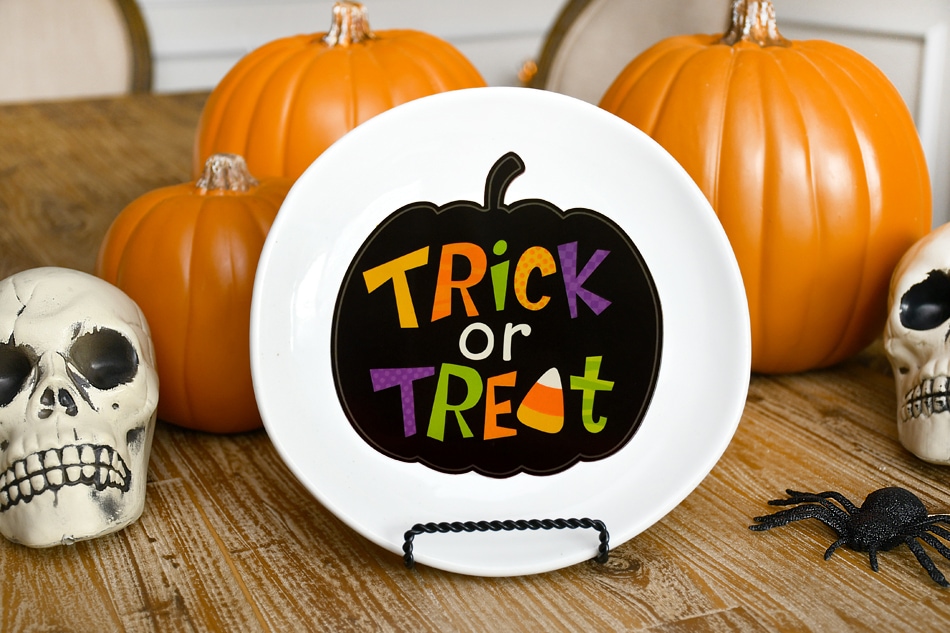
And there you have it!

I was able to fit two black pumpkins on one sheet of clear sticker paper so basically it cost me $1 for each pumpkin print and $1 for each plate from Hobby Lobby. Yep, $2 for this easy and adorable Halloween decorative plate.

Putting the sticker on the plate.

If you want to see more Halloween and fall decorating projects and ideas,
CLICK HERE!

The decorated Halloween plate on a stand.


popular-projects
« Trick or Treat Wood Sign: Halloween Front Porch Idea
DIY Halloween Candy Bowl »

Comments

  1. Linda B says

    at

    Thanks for the printable and instructions! I’m looking forward to your other holiday creations for the white plates.

    • howtonestforless says

      at

      Thanks Linda!

  2. Cindy says

    at

    Adorable plate and my kind of price! Hugs and blessings, Cindy

    • howtonestforless says

      at

      Thanks Cindy!

  3. Renee Jerry says

    at

    Love these plates! thank you!

  4. Danielle @ A Sprinkle of Joy says

    at

    Such a great idea! It turned out awesome. 🙂

    • howtonestforless says

      at

      Thank you!!

  • Facebook
  • Instagram
  • Pinterest
  • Twitter

We love to conquer DIY, home improvement projects, and room makeovers. We're not experts; we just try to design on a dime.

Follow us as we try to update our latest house one project at a time. Check out our archives for over 1,000 DIY and home-related projects. Enjoy! Read More…

ARCHIVES

Copyright Policy

All text and images on this site are copyright of How to Nest for Less, LLC. Unless otherwise noted, you may not use this content without written permission.

This blog accepts forms of cash advertising, sponsorship, paid insertions or other forms of compensation. The compensation received may influence the advertising content, topics or posts made in this blog. That content, advertising space or post may not always be identified as paid or sponsored content.

The owner(s) of this blog is compensated to provide opinion on products, services, websites and various other topics. Even though the owner(s) of this blog receives compensation for our posts or advertisements, we always give our honest opinions, findings, beliefs, or experiences on those topics or products. The views and opinions expressed on this blog are purely the bloggers’ own. Any product claim, statistic, quote or other representation about a product or service should be verified with the manufacturer, provider or party in question.

How to Nest for Less is a participant in the Amazon Services LLC Associates Program, an affiliate advertising program designed to provide a means for sites to earn advertising fees by advertising and linking to amazon.com.

Privacy

Copyright © 2025 · glam theme by Restored 316

Copyright © 2025 · Glam Theme on Genesis Framework · WordPress · Log in

674 shares