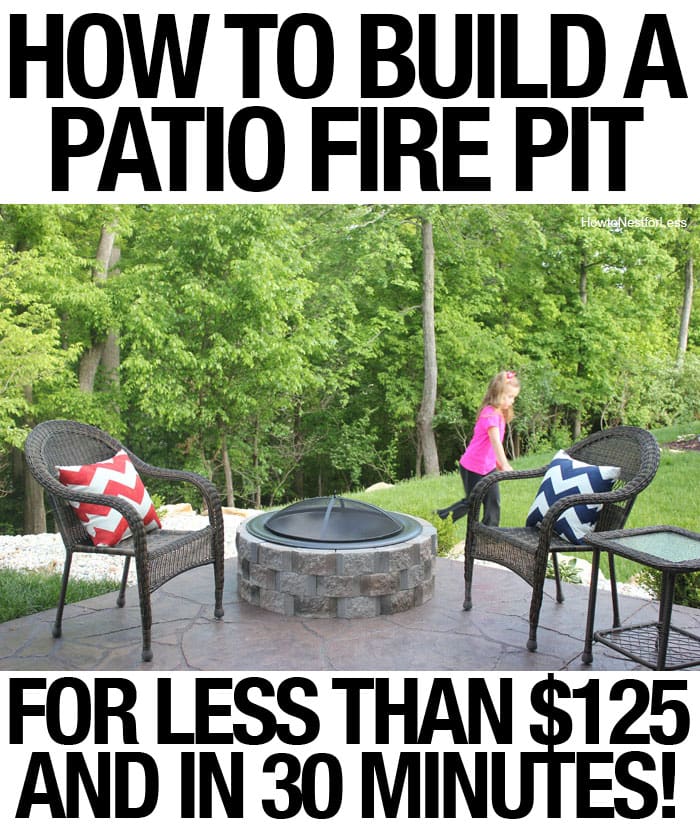
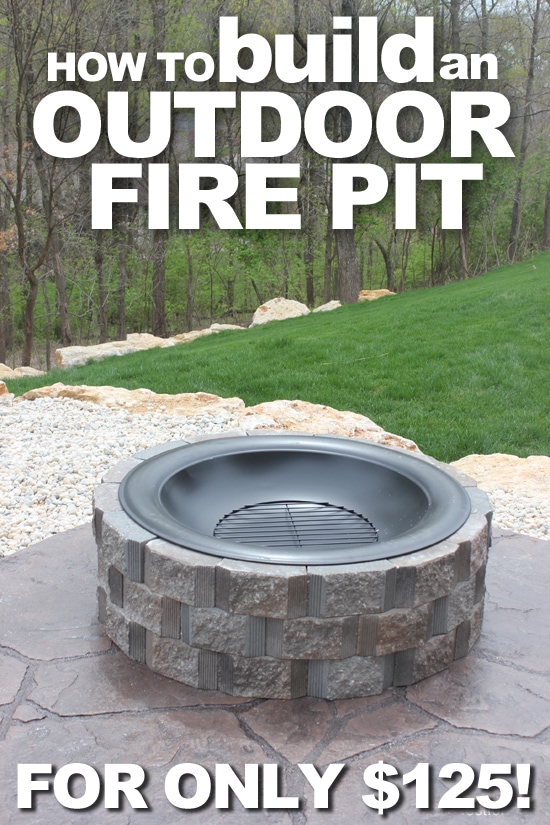
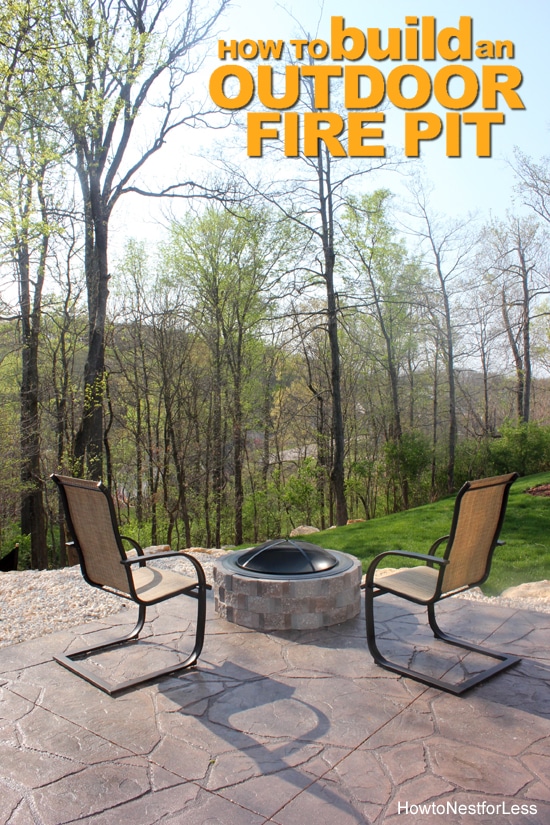
How to build a DIY fire pit in less than an hour!
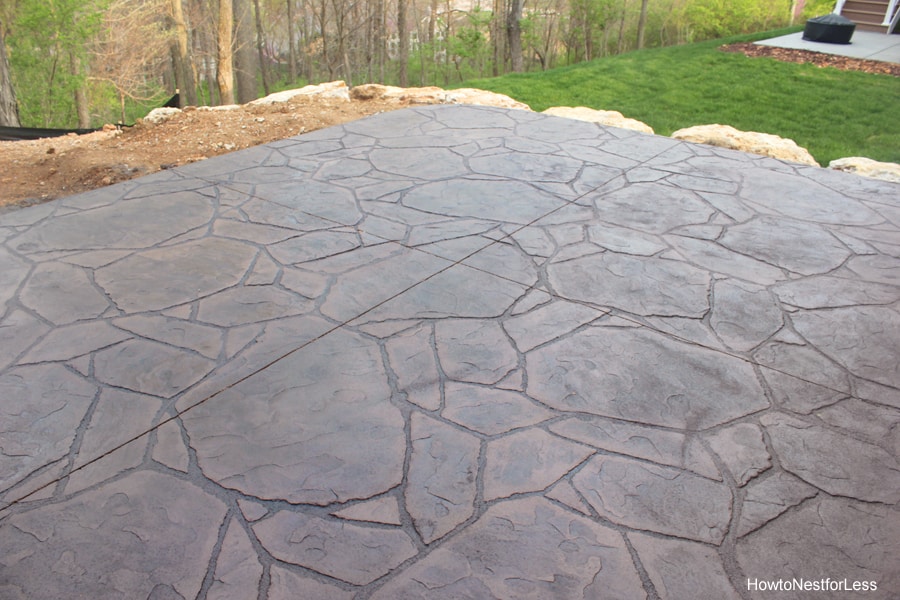
So we finally got our stamped concrete patio finished this past Friday. Can I just say… I’m in love! I really wanted a DIY fire pit but wasn’t quite sure if we could really pull it off. Then, when we were at Home Depot this past week we noticed a little stone fire pit on display made from retaining wall blocks.
The best part? We could put it right on top of the patio and the fire pit rocks didn’t need to be glued down. I was sold. So here’s what you need to build a fire pit.
DIY Fire Pit Supplies
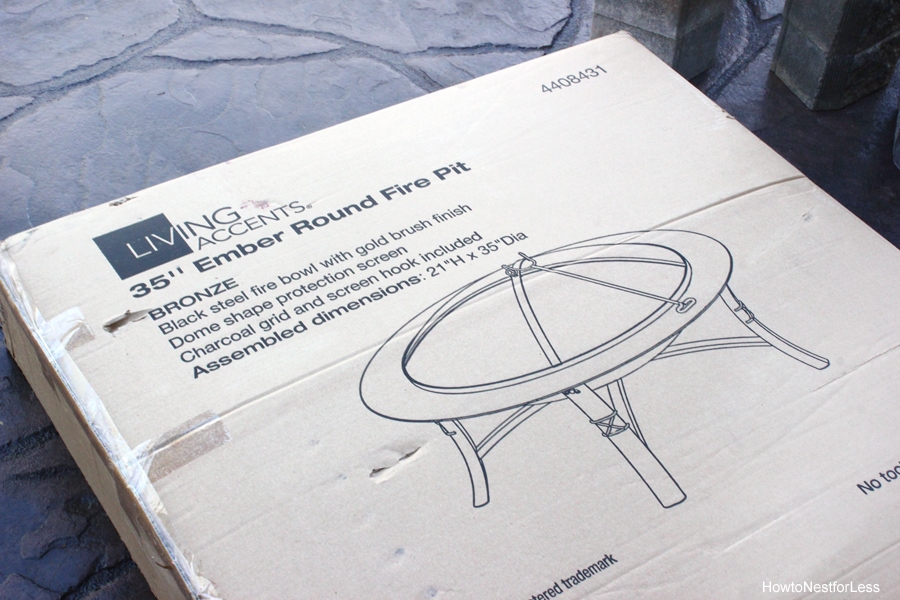
round fire pit … click here to purchase
retaining wall blocks … available at most home improvement stores
How to Make a DIY Fire Pit
To get started choose a 35 inch circular fire pit. You want to make sure the bowl you choose has the big lip around the edge. Do NOT assemble the fire pit kit when you get it home. Yeah, that’s the best part.
Build the Fire Pit Wall
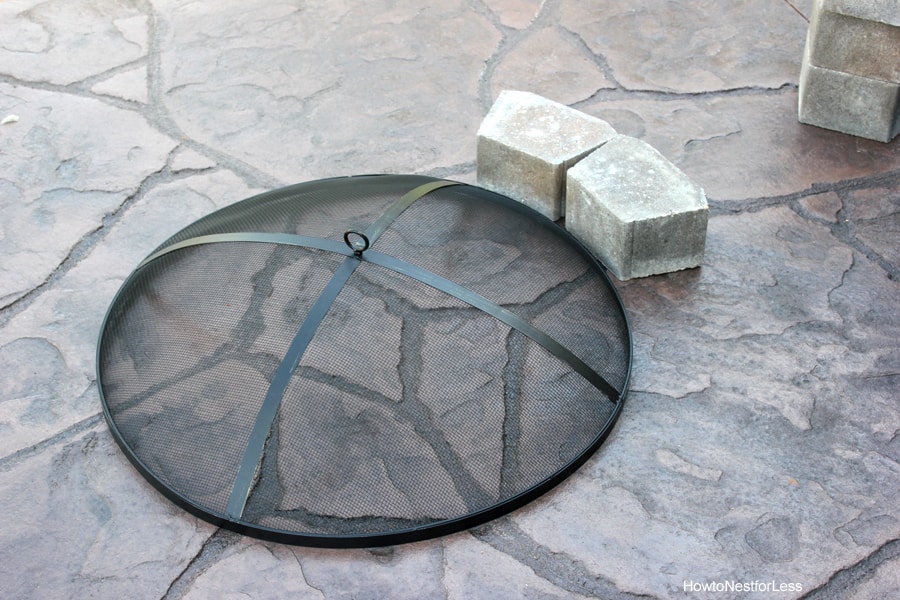
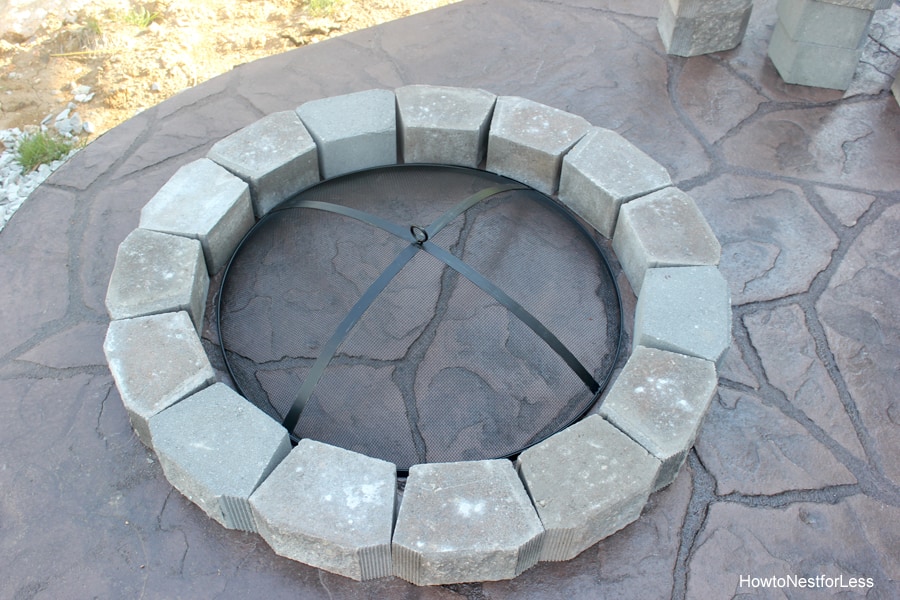
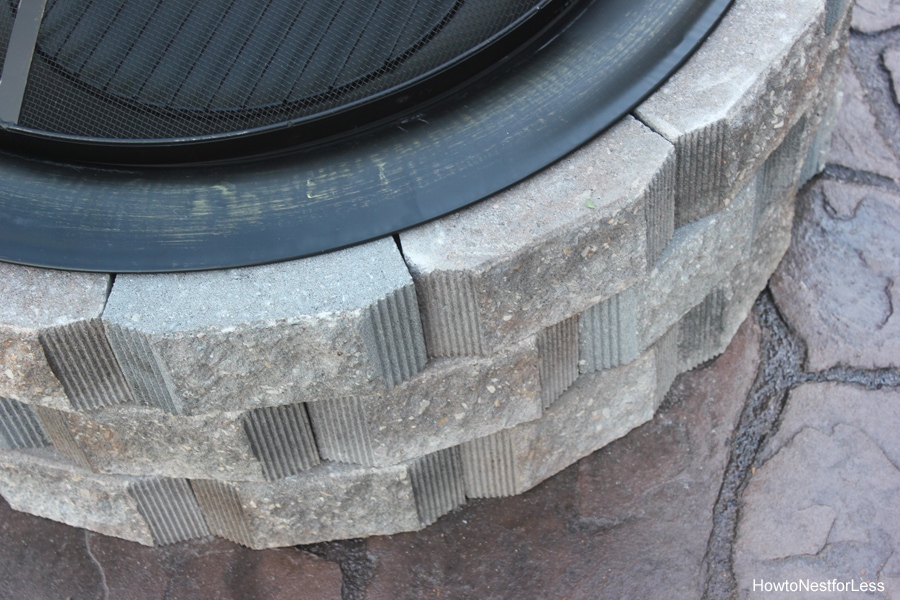
Next, take the fire pit cover out of the box and start laying your retaining wall blocks tightly around it. Make sure the outside edges of the stones are touching, but it’s ok if the interior blocks have a little gap. You can see this in the photo below.
Create the Fire Pit Base
For the 35 inch bowl we ended up with 15 blocks around it. We also chose a tan color rock and threw in a couple gray ones. Yeah, you can hardly tell in these pics but there’s 3 gray stones in the first ring.
Stagger the Second Layer of Blocks
Next remove the fire pit cover and start laying your second row of stones. Make sure you stagger from the first row. Again it’s ok that the backs of the rocks aren’t flush. You’ll see why in a minute…
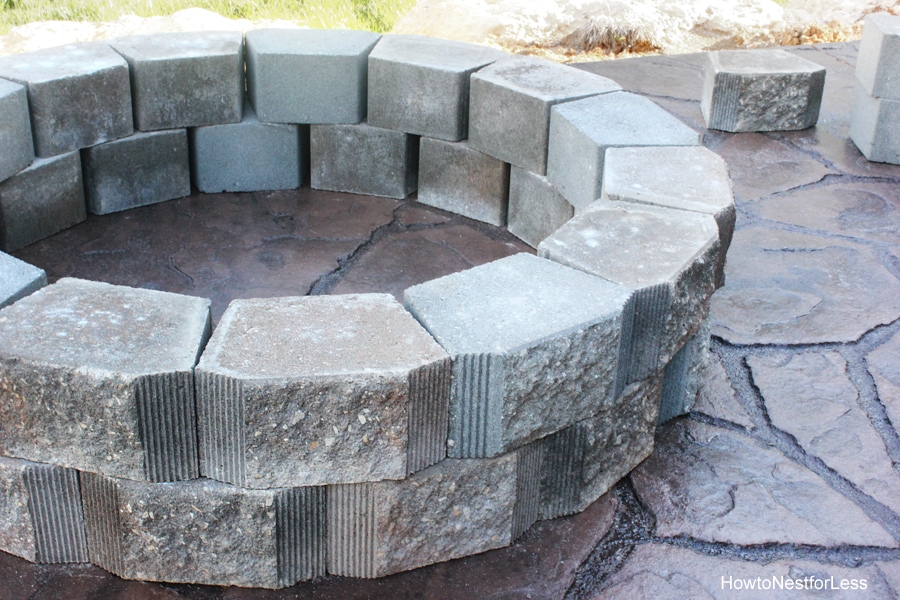
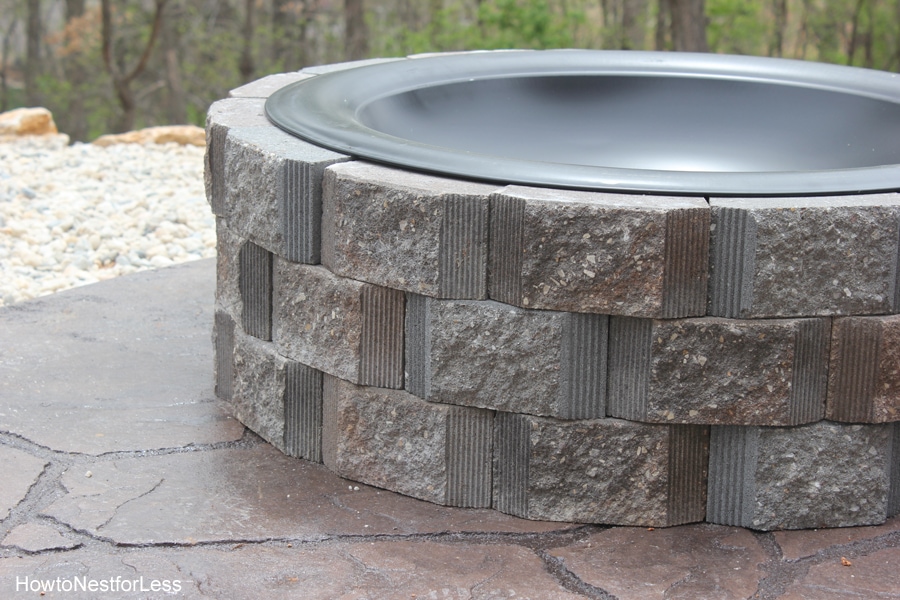
Third and Final Layer of Blocks
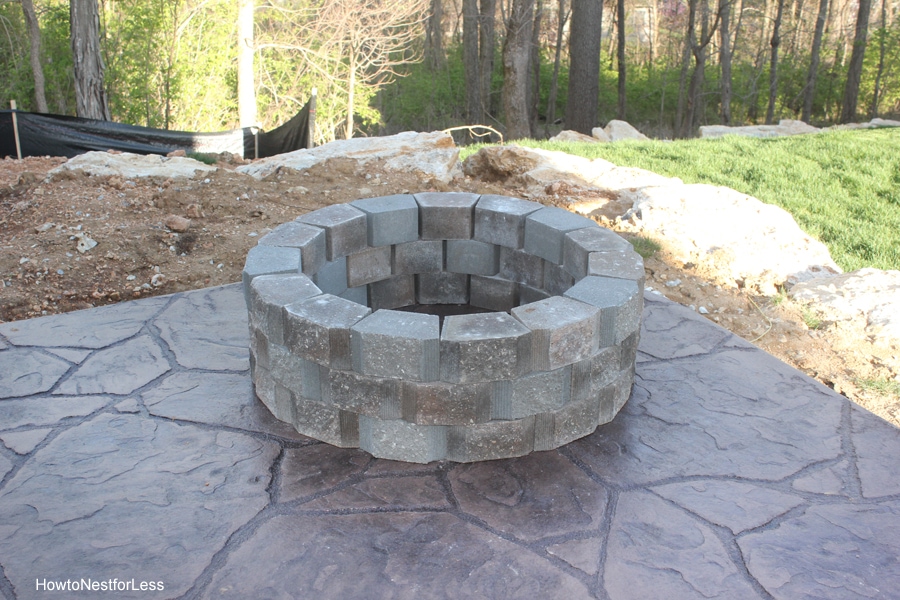
Now it’s time to add the third row of retaining wall stones, again staggering. You can kind of see the two subtle shades of stones a little better now. Totally not needed; just a little something to add character. Now you can make the DIY fire pit as high as you want, but we decided to only do three rows.
Prep the Fire Pit Bowl
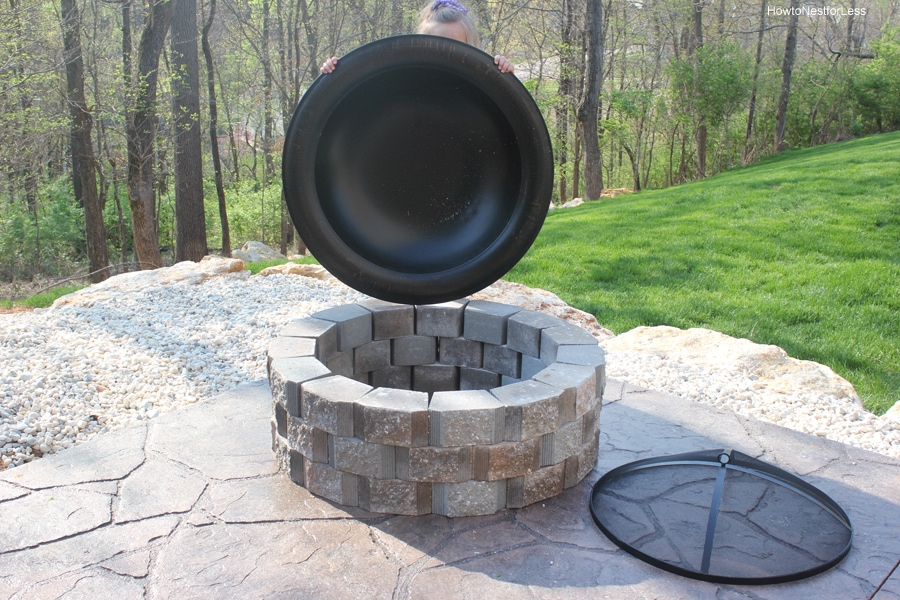
Now it’s time to work on the insert. Underneath the lip of the bowl were little metal brackets for where you would normally attach the legs. Well since we don’t need those, just grab a screwdriver and remove the brackets. This will help the bowl fit flush with your top layer of stones.

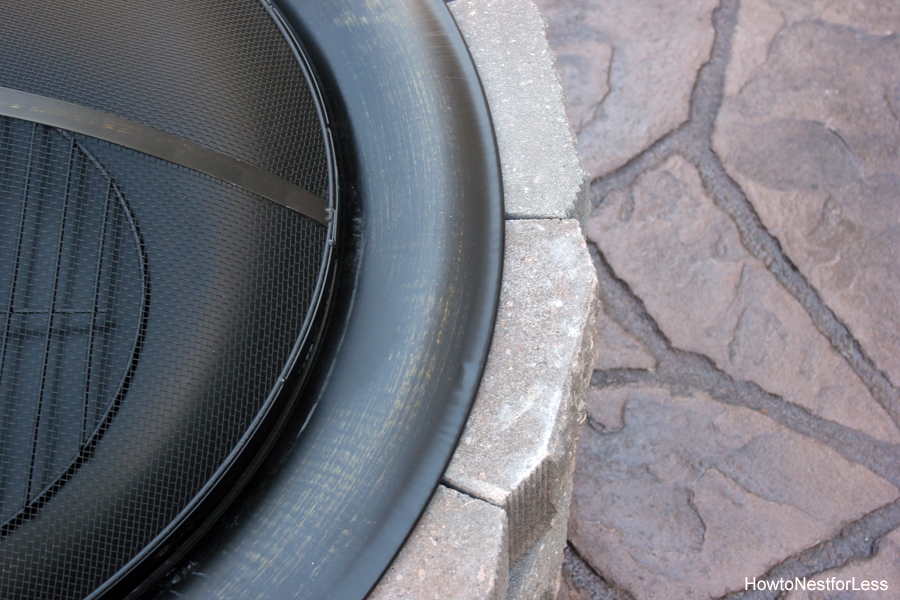
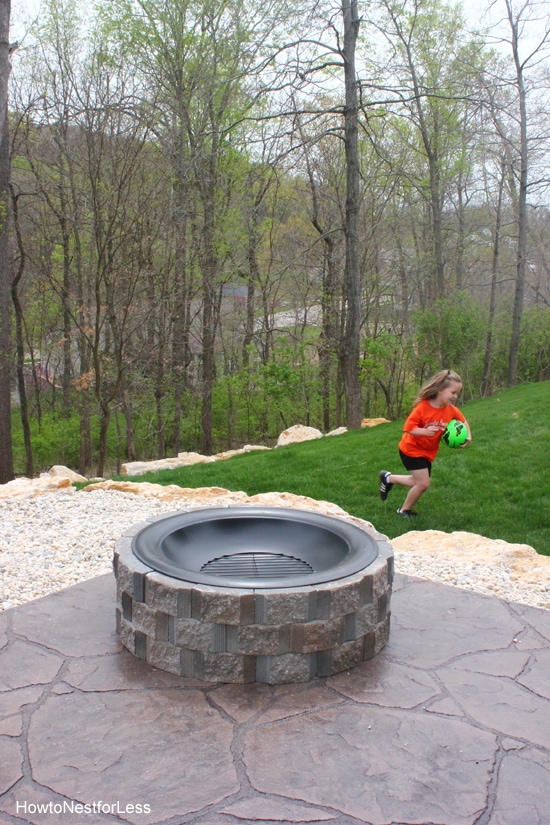
Insert the Bowl
Then just insert the fire pit bowl into the ring of stones.
And remember how I mentioned those retaining wall rocks not being flush in the middle of the ring? Well the fire pit lip covers most of that. Yep, problem solved.
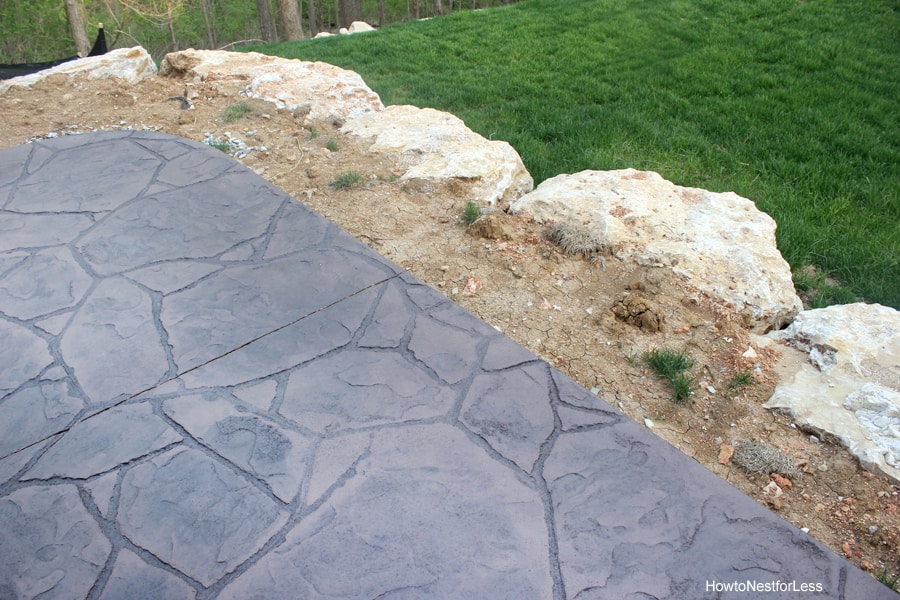
The last bit of the patio makeover was to fill in the gaps between our large natural retaining wall rocks and the patio edge.
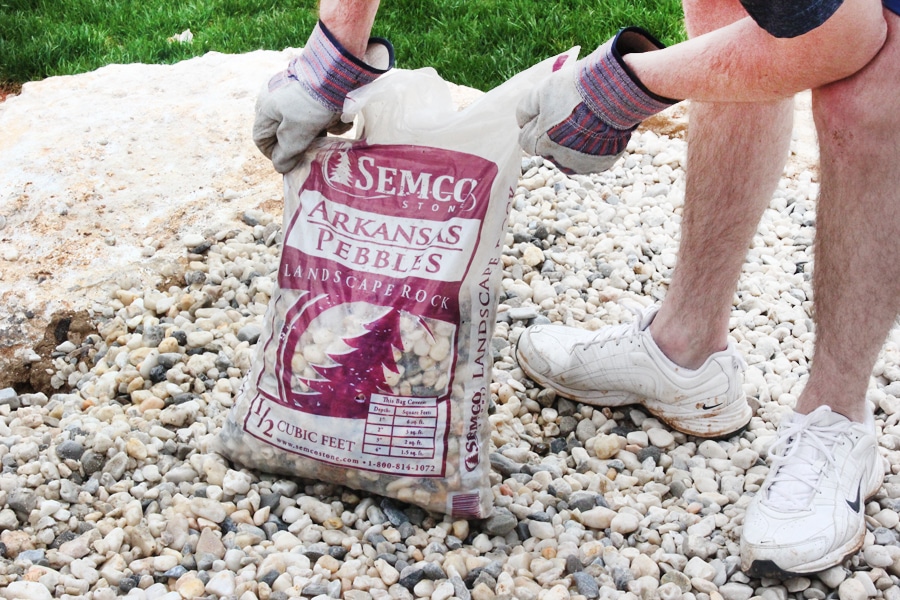
We grabbed a bunch of the Arkansas Pebbles river rocks to cover the space, but any landscape rocks just like these will do just fine.
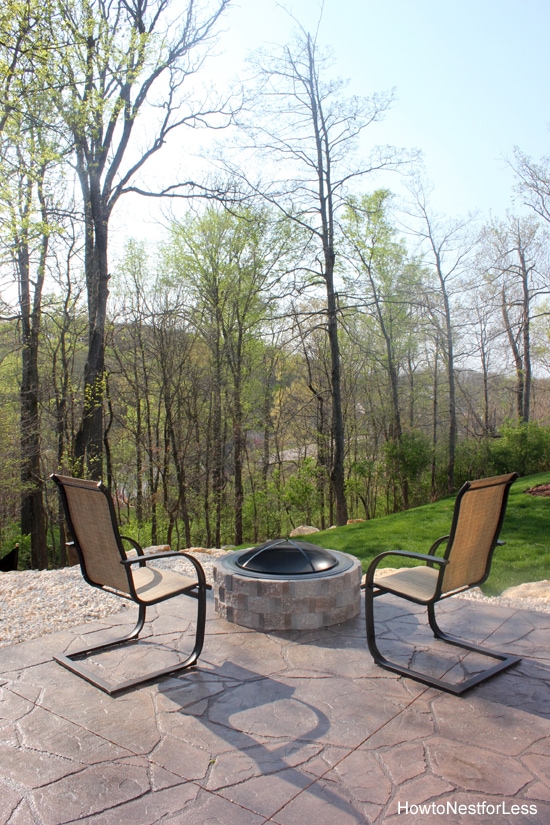
And then we sat back and admired our work. We added some spare patio chairs, but I’d look to make or buy some Adirondack chairs for the space.
I totally didn’t think we could do this for the price and the time it took. This DIY fire pit project cost us $125: $80 for the insert and $45 rocks (3 layers of 15 rocks) at $1 a piece. And the fire pit only took us 30 minutes to build. We got home from work at 6:15 on Friday and were done by 6:45. Then watching the Blues get whooped by the Blackhawks by 7pm.
The hardest part? Lugging the stones from our garage around the house to the fire pit area.
No joke.
We still have a lot to do back here… need our sod delivered, some plants, and some furniture for a finishing touch.
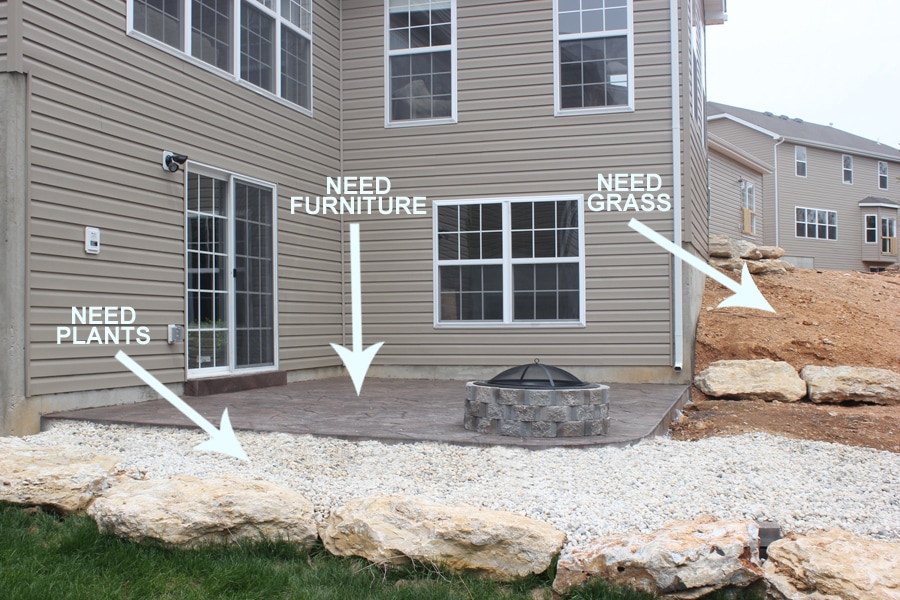
But at least for now we can enjoy our DIY project back here with friends and family.
I can’t wait for the leaves to grow to complete this gorgeous view.
So, who’s got the marshmallows and graham crackers?
I’m pretty sure I’ve got the chocolate. I always have chocolate.

Chelsea @ two twenty one says
Looks awesome! Whenever I finally come visit we’ll have to make s’mores.
howtonestforless says
Uh… yes please!
Roy Odom says
One concern…unless you plan on cleaning it after every use, the lye that is a result from the creation of ashes will be washed out by the rain and cause major problems for your concrete and stamped decoration. Just a suggestion – disassemble and move to a leveled area off the deck. Its a little more trouble but if you built a form out of 2x4s the size of the perimeter of the pit and just dump in some bags of Sacrete, rake it level and wet it down with a hose your pit (you don’t even have to throughly mix it) will always be level.
That said, this is a great idea. Thanks for sharing.
Megan says
What a pretty view you guys have back there!
howtonestforless says
Thanks Megan! Definitely the reason we picked the lot!
Annie says
Erin…..I love it!! I will pass on the marshmallows but maybe you would have a Hebrew National Hot dog for me? Actually, I will bring the hot dog stuff….LOL!
I meant to tell you…I made your Reeses Peanut Butter Gooey Butter Cake a few weeks ago….delicious!!
Enjoy!!
Annie
howtonestforless says
Hahah! Yeah… you bring the hotdogs, I’ll provide the chocolate! And so glad you loved the gooey butter cake. One of our family’s favorite!!
Jenni says
If we can get to work on our back yard, I’m planning a fire pit like this! Thanks for the details!
howtonestforless says
You’re welcome Jenni. SO easy to do! We were seriously shocked!
Melvina Kirlew says
We are working on our back patio now and I wanted a fire pit. I like the fact that it looks like it was built in. I am gonna give a try. Thanks for the detailed info!
howtonestforless says
You’re welcome! And good luck with yours!
Linda @ it all started witlh paint says
I am in LOVE with this idea!!! I may just need to make one of my very own!
:)Linda
howtonestforless says
Thanks Linda! Now go get to work on one… 😉
Kelly @ The Lily Pad Cottage says
Love it, turned out so great and your backyard is beautiful!
howtonestforless says
Thank you so much Kelly! The view definitely sold us on the home!
michelle says
i am doing stamped concrete what colors did u use
howtonestforless says
Terra Cotta with Walnut release.
Jill says
Hi Erin… I have a question… Can you tell me the size of the blocks that you used. Are they 10 inch or 12 inch. And where did you get them? I have looked at Home Depot and I want to make sure I bring home the right size. The 10 inch ones are $0.99 and the 12 inch ones are $1.48. Thanks for your help!
howtonestforless says
We used the 10 inch blocks for 99¢ each. If you’re going to buy a fire pit bowl for this at the same time you buy the stones, I would ask them to take the wire cover out of the box so you can properly measure around with the blocks like I did. Otherwise just buy a couple extras! GOOD LUCK!!
Michelle d says
We made a fire pit very similar to this one a few years ago. We love it and use it often. I’d like to make a suggestion to anyone who makes one. When it rains, the bowl will fill with water. Unless you plan to empty it each time, drill a hole in the bottom for drainage. Otherwise it will rust quickly and will need to be replaced. We learned that the hard way.
howtonestforless says
SUPER SMART Michelle! It’s been raining like crazy this week here in STL so we’ve been emptying it each night. Great solution!
Jennifer says
Pretty cool!
But if there is no glue or anything to make it stick together, how stable is it?
Thanks!
howtonestforless says
Actually quite stable! The rocks are pretty heavy and the formation and insert help keep things in place. I really don’t have a lot of people bumping into though since it’s mostly filled with fire logs. If you want, you can always secure using outdoor Liquid Nails.
Virginia Fynes says
AMAZING!!! We totally need to do this, showing hubby RIGHT NOW! Thanks for the genius idea!
Digna D. says
Awesome! Thanks for posting this. We are getting a stamped concrete patio in a couple weeks and want to do a fire pit. This is perfect and looks so easy. Will bookmark for later.
howtonestforless says
Good luck to you! It’s seriously the easiest project ever 🙂
Jason Styron says
Awesome idea! Thank you!
How do you keep it from filling up with water when it rains?
howtonestforless says
We actually have a firepit cover that fits over it. I didn’t want the insert to rust.
Carl says
Great idea! So here’s my burning question: can you prop your feet up on the stones? Or do they shift with much force? I’d love something that also served as a footrest when not all fire-y hot.
howtonestforless says
Use it as a footrest every single night when we sit outside. Never had one problem with shifting! I do recommend a fire pit cover if it’s rainy in your neck of the woods. I feel like I used to empty my pit weekly before I invested in one.
Carl says
Fantastic. And yes, I agree 100% on the cover.
Snehal says
This is good idea . I have already pinned it, but I have one question..I am relatively new to all DIY projects..Where do u get those stones ?Any place to buy them ?
Thanks
Snehal
howtonestforless says
We purchased ours from Ace Hardware. You can get at any hardware store as well.
Melissa says
Very pretty. Has the fire affected the floor you have it on? We have a cement slab I want to put one on but 7 I am concerned of it heating up and cracking/destroying it.
howtonestforless says
It hasn’t damaged it yet! Everything seems to be fine underneath.
George says
Great Idea, Wen’t to my local ACE/Home Depot/Lows to day and could not find the stone that you’ve used on this Project. Maybe it’s discontinued?
howtonestforless says
It might be because it’s out of season. Maybe wait a couple weeks until their Spring shipment arrives?
nicole says
How perfect i am so going to attempt this tomorrow, We have the same fire pit. We moved into our home 7 months ago and working on the inside first. So much to do. Great idea thanks will link back to you!
Mary Denman says
We have a fire pit on legs like yours that is terribly wobbly! Now I know what to do!
Your project is the most reasonably priced fire pit I’ve seen….and simple!!
howtonestforless says
Glad you can use the idea!
Monica Marchant says
Do you feel like the bowl is deep enough to get a good warm fire going? And what do you do about rusting??
howtonestforless says
After 1 year we haven’t had any rusting, but I guess we could always replace the bowl down the line if needed! Also, you can use this idea for any size fire pit bowl, so if you prefer wider or deeper the design is easy to adjust!
Dave says
I’ve been searching all over for the blocks! Where did you buy them from? Every retaining wall block I’ve seen has a lip on the bottom for stacking purposes. Yours look like it doesn’t come with the lip.
howtonestforless says
We got ours from our local Ace Hardware. And you are correct, no lip!
wayne morello says
I looked at the reviews .They were not so good. How has the metal bowl held up? Did you purchase the cover from ACE too? And what size is it?
Thanks,
wayne
howtonestforless says
We did not purchase a cover from Ace and it seemed to hold up well in the elements. We moved from that house last Spring so I can’t give you a full update. The size was 35 inch round for the fire pit insert.
Tim says
Great idea but this would be only a couple of uses fire pit and the metal pit itself would rust/burn out and the heat would cause the bricks to crack quickly. I am a metal worker and build pits and you should use 11 gauge steel and the least, great idea though just the quality would not last.
howtonestforless says
It has worked great for us thus far with no issues. I guess if a brick did break it’s easy to replace since nothing is glued down. We’ll keep an eye on it though! Thanks for the tip.
Bridget says
Can you do this on a wooden deck if you build it a little higher or would the heat still damage the deck?
howtonestforless says
I wouldn’t trust it on a deck (just my opinion).
T. grant says
Don’t put it on a deck. You could burn your house down.
Betsey Dirkse says
What a great idea! We are building this tomorrow! We decided to go with a cast iron bowl I found on amazon for $70 just to see if it will last longer. Where did you get a fire pit cover? We are near Chicago and have quite the weather and will likely need the cover. Thanks for this great idea!
howtonestforless says
The cover came with the pit!
Ed says
Looks like you got a stamped concrete patio. Will it be damage due to heat from the pit? Thanks.
howtonestforless says
We luckily had no issues with the color fading or any chemical reaction issues.
Dawn says
I love this we are planning on making the pit tomorrow. I have a question regarding your stamped patio where did you get this from? You stated that you didn’t have to do anything special to lay it down, and it was simple trying to get my husband to do this… I see why you love it.. very lovely indeed.
howtonestforless says
We had the stamped patio professionally done. I was saying we didn’t have to do anything special to lay down the patio firepit stones. Hope that helps!
Kelly S. says
Did the bricks have to be fire “safe”? I wanted to build something similiar a while back but heard you needed certain heat resistant stones for it. Also I can’t find any without the lip also. Guess I will keep looking. Looks awesome!
howtonestforless says
We just used plain landscape stones for this; no specialty heat resistant stones! Try Ace Hardware, Lowes or Home Depot!
T. grant says
They have them at Home Depot. Stones without the lip.
Tilesbay says
What a pretty view you guys have back there!
Keep it up. 🙂
DARRYL DURAN says
I love the look of this home project. I’ve been considering a fire pit for winter. I will be placing the pit over an older cement slab. I hope it doesn’t give me a problem. I imagine, I could add some type of insert at the bottom to protect the slab.
Looking forward to starting this project. It’s 2019 and I’m sure I can find the materials I need.
Thanks again for a great money saving and great looking fire pit.
Darryl – Palm Springs, CA
Brett says
You do know concrete does not like heat
Samuel Adler says
First I though 30 mins would be an insane idea.
After cheking this over, I am confident that I can make it in 20 mins. 😀
Brilliant DIY Idea.
The stones are cool. Best view in the Patio.
Concrete Patio Lover says
Love that so much! Especially that gorgeous stamped concrete patio! Super cool and also kinda fancy!! : ) Good work!
Joe says
That’s got to be the best way to build a firepit on a budget. I should have done this years ago.
Thanks for the great idea!