As you all know, I’m trying to “nest for less” by revamping my house on a budget. Last week I got a new kitchen stone backsplash for around $350 in materials and I’m in LOVE.
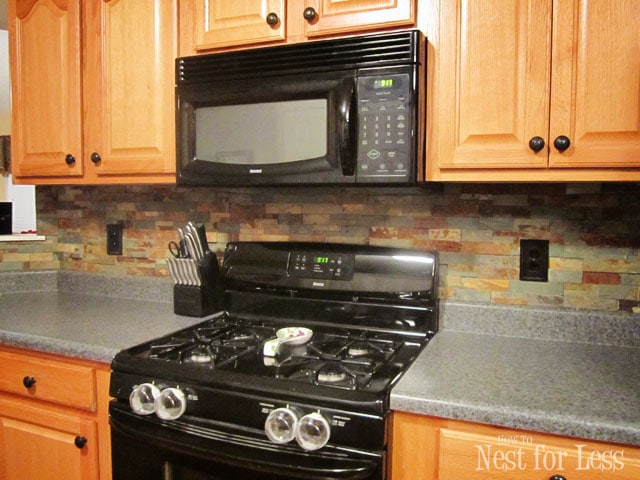 Now to continue with my kitchen transformation we’ve added crown molding to the top of the cabinets. We just had plain oak builder grade cabinets and thought they could use a little sprucing. So here’s the before…
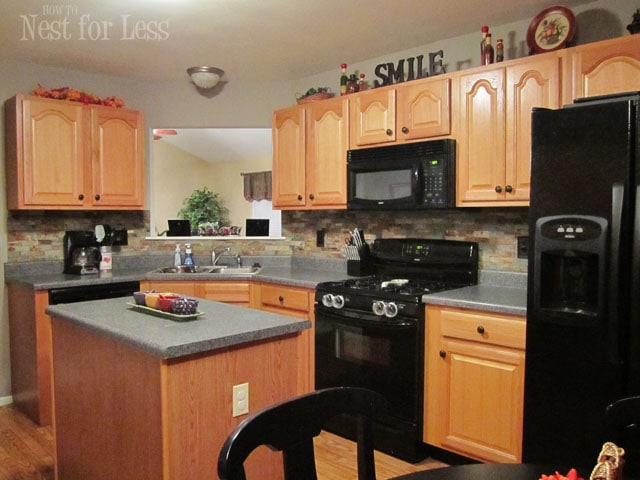 We were lucky to find faux oak crown molding from Lowe’s for a little over $10 for an 8ft section…and it matched our cabinets PERFECTLY!!
I had my neighbor install the crown molding since that’s a little outta my range. So here’s some after shots!
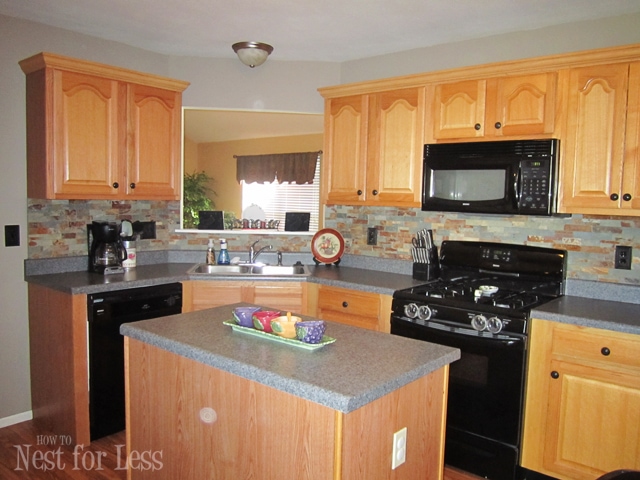
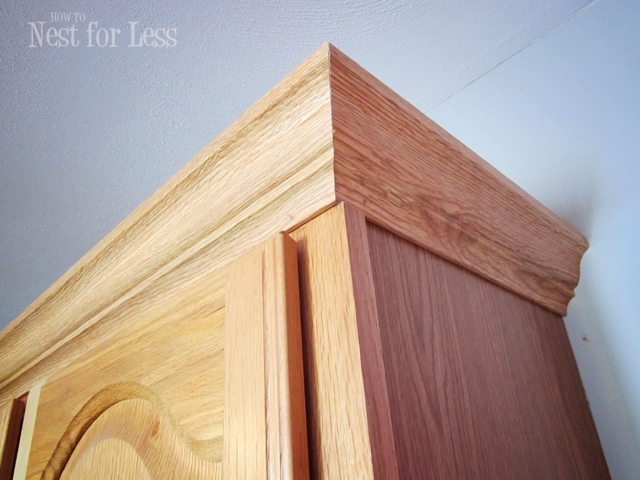
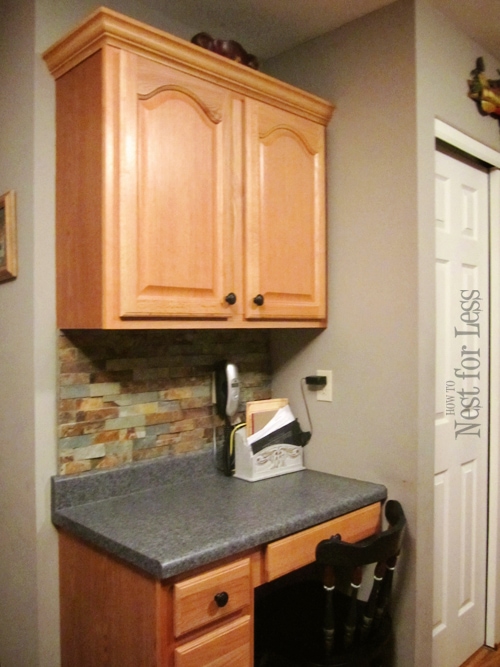
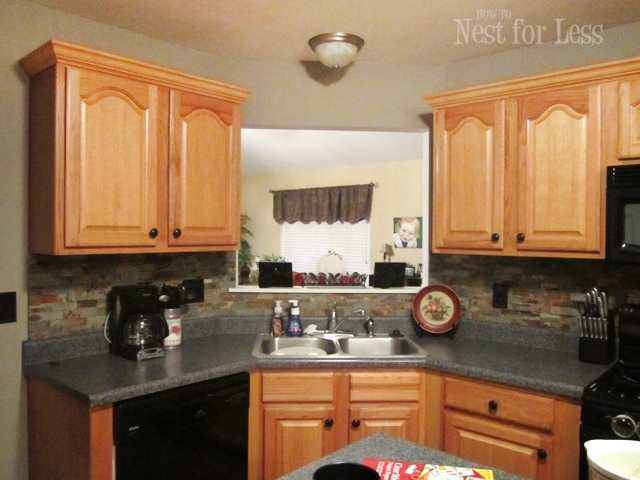
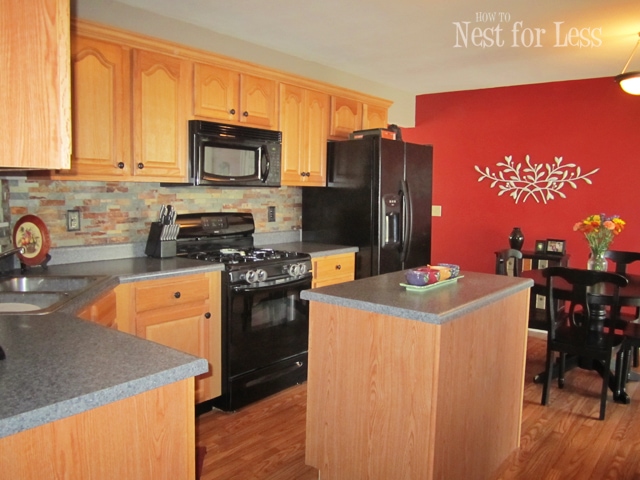 Maybe not a huge transformation for some, but I love the height it adds to the cabinets! Plus I removed the decor from above for now and everything seems crisp and clean. So here again is before and after.
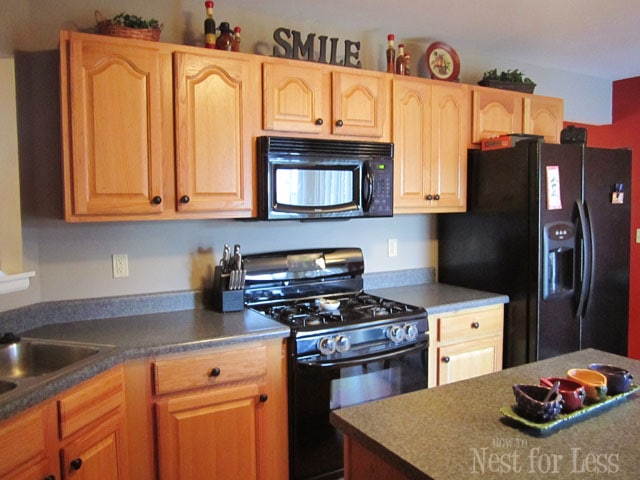
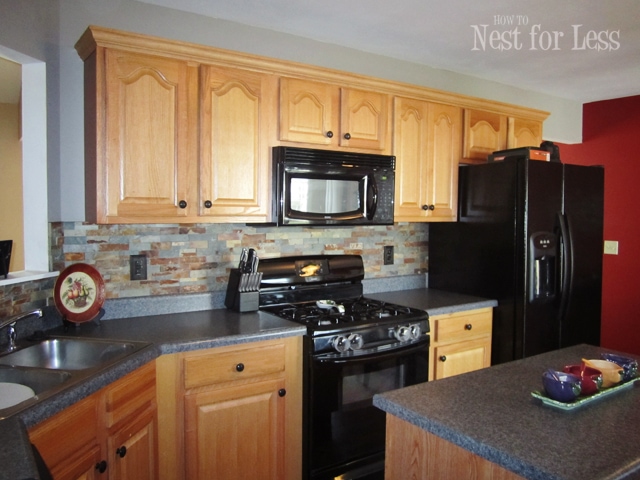 We only needed 4 boards of the 8ft pieces of crown molding, YAHOO! At about $10 for each board plus another $10 for some putty. Talk about a cheap makeover!

Irma says
Looks great! Thanks.
Wendi says
Funny how something so simple {and inexpensive!} can be so transformative. Looks great!
Linda@Coastal Charm says
Oh my…they look soooo much better and I LOVE your backsplash. Hop over and share your thrifty makeovers at my NIFTY THRIFTY TUESDAY party…hope to see ya there:)
Blessings,
Linda
Laura says
Love it! LOVE your kitchen!
ashlee says
it never ceases to amaze me – what a little crown molding can do. i’d love to have it in my childrens’ rooms.
ps. found you via yhl.
howtonestforless says
Thanks Ashlee! Just peeked at your site. I hope you get the courage to open up your cabinets!!
Lori says
I love the difference a little trim makes. Great job!!
Candace says
I love it! Was it difficult to find trim to match?
howtonestforless says
Luckily with builder-grade cabinets, it was a perfect match to what Lowe’s had in stock!
Elaine says
I am astonished at the transformation! We have been looking at houses online and so many of them had kitchens that seemed unfinished to me. I think you helped me figure out why! Beautifully done!
Shiloh says
What a good idea! It looks fantastic.:)
Brooke @ waywardgirlscrafts.com says
This is great! What a little thing but it makes a huge difference!
patti says
looks great. the long area appears more than 8′. How did you piece the molding together so you don’t see a seam?
howtonestforless says
Yes, there is one area that does have a seam. We used color puddy to fill in and it matched the crown molding perfectly!!
patti says
Looks beautiful… I found a crown that I liked too but it was only 8′ long and we have an area that is 10′ and I was worried about seeing a seam since it is a natural wood like yours — not painted which would be easer to hide a seam. From your photos it looks like it is possible. thanks for the information
Tammy says
I really found your site to inspire me to update my kitchen cabinets. I, too, have bland boring cabinets. I have tried everything I know (other than) crown molding atop of them. I have googled different kinds of molding and different sizes. I really like what you have done with yours. The wide molding, I think, gives a more eligent look. I am definately going to do this with mine. Thanks for sharing!
GG says
looks great, wow, i am getting ready for a kitchen remodel, and they want to charge me 1,600 dollars for crown molding! i was thinking if i could match the color off white, i can do it myself
howtonestforless says
Yes, you can totally do it yourself!! Good luck 🙂
Eric S. says
I know I’m late to the party here, but wanted to comment on the crown molding job you did on the cabinets. They look great! – but one question for you. Have you ever considered adding molding to the base of the cabinets as well? I added a top and bottom molding to a kitchen cabinet and it really took it to another level. Just a thought. Love your web sight!
howtonestforless says
Do you mean like a toe kick? We’ve since moved from that house but I do love finishing a job with molding. Such a cheap fix that really looks custom!
Nichole says
Hi there – I’m even more late to this party, but love the molding you added and I want to do something similar. Can you tell me if it was 3″ or 4″ crown molding that you used? Or somewhere in between? Thanks!
howtonestforless says
I believe it was 4 inch. We got it from Lowe’s!
Nancy says
Was it in stock in the kitchen cabinet section or crown molding section? Thanks! I’ve been looking for exactly the same thing and Lowes didn’t have it in molding area.
howtonestforless says
Crown molding section!
Laura Hendrix says
What color are your walls? a
and what did you use for your backsplash?
beautiful!
howtonestforless says
Here’s the link to the backsplash tutorial:
https://howtonestforless.com/2011/10/17/stone-kitchen-backsplash/
The backsplash is from Lowe’s!
Unfortunately I can’t remember the paint color in the kitchen. Sorry!!