As promised, here are a couple more Photoshop Tips & Tricks to help adjust your photographs to perfection. If you missed the first two posts, you can find them here!
Today’s lesson is LAYER MASKS!
I’ll teach you how to isolate an element within your photograph and how to merge two imperfect images into one flawless photograph!

 ____________________________________________________________________
ISOLATING AN ELEMENT
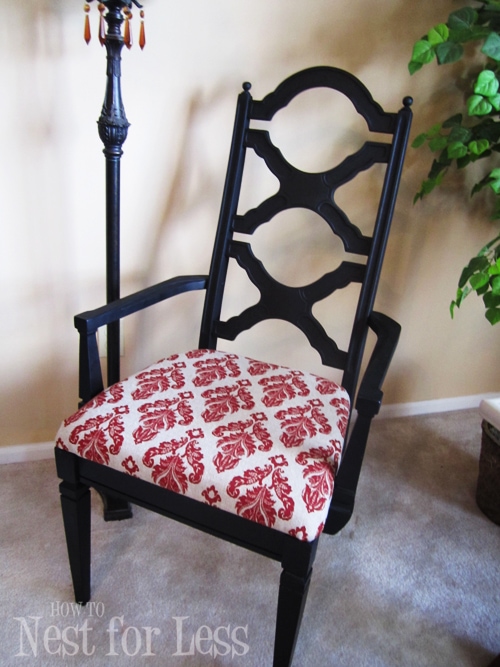
A simple use of a Photoshop Mask is to extract an element from the rest of the photograph. Below is a photo of a lamp I made for my daughter’s bedroom last year. I want to use a mask to erase the entire background and just keep the lamp itself.

First thing I’m going to do is create an adjustable layer from the background layer. Just double click on the Background layer from the Layers Palette. When the pop up window appears, click OK (I left my layer name as Layer 0).
 Now you’re ready to add a Layer Mask. You can choose the option from the lower part of the Layers Palette.
 Now you can see that we have the layer mask on Layer 0. Set your color palette in the toolbox to black and white. Now we’re ready to begin isolating the lamp!
 MAKE SURE WHENEVER YOU ARE ADJUSTING THE MASK, THE ACTUAL MASK IS HIGHLIGHTED IN THE LAYER PALETTE.

Grab the brush tool from your toolbox (on the left of my photo). In a mask setting, paint with a BLACK paintbrush and you will remove anything you paint. I started tracing around the edge of the lamp shade and flowers…

So as you can see below I erased a little too much of the lamp shade! No worries. You can simply switch to a white paintbrush and paint back in! Yep, that easy. This is perfect when you’re cutting out small details and the round brush is hard to maneuver in little crevices.

Make sure you adjust your brushes to best fit the task at hand. If you’re trying to get a sharp, smooth line, use a harder brush. If you want a feathered or soft edge, move your Hardness to 0%.

OK, now I have completely isolated the entire lamp. Now you can use it however you’d like!

You can layer with other images to create a desired look, or flatten the image so your newly isolated lamp has a flat white background!

So you might ask yourself, why is a layer mask better than an eraser? When you use the eraser, you are getting rid of the background for good. There’s no room for errors! When you use a layer mask, you can always switch the paintbrush to white and fill it back in with the original image! Gotta LOVE that.
Ready to see something else extremely cool?
_________________________________________________________________________
CHANGING HEADS
Huh? Yeah, that’s right. It’s time to change some heads.
After taking family photos parents always seem to complain that they can never get a perfect family photo. Either someone is blinking, looking away, not smiling, etc. So what can you do? CHANGE SOME HEADS.

This is our family photo from last Fall. I like how my daughter and I look. My hubby on the other hand? A little goofy. So I decided to grab his head from a different photo and Mask it onto this one.
I selected just his head from the second photo and dragged it onto the original.

I used a soft brush to remove the new unwanted areas, mostly around my daughter’s face to keep the original intact. And it’s that simple!

Just make sure you play around with the brush size and hardness to get the best results. Play around and have fun!
_______________________________________________________________________________
CHANGING BACKGROUNDS
You can also create cool backgrounds for family photographs using Layer Masks. Just find a background you like, drag it on top of the original photograph and click ADD LAYER MASK.
Use the black brush to “fill in” the children and flooring (leaving only the walls with the new background). Something like this will take a little longer since it’s a little tedious to trace around all of the shoes, arms, legs, heads, etc… but it can be totally worth it!

HINT: when doing a huge mask like this, it’s often helpful to turn that layer’s opacity down so you can really gauge what you’re doing. Also, when tracing around hair, use a softer brush. It looks MUCH more natural!
Well, that’s it for this week!

Please feel free to email me any questions!
And don’t forget to check out the past Photoshop Tips & Tricks for more quick tutorials 🙂
Next week’s lesson:
HOW TO MAKE A BLOG BUTTON
So make sure you stop by Monday!

Kelly says
Girl! These tips and tricks are fantastic 🙂 Thanks so much for putting them all together!!
Kari says
As always-awesome tips! Thanks so much for sharing!
Kari
Newlyweds on a Budget
Sarah C says
Love it!
Ang says
Thank you! I’ve always used an eraser, and that’s a pain! This sounds so much better.
howtonestforless says
You’re welcome 🙂
Mandy says
What a GREAT post!! I love it!! Simple… pictures… real world application. THANK YOU!!!
Kristy says
Wonderful post!!! Love these tips! I’m always trying to tinker, this helps!!
Kristy
kristyscupofjo.blogspot.com
howtonestforless says
Thanks Kristy!
Judy says
thanks for the tutorial, I tried it right along with you, good tutorial
howtonestforless says
Thanks Judy! Glad to hear it worked for you 🙂 I get nervous sometimes that I talk (or type) too fast 🙂
Rose says
I Have a brand new PSE and a mew Rebel T2i. I know you are working with PS but I they are so close that I have been learning a lot from your tutorials. Thanks for all the cool tricks. I’m a new follower and linky, and I would like to invite you to my blog and share at my party. @ http://www.arosiesweethome.com/2012/03/sunday-round-up-2.html If you have the time I have a photo challenge going on too check it out and tell me what you think @http://www.arosiesweethome.com/ . I would love that.
Thanks,
Rose
howtonestforless says
THanks Rose! SO happy to hear you can still learn PSE tricks through my post! I have a photo post coming next week of my daughter’s first soccer game so I’ll definitely link up!! THanks for visiting. I’m your newest follower 🙂
JennieD says
Greetings Erin! Thanks for posting the info about how to work with the “Layer Masks.” I’ve got the PSE9 program on my computer and use it quite a bit with my photo editing, sometimes editing is greatly needed and sometimes not. I have some photos that I wanted to get rid of the background, but have usually used just the “quick select” tool and then the “cut” function ~ I’ve done this with photos that I want to replace the sky with. We had a photo shoot some months ago and ended up with a lot of photos with very bland skies! Ooh, how I hate that! Thanks for posting this as it helps to better explain & understand how the “Layer Masks” work. 🙂
howtonestforless says
Thanks Jennie! Glad the tips are helping!!