
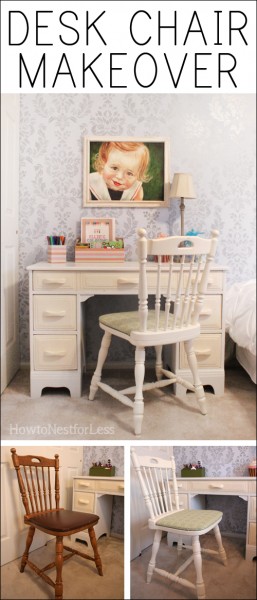
While roaming through the aisles of my recent favorite store (Goodwill), I found a wooden spindled chair with an old leather upholstered seat for $9. I thought it would be perfect to transform this chair since I would be able to change out the seat cover fabric with something modern to match her new bedroom.

OK, here’s how the transformation took place:
The chair was actually in pretty good condition when I purchased it. While it was covered in some grime (probably used as a kitchen chair in its previous life), it was nothing that a little soap & water and sanding couldn’t fix.
I first took the leather upholstered seat off the chair base. The seat was attached with a couple of screws underneath the chair base, plus adhered with a hot glue around the seat rim.

Once the seat was fully removed, I clean the entire chair with soap and water, then lightly sanded with a light grade sand paper. I rewashed the chair base when I was complete with the sanding to make sure all of the dust was removed.
The empty seat base was the nastiest. There were old crumbs and dirt wedged into the nooks, but luckily some good ol’ scrubbing and disinfecting took care of the job.
I primed the entire chair with Zinnser Bull’s Eye 123 spray paint primer. I absolutely love this primer and suggest it for almost any project! It goes on smoothly and has wonderful coverage, especially when dealing with odd shaped like spindles.

I covered some of the chair base with two coats of primer since I knew it would get a lot of wear and tear, especially from a three year old!
Next I lightly sanded the primed chair to get the smoothest surface for my final coat. I chose Valspar’s semi gloss off white spray paint to cover the base of the chair. I used two coats and left it to dry overnight.

Now time to work on the upholstered seat! The current leather that covers the seat is actually placed quite well. I was afraid to take it off and lose some of the curvature of the current padding underneath so I decided to just upholster with my new fabric over the leather.
I chose a green geometric fabric from JoAnn Fabrics to cover the seat that has some accents of cream and pink. This perfectly goes with my daughter’s desk and either play room or bedroom, depending on where I finally decide to keep the desk! I purchased one yard on sale for $2.99.

To begin, I laid the fabric upside down on a flat surface and aligned the chair seat on top upside down as well. I played around with the placement until I had it perfectly centered. With the geometric pattern, it was easy; I just made sure the center of the chair had a row of the circles going straight down the middle.
I measured the new fabric for cutting, making sure I had enough to overlap and secure into place.
Starting with the straightest side of the chair seat, I folded over the fabric and used my staple fun to secure starting from the center and making my way out to the edges. I had to make sure the fabric was smooth and tight, often flipping over the chair seat to check my progress.
I repeated with the opposite side of the chair seat, firmly pulling as I went but making sure my pattern was staying centered.

To work with the rounded edges, I made sure that any folds in the fabric happened underneath the chair seat where no one would see it. Often I made tiny folds and stapled into place to make sure I had the smoothest cover possible.
I continued along the sides, pulling firmly along the way. I ran my hammer over all the staples when I was finished making sure everything was tightly secure, then trimmed all access fabric.


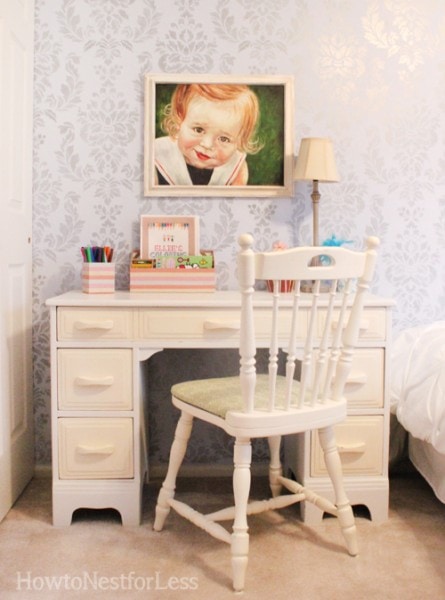
And here is the transformation! I decided to put the desk in my daughter’s bedroom afterall, and I have to say… it goes perfectly with her room!
Final costs: $9 for the chair, $3 for the fabric, $4.50 for the Zinsser primer, $3.50 for the Rustoleum semi gloss white spray paint. $20 total! Not to shabby for something totally unique.


Cassie says
it looks so cute- love teh fabric! and i LOVE that accent wall- the room is adorable!
Carolyn@Sweet Chaos says
Looks great! I just spent yesterday sanding and painting a bench with lots ‘o spindles! I should have read your post first and gone the spray-painted method 🙂 Visiting from debbiedoo’s. Looking forward to reading your blog 🙂
Rondell says
A really pretty room and the desk and chair just added beauty to it! I used to have those chairs and table in the 70’s they were very heavy if I remember correctly, the seat part of avocada green.LOL You did a great job on both pieces! I’m visiting from Debbie Do’s!
Rondell
debbie says
Looks so fun and fresh. I really love the soft color combination. Thanks for sharing at my newbie party.
ashley says
ah the before and after is amazing!!! I really love it:)
you rock
Amy says
I love what you did with the desk. It goes so well in your lovely room. By the way, the wallpaper in that room is gorgeous!
thepaintedlegrestyled says
Ella has a really nice and talented mommy! I love the desk color I love mixing colors gives it more depth I also love that you chose green for the fabric instead yellow it’s not too matchy-matchy.
Kristin says
This is gorgeous, love the whole room! I’ll be feauturing it tomorrow 🙂
Kristin
Meg says
Ah, a perfect fit! I love the fabric! Great job.
Julia @ 551 East Design says
That fabric is lovely and the chair goes so well with the wallpaper. Love it:)
teri c says
I am so loving that bunting! You were right about it adding to the size balance, but to me even more-so, is the way all those different colors just “tie” it all in together. And the desk and chair project turned out great. I bet your little girl is just loving her room right now…..not to mention her mommy too! :o)
Thanks for posting the make-over. As always, I look forward to your e-mails and projects!
Teri C
howtonestforless says
Thank you so much Teri! You are the sweetest 🙂