Two of the first pieces of furniture I purchased with my husband were kitchen bar stools. We got them from Target about 7 years ago for our first apartment. Since then we’ve moved and they’ve been sitting down in my basement for quite some time. With an upcoming furniture sale, I grabbed some chalk paint to create some chalk paint stools.
OK, I was so anxious to start this project that I forgot to take some before photos, DOH! So instead I found a photo online.
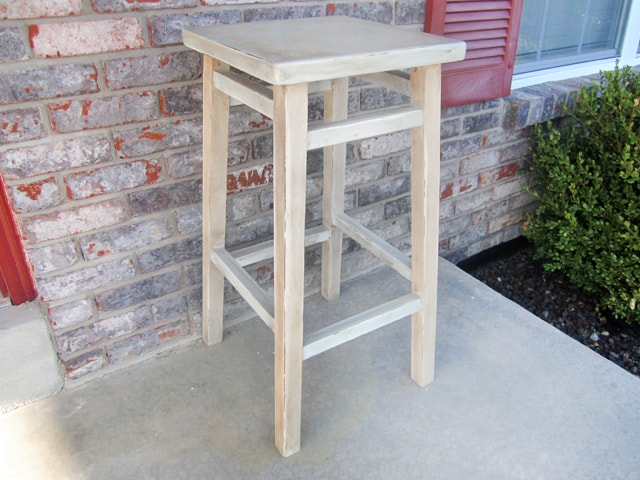
 So here’s the before… and a sneak peek of the after! Here’s how I completed the transformation.
 First thing I did was give them a coat of some Country Grey Annie Sloan Chalk Paint. I had some in my paint closet and thought the light tan shade would go well with any kitchen.
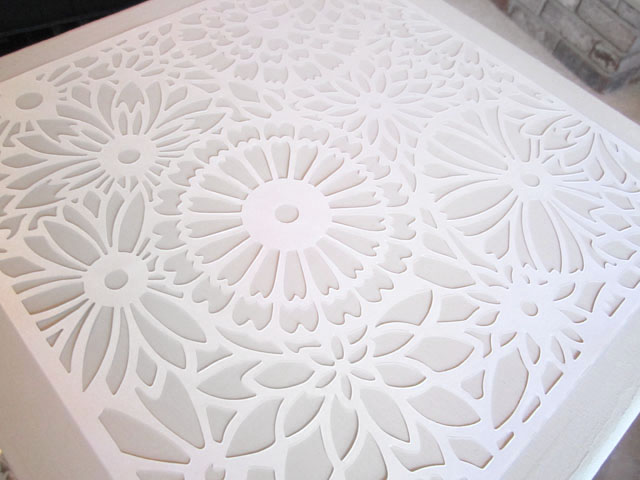
 For the top of the chalk paint stools, I found some cool Martha Stewart scrapbook paper on clearance from Michael’s and decided to use it as a stencil. To keep it in place while I painted, I used a bit of stencil adhesive spray.
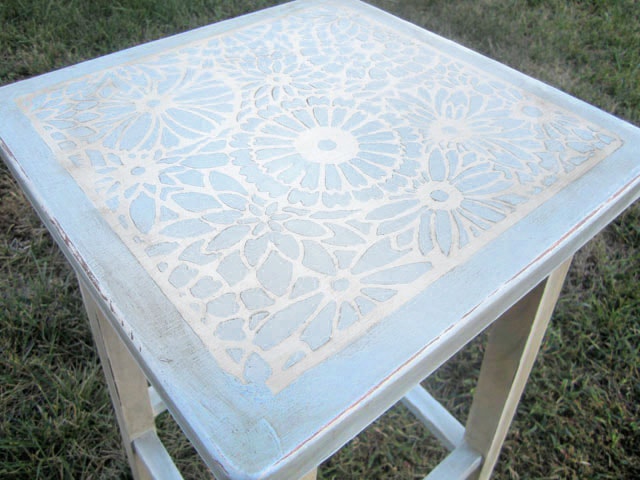
 I mixed one part Country Grey and one part Louis Blue chalk paint for the top. I also used this color for the cross bars.
 I finished off with some dark and clear Annie Sloan wax and distressed the edges. Here’s the finished product! I really wish you could see the colors better!


evie @ brown paper packages says
Wow, those really turned out beautiful! Great job!
Debbie~refreshrestyle says
Love it! what a great idea for the paper!
Debbie
Miss Kitty says
Wow! These are so cute now! I could envision someone even buying them for end tables or plant stands too. Good luck with the sale.
Pat says
Awesome, especially using the scrapbook paper as a stencil!
Amanda {at} DAES of Our Lives says
That’s beautiful!
Katie says
These are beautiful! Perhaps you could give a brief tutorial about how to use the wax and then distress the piece. I would be so grateful.
howtonestforless says
Katie, I’m featuring another Annie Sloan Chalk Paint table makeover next week and I’ll give a step by step tutorial for the wax and distressing. I’ll send you a little email reminder when it’s up!
Deborah says
Really lovely. I stencil a lot in furniture up-cycles, so I’m always looking for new ideas. Thanks for the inspiration!
Sharon says
Love the stencil with chalk paint! Very nice!
Sara says
WOW!!! SO pretty!! Would LOVE it if you would share this project at my turquoise lovin’ party going on right now!! http://www.sweetlittlegals.com/2011/09/turquoise-lovin-4.html
SueBee says
Wow! You have inspired me. I have those same stencils in my cabinet for cake tops. Thanks!
debbie says
This my dear is gorgeous! Love the color, love the stencil design. My newbie party will resume back to normal on Monday, thanks for joining in!
Lindsay says
Gorgeous! I am loving all the fun ideas I have checked out here. You have a fabulous blog!
cassie says
so pretty! i love the soft colors and the fun stenciled seats!
Teresa says
Scrumptiously Lovely!
Heather@The Black's Best says
I have stools just like these. Two of them got a coat of black paint of the kitchen, but I have one more that I might give this a try on. I love the stenciled top you did!
kim@todayismysome-day says
Great job! and genious on the scrapbook paper! Saw you over at 30 days pity party 🙂
Jaime from Crafty Scrappy Happy says
I ADORE this too! WOOOOOwwww I think I am going to become your newest HUGE blog fan very soon!!! :o) LOVE this! I am so glad you showed how you did everything!
Jaime from crafty scrappy happy
Tonia @ The Gunny Sack says
I love how this turned out! Was the scrapbooking paper already like a stencil or did you cut out the shapes?
howtonestforless says
The scrapbook paper was already like a stencil! Super easy 🙂
Tasha says
What a genius idea!!! I LOVE it!! I would love if you linked up to my party so I could feature you! There is also a giveaway going on as well!! I hope to see you there!!
Thanks!
Tasha
http://www.dotdotdotthis.blogspot.com
P.S. I am your newest follower!!! I can’t wait to see what you come up with next!
Toni says
Erin – it’s fabulous!!
kimbowest says
featured this today on my blog.
http://kimboscrafts.blogspot.com/2011/10/shout-outs.html
howtonestforless says
Thank you~ I’m your newest follower!
Kimmy Davis says
This is beautiful! I hopped over from A Girl and a Glue Gun–I thought this was grout and mosiac tiles!!!!