So much for a lazy weekend before the big move… Somehow my sister talked me into starting her son’s nursery. I’m actually quite excited about this project though because 1.) I’ve never decorated a boy’s bedroom before and 2) it’s been 8 years since I decorated a nursery.
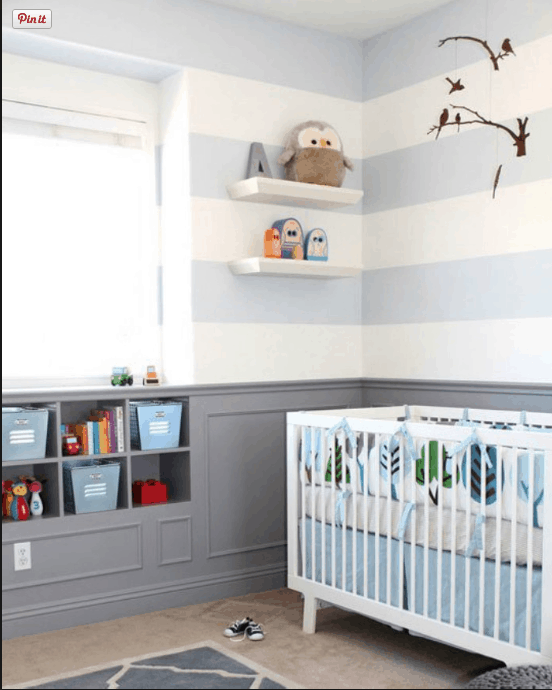
My sister sent me a photo she found on Pinterest a couple weeks ago for inspiration. The nursery was from Jennifer HSU Interior Design and I instantly fell in love with the look.
 So I headed out to Ace Hardware to pick out some similar paint colors from the Clark+Kensington line.
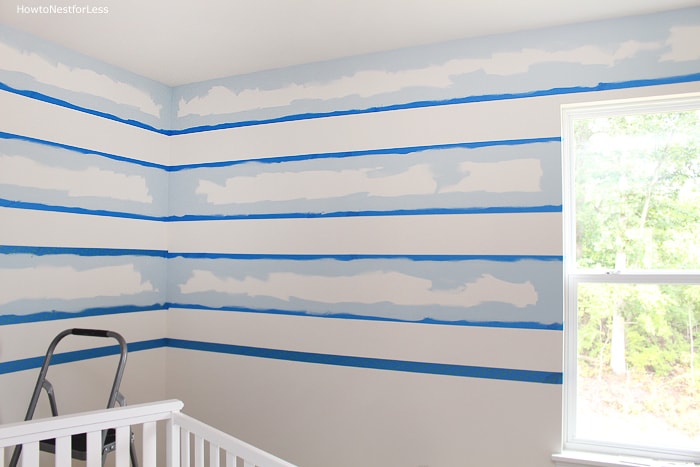
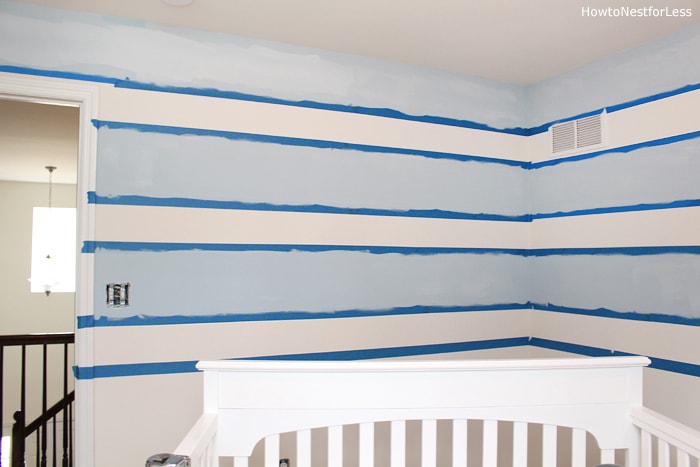
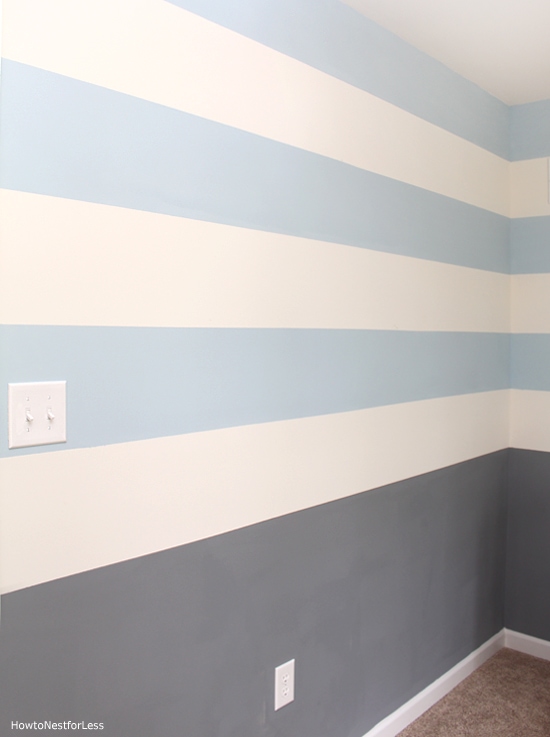
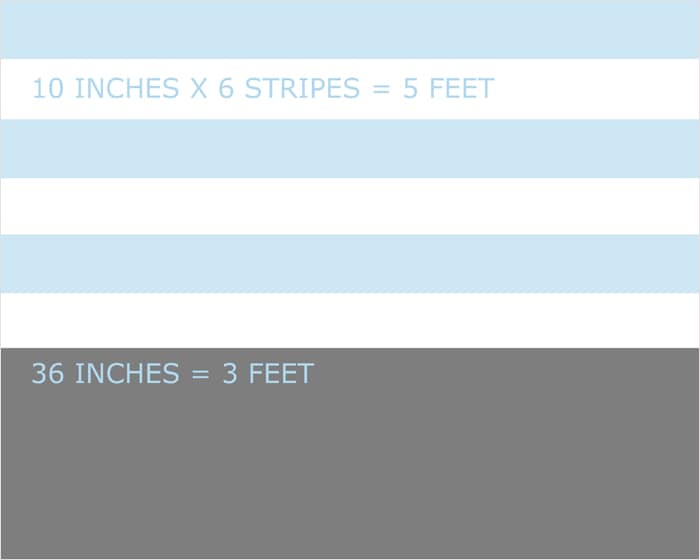 Next it was time to tape off the walls. Since the walls were already white, I only had to tape off for the blue stripes. I marked off the 10 inch sections with just a little pencil mark in the corners, then Ben held the laser level while I taped off the lines. I have to admit, it was a little off by time we taped off the 4th wall, but there is NO WAY you can tell. I even thought some of the lines would look wavy but nope, you can’t tell at all.
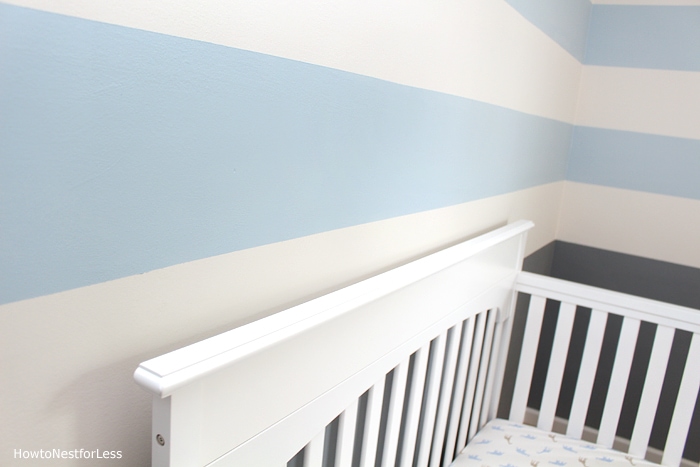
Note: when you put the tape on the walls the width of your stripes are going to look uneven. This is because you’re taping on the OUTSIDE of the blue stripes; the tape is on the white part of the stripes. Make sense?
 Then it was time to edge with a paint brush. I first pressed down the tape firmly so the paint wouldn’t bleed underneath.
 Then I filled in the rest with a roller.
I followed the same step with the bottom dark gray section as well.
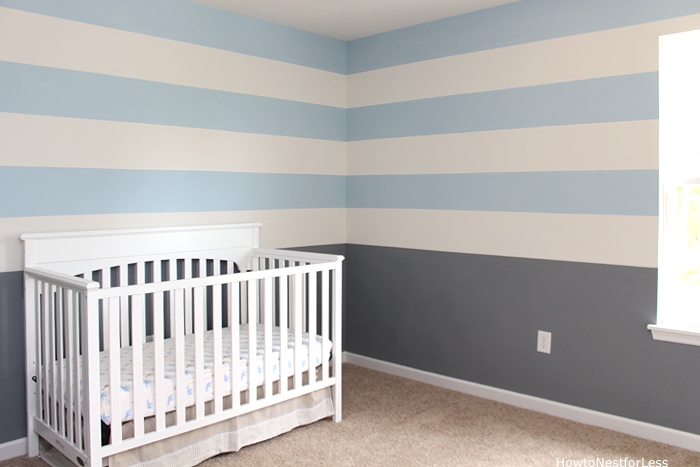
 Then I peeled off the tape and saw this beauty…
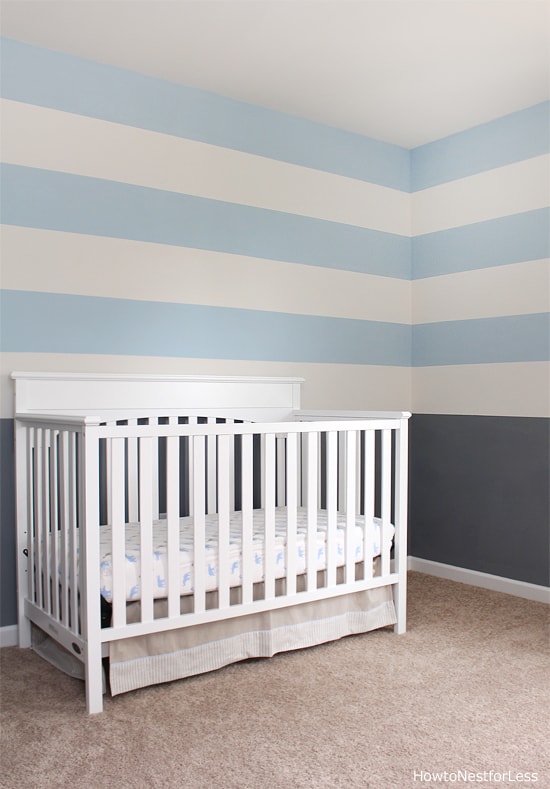 Seriously, I’m in love. This might become my favorite room to date when it’s all said and done. Now we just need to finish the wall art, move the rest of the furniture in here, hang some blinds, and some other minor adjustments.
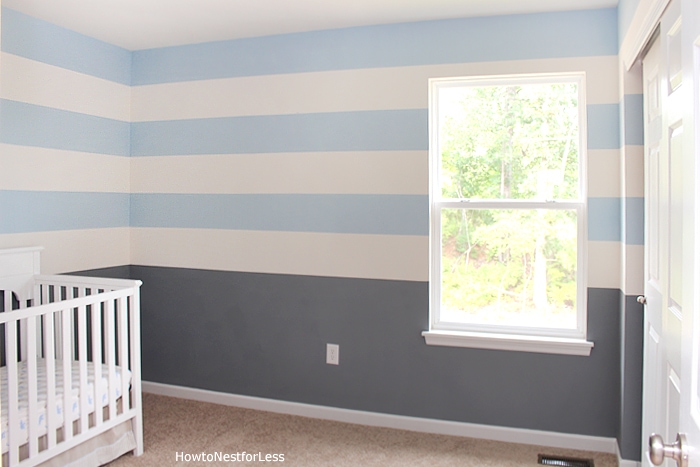
 And we still need to do the chair rail and picture frame molding, but this room is quickly coming together after just one morning of painting!
 So stay tuned for the rest of this makeover. We close on our new home Wednesday and move in this weekend but I promised my sister I would help her finish the nursery ASAP. Stay tuned!
And a special shout out to Ace Hardware for providing me the paint for this project. It’s definitely the best part of the nursery and I can’t wait to see how it all turns out!

Shelly says
This is really pretty! I’ve had problems with the paint bleeding through – what brand and type of paint did you use?
howtonestforless says
I used Clark+Kensington paint from Ace Hardware (LOVE this brand, silky smooth and amazing coverage). I just make sure to press down the tape really hard along the edges before I start painting. I had to touch up a place or two, but luckily nothing major!
Denee says
What colors did you use. Thx!
Jenny says
Beautiful! I love it!
Tara C says
I love the color combination. This may be a dumb question, but how do you get the lines so straight? Do you measure and mark with a pencil on the wall or is there a better way?
howtonestforless says
Ooh yeah, should have mentioned that part! I used a laser level. I didn’t mark with a pencil the entire line because the blue paint was pretty light and I didn’t want the pencil mark showing through. I just had Ben hold the laser level while I taped.
And I should note that the lines are not 100% level or even and there’s no way you can tell… thank goodness 😉
debbi says
a 1 1/2-2″ wide molding right along the grey and painted the same color grey will give the effect of a chair rail and wainscot without much trouble and add some texture to the flat wall. I have done it and it just makes it look even more fabulous. I love your colors and how it turned out. Stripes care me, but maybe some day soon I will get the courage to try. Nice job.
howtonestforless says
Thanks Debbi. Yes, molding in gray is next on our to-do list!
Cecilia says
Oh, how sweet! Love the stripes with the grey on bottom. Looking forward to seeing it done! And very excited about your new house!
Annie says
Erin….love the colors and the stripes! Moving this weekend…already! Have fun and enjoy!
Annie