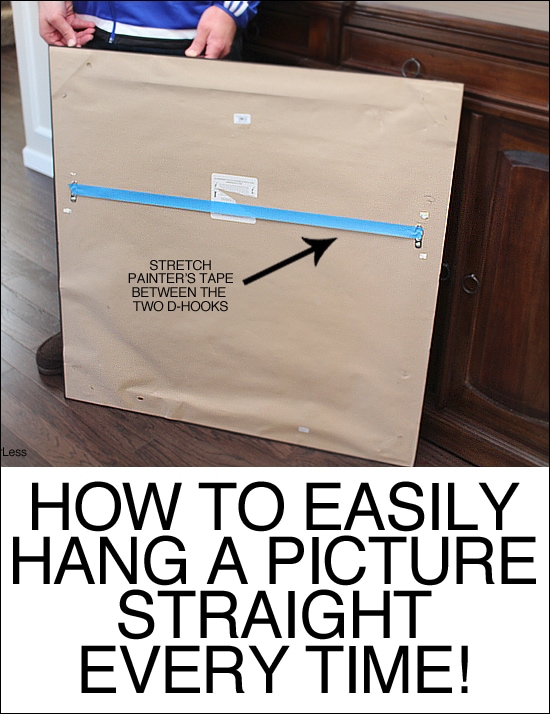
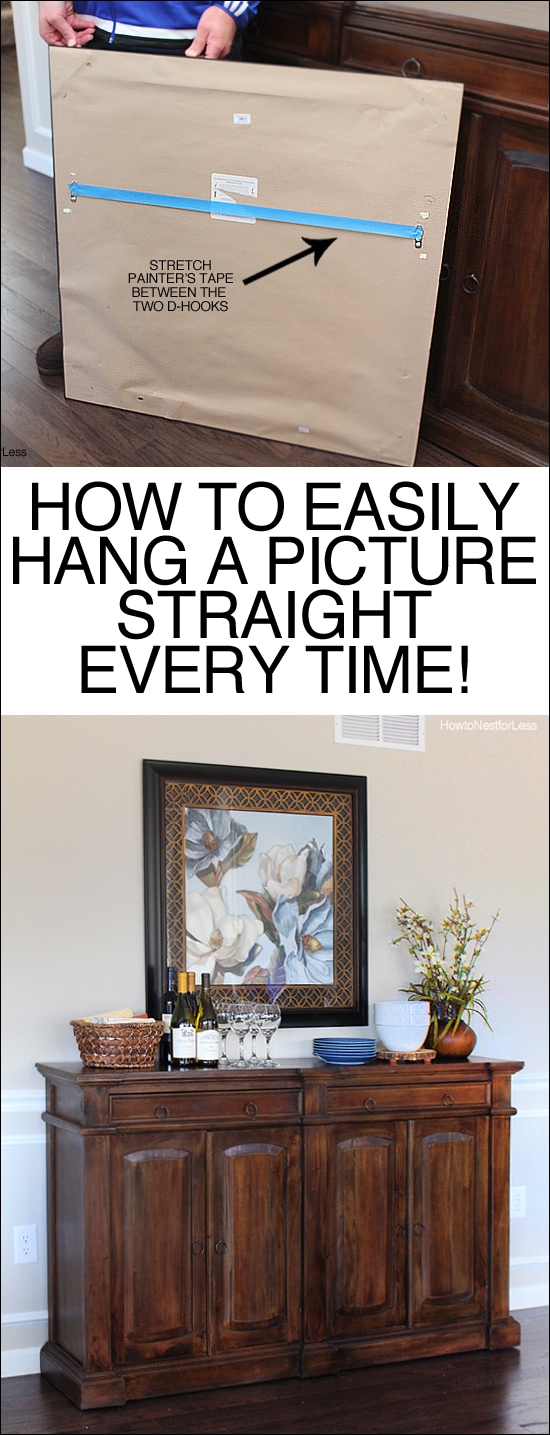
I will show you how to easily hang a picture that is perfect every time!
Make sure you follow me on Instagram and Pinterest for a sneak peek into my recent projects!
So a couple years ago my mom showed me how to easily hang a picture straight every single time. Maybe you guys know this one too? Well if not, I’m about to blow your minds.
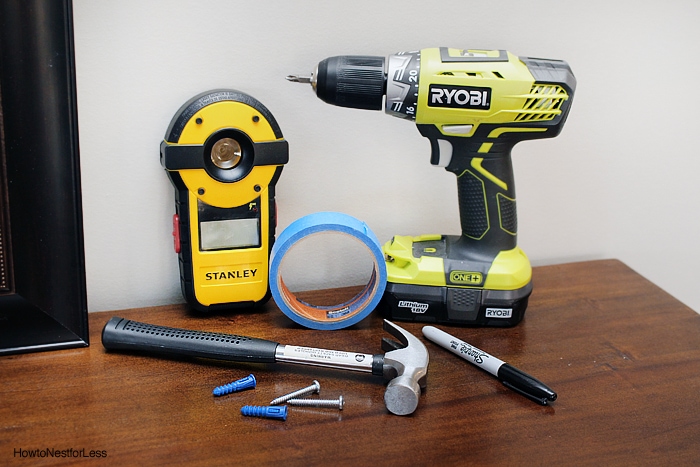
All you need is:
- hammer
- drill
- screws (and maybe drywall anchors)
- pen or marker
- level or laser level
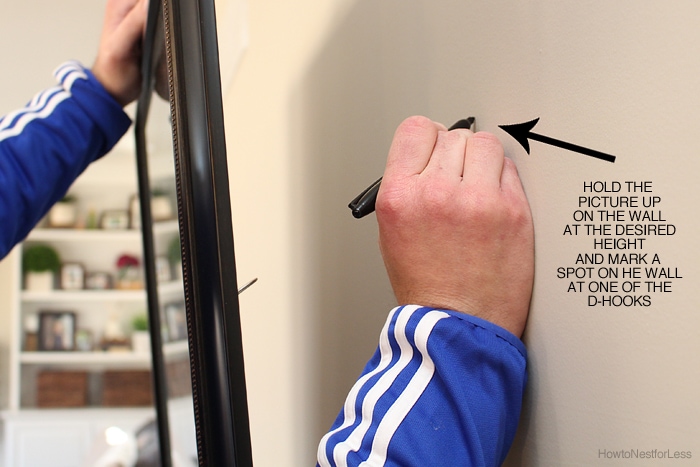
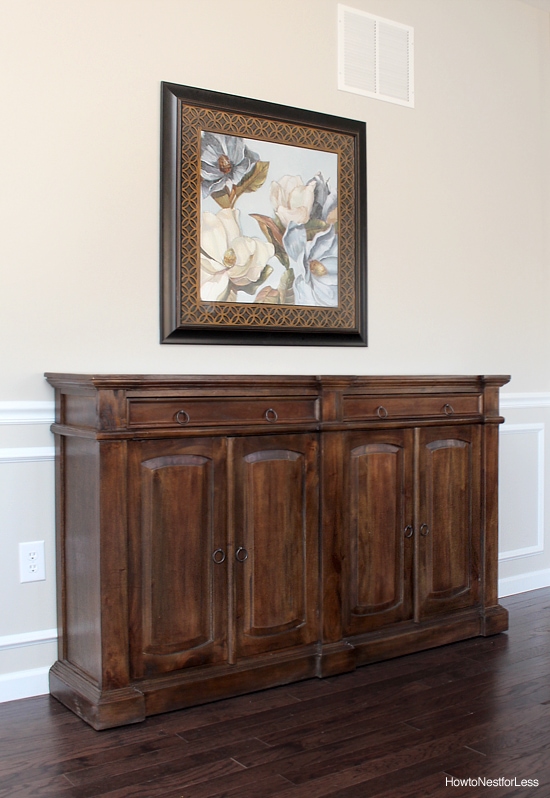
So hold the picture you want to hang on the bare wall roughly where you want it. Then mark with a marker or pen on the wall where the d-hook lines up on the wall. You only need to mark one side/hook on the wall.
Tip: Don’t hang it too high! If hanging a picture above something like a table, fireplace mantel or console, you only need it about 4-6 inches above the piece.
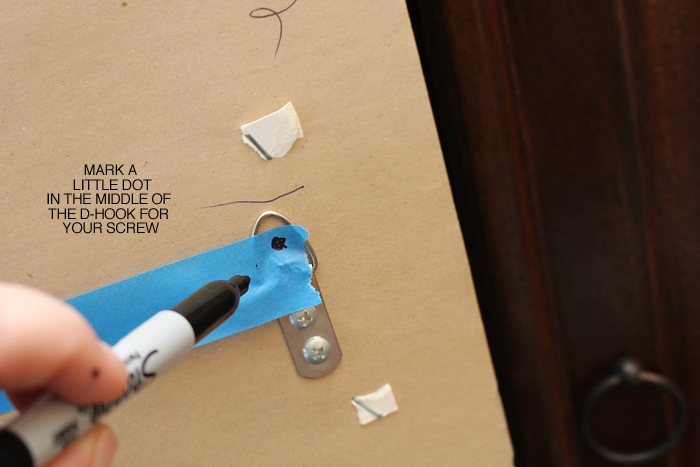
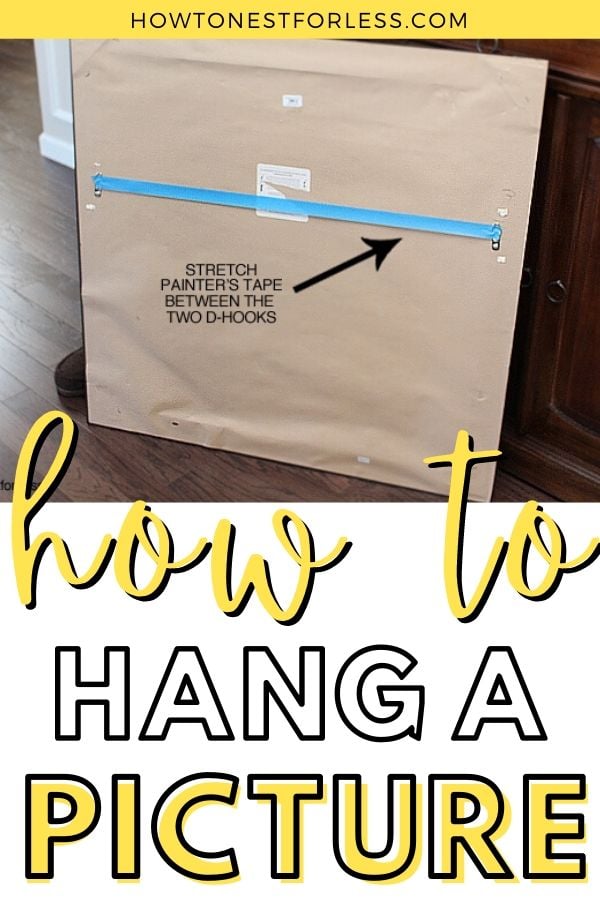
Next turn your artwork or picture over and stretch a piece of painter’s tape across the back, slightly covering both hooks.
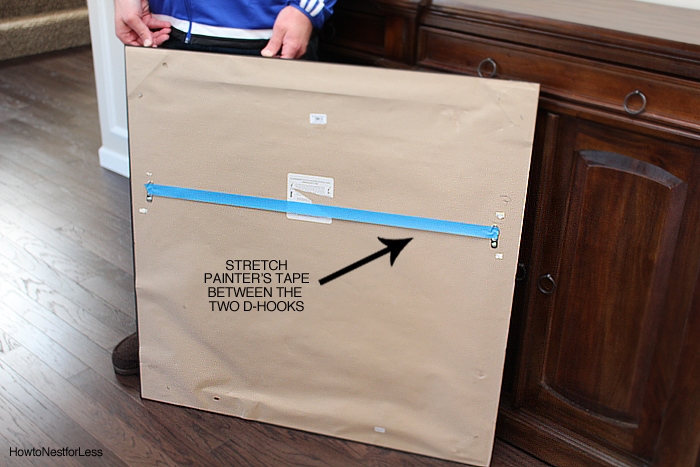
In the exact middle of the hook, mark a big dot with your pen or marker.
Now take that piece of tape off the back of your artwork and put it directly on the wall just below where you marked earlier. Use your level to make sure the piece of tape is perfectly straight.

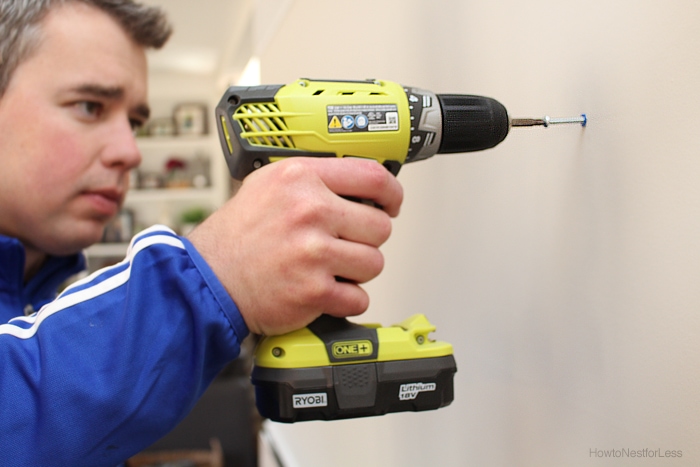
If you don’t have a stud here, make a small pilot hole with your drill, insert your anchor, then screw. Make sure you leave the screw a little bit out of the wall so the d-hook can easily latch.
And there you go… perfectly straight artwork on your wall!
Pretty cool, right?
Yep, pretty much my favorite tip & trick of all time. Thanks Mom!
Unless you have a better way…
Wait a minute… DO YOU?
For more great tips and tricks check out Life Hacks: 25 Awesome WD-40 Uses
Make sure you follow me on Instagram and Pinterest for a sneak peek into my recent projects!

Wendie says
Brilliant! Happy Easter to you.
howtonestforless says
Thanks Wendie! Happy Easter to you and your family!!
Genevive says
Great tip!! I like everything you post. Happy Easter to you and your family.
howtonestforless says
Thank you so much! I appreciate it 🙂 Happy Easter to you!
Heather says
Wow, I just hung a shelf a few weeks ago and it was so difficult. This method is going to save me lots of trouble in the future! And you are the first person I heard it from!
Debrashoppeno5 says
Oh My Gosh how easy is that. I will need to redo all of my pictures using this method.
syl says
Did I miss something? After the dot on the D hook??? Not clear after that.
howtonestforless says
The screws in the wall go where the dots on the tape are.
Kattrinka says
No you didn’t miss anything….it’s just not there…..the need to make dots on EACH end of the blue tape. 🙂 I thought I was missing it too.
Sherry says
Thanks for the tip. This should make my life easier!
Vineta @ The Handyman's Daughter says
What a great tip! This would be really useful for some of the bigger art pieces I like to hang.
Charlene says
Wow! That’s brilliant! Why have I never thought of that?
Terry Moore says
I’ve done this before but thanks for the reminder. I have been hanging lots of pictures in my daughter new home and totally forgot this trick. Sure would have been easier.
Chelc | Inside the Fox Den says
This is the best method, I use it at work all the time! Thanks for sharing at Merry Monday, hope to see you again next week!
Kimberly L says
Hi! Great tip. I am really liking your buffet. Is that 2 seperate cabinets put together? May I ask where you found this piece? Thank you!!!
howtonestforless says
Well thank you! It’s one piece from a local store called Weekends Only. We love it!
tam says
or use framing wire between the D hooks and hang with the wire but this is a good ideafor things like shelves
Rob says
If the frame has D hooks (D Rings in Australia), it is most likely not advisable to add a wire. I’ve lost count of the number of times customers have brought frames into my shop with corners opening up, or with cracked glass because the frame’s sides were turning inward from strain because they’d added a wire – or a ‘professional’ picture hanger did it. D hooks allow the frame to ‘dangle’ rather than hang under some strain.
Tatiana Christian says
Great tip!
Suzanne says
Your trick works IF the brackets are the same distance from the top of the frame, but if they are not, the picture will not be level. hangITstrips solve this problem. If you want to try them, send me a email and I will send you a free packet.
Liz says
This was so easy. I have struggled in the past. Wonderful instructions. Thank you.
Chris says
Just a note to add. This trick does work but If the D hooks aren’t mounted evenly on the picture frame, the piece won’t hang level. One must measure to make sure the hooks are the same distance down from the top of the frame.
Chris says
Exactly, many times those d rings aren’t mounted evenly. also your tape along with the wall should have a middle mark to line up as well so you’re centered where you want to be.
Lisa says
Why is the tape not listed in the equipment needed list?