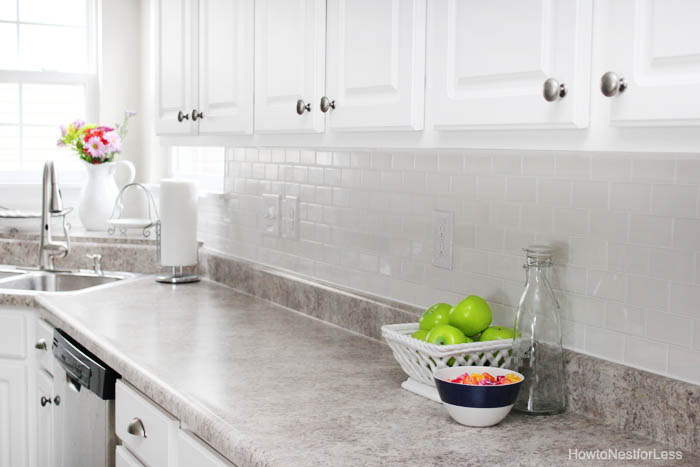
Yesterday I showed you guys my new white subway tile backsplash, and I promised I would give you a cool tip and trick for how to caulk like a pro. Now I would like to take full credit for this, but my good friend Sarah actually gave me this tip. I at least get the credit for passing it onto you, right? Read on to learn how to caul like the experts do!
This post contains affiliate links.
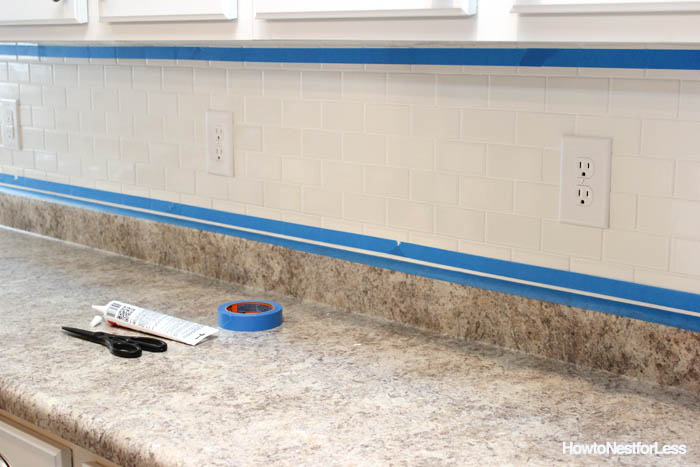
So what supplies do we need to make the cleanest, most beautiful caulk lines?
Painter’s tape and caulk.
That’s it.
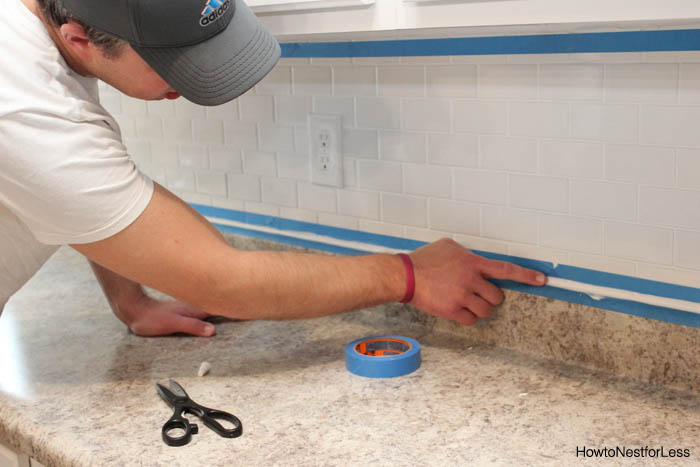
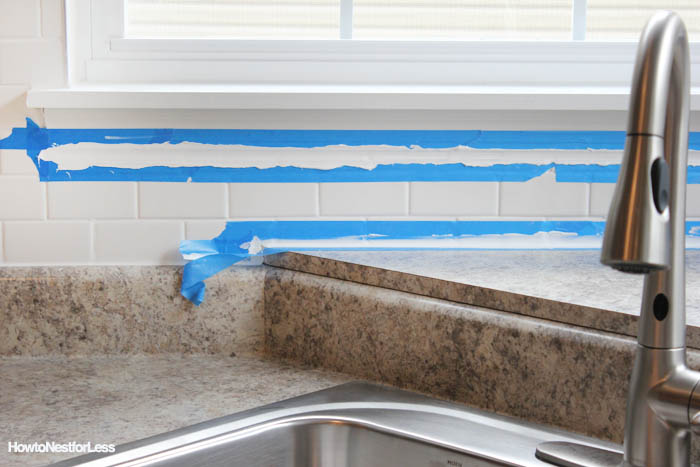
 Basically you want to tape just above and just below where you want the caulk to go. For me this was leaving a little bit of countertop showing on the lower piece of tape. Painter’s tape is key in learning how to caulk like the big boys.
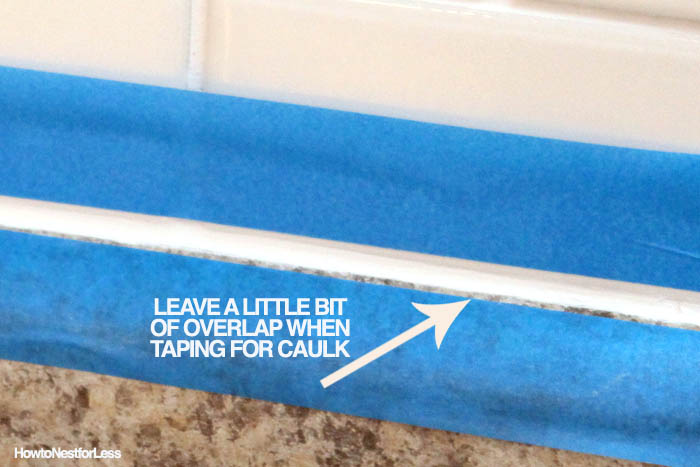 Just make sure you keep about the same gap size the entire length of your project.
 Next we squeezed a thick line of caulk in between the pieces of tape.
 Then we ran a finger across the caulk to smooth it out. If you don’t want to use your finger, you can use this handy tool.
 Don’t be scared at this point if it looks like a complete mess.
Ours did. I’ll have to admit I was a little nervous at this point.
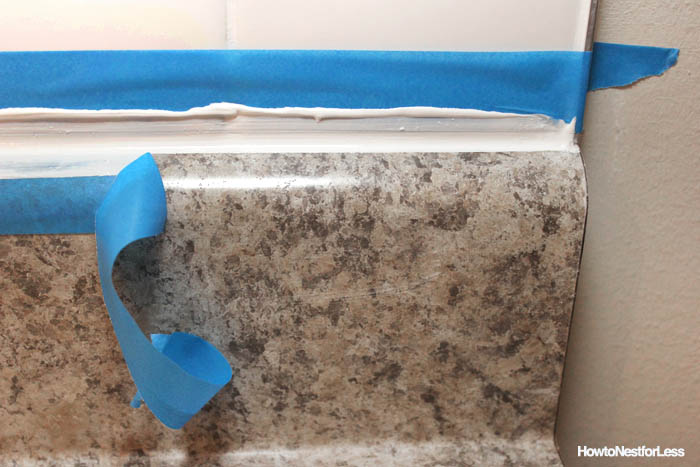
 But about 5-10 minutes later we started to peel up the painter’s tape and we saw some beautiful crisp, clean caulk lines! The caulk wasn’t dry at this point, but I wanted to let it set for a couple minutes before removing the tape, and not far enough along the drying process where I would run into any issues of the caulk peeling up with the tape.
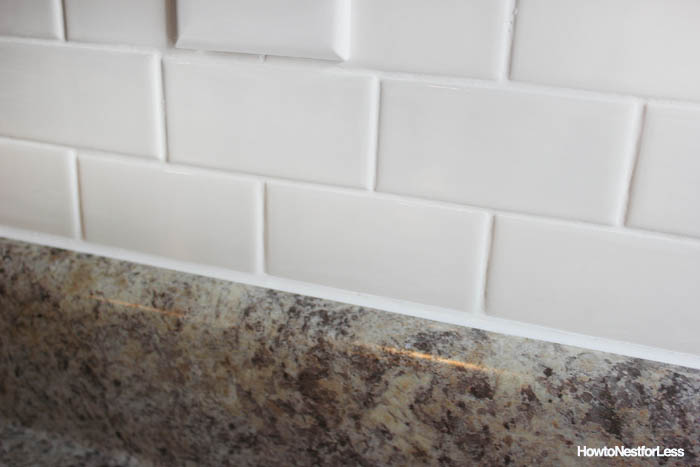
 And here’s the final caulk line…
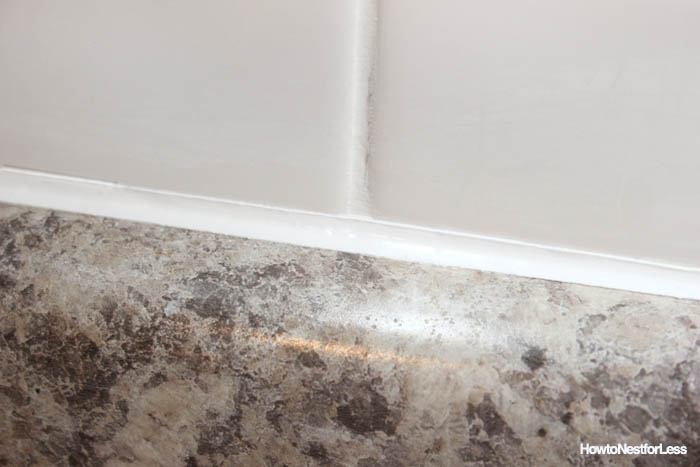
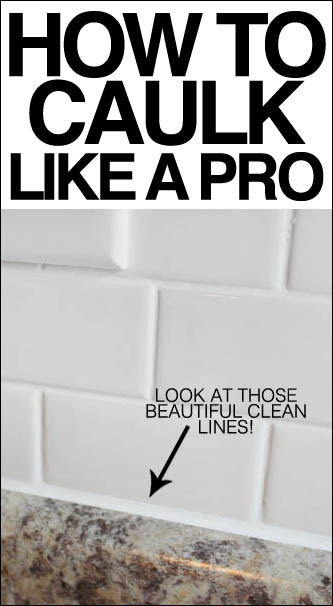
 And a closeup so you can see this actually works!
Seriously, isn’t this cool?
Who knew caulk could be so exciting.
Ok, maybe I’m overshooting here.
But it’s still a cool trick, right?
 Don’t forget to check out my complete kitchen tour!

Jenni says
Awesome! Thanks for the tip! I have some places where I need to fix the caulk and I’d love for it to look good and now I know how to do it!
howtonestforless says
You’re welcome. Good luck!!
Alice Oneal says
I have a question— I have old caulk in both bathrooms. Before I add new caulk,,,,do I have to REMOVE the old stuff?? Thanks
howtonestforless says
Yes, I would recommend removing old caulk.
JS says
Absolutely!!
Jared says
Definitely remove as much of the old caulk as you can before applying the new caulk…
Darrell Culbreath says
Well I,m a painter and artist I don’t need no tape but that’s a cool technique, I like it
Matt says
I do this for a living…no need for tape… back of the cart or a sharp stick and take off the excess. Anyone want to know more let me know
Julie says
Very cool! If only I had read this before doing my tub. Oh well, next time!
Hani Shabbir says
You make it look so easy.. 🙂
howtonestforless says
It is, I promise! My first time using this technique and it turned out perfect! And that NEVER happens 😉
Nadia Winters says
Another handy tip is to dip your finger in liquid dishwash soap before running it across the caulk, that way it doesn’t stick to your finger.
howtonestforless says
Very smart!!
Steve T says
I just keep my finger moist with water… and don’t use tape at all. This allows me to feather the edge of the caulk, instead of leaving a ridge (the thickness of the tape) on either side. Smooth a section, wipe excess caulk from finger on paper towel, re-moisten finger, repeat. Caulking is so easy.
Sonny says
if you take a spray bottle and apply the caulk, then spray the caulk lightly with water and proceed to wipe away the caulk. The caulk will not stick to anywhere the water has touched so you get a nice clean bead without nasty smears that go halfway up the wall.
Rupa says
This was indeed a great tip. My husband bought the same caulk. The Home Depot sales person told my husband to thank me since he himself was not aware of this product at HD! I had to caulk a small window and it came out no so great the first time despite using the blue tape. I had left the caulk for 10 mins. and the caulk came with the tape!. So I redid the tape and caulked again but removed the tape in 5 mins which left a clean line. Thanks again for this great tut, it’s exciting indeed that I learned to do this by myself without my husband’s help. He was even impressed with the tape trick.
howtonestforless says
Glad to hear it worked for you!!
Caroline says
What about “stripping” out the old caulk? Any suggestions?
howtonestforless says
We always apply a caulk remover and then use a utility or x-acto knife to cut out.
Tracy says
Rather than use all the expensive tape, this tool works like magic. Perfect lines, any size. Simple to use and clean.
http://www.amazon.com/Homax-Caulk-Finisher-Width-Height/dp/B00176NTPE
howtonestforless says
Thanks for the tip Tracy!
Julie @ Restyle Relove says
Very cool. I dread caulking cause I always make a mess of it. I’ll have to give this a try. Thank you! 🙂 Julie
Anne says
Thanks for this amazing trick! I will use this to caulk my kitchen tile!! THANKS AGAIN!!!!
Laina says
It has been my method for awhile now. I use a different kind of tape. And I don’t let it cure quite that long before removing tape. What ever works.
Tanya says
Tried this out today… heed the timing. Does not work out well if caulk starts to dry. Be sure u to remove the tape pretty quick, I’m assuming the results would have been much better.
Tammy says
This looks great and I love your tips! I just finished a subway tile back splash in my kitchen but haven’t caulked the edges yet because I am worried about how it will look. I have a larger gap than I anticipated and I don’t want it to be too obvious.Your gap looks wide compared to the spaces between tiles, but it doesn’t stand out at all – how big is it? I’m hoping it is similar–I will be able to get this done finally knowing that it will look great when I do it using your tips. Thanks!
howtonestforless says
Our gap was pretty big… like a half inch maybe? That’s why our caulk is so thick. Looks fine though!!
Stacey says
I used to paint houses for a living (a pro) and there is no time for taping all the lines that need caulking. All you need is a bucket of water, a small rag, a chalk gun and the tube of caulk cut correctly. Then you caulk the area, dip your finger in the water smooth the line, wipe off excess with the rag and move on. We would never spend that much time taping, on a side note painters tape is not for professional painters either…if you can not paint a strait line without tape, it is not the right job for you. Painters tape always run, then you always have to go back and fix the leaks.
Carol N. says
Hey Stacy, Don’t come into another person’s house and be rude. In your own words “you are a pro”. That is great for YOU, but the rest of us love & appreciate these “non-pro tips” as they make many of our DIY projects look great with less heartache. I have tried your method more than once. The tips were cut at the correct angle etc., etc., & even tried a smoothing tool to no avail. We aren’t doing a whole house, just individual projects. Please refrain from making someone feel bad because of an inability to freehand at a professional level. Sorry if I upset anyone out there, but you Ms. Stacy came off snarky, and I don’t appreciate being downgraded for using a technique that is in your opinion “non-pro”.
By the way Erin, your kitchen is fabulous!!
howtonestforless says
Thank you Carol!!!! I appreciate your comment 😉
Amy says
Actually,a professional painter won’t bother dipping their finger in water.They use saliva!They just spit on their finger and smooth it out.It works much better and the caulk doesn’t stick as bad.They are also very careful not to use too much caulk.You can always add another layer but too much looks horrible and is a waste of materials to fix.
PazKe says
Painter’s calk is not the same as silicone caulk to seal around a tub or a backsplash. Painter’s don’t typically even do that job. You want the painter’s caulk to feather out and then you paint over it. In addition to being rude, you’re comparing apples to oranges. Put that in your professional pipe and smoke it.
Anita says
Thanks for the great tip. Perfect timing as I was looking at my kitchen today thinking that the counter needs re-caulking and dreading it. This will make my life so much easier.
Caroline says
Thank you, Erin. This worked better than the tool that the hardware store suggested to make nice lines and also the “just use a wet finger” method. The lines stayed straight and even the entire way though. With having a contrasting counter top, I would see any variation. The timing on the tape removal is definitely important. I had one corner where I was a little late at 20 minutes and I had to carefully use a knife to cut the surface so it would not pull.
Syndee says
I loathe thick messy caulk lines. Decided to give this a try on my daughter’s brand new kitchen counters. All I can say is this is so simple and effective. It worked perfectly. Forgot to take pics before I left though. Thank you for making a time consuming, frustrating job a breeze. Definitely keeping this in my handy tips.
howtonestforless says
Glad it worked well for you!
Susan says
howcdo you remove the old caulk?
howtonestforless says
You can buy a caulk remover and then pry the old caulk loose. Or you can use a utility knife to cut out (but that can be dangerous!).
Meena says
thank you so much for this. I tried caulking and it was like — the blind did it.
howtonestforless says
HA! That made me laugh at loud 😉
Meena says
I write a funny baking blog.
I like your site. Great info. =)
I work like a rented mule on my own house and try to do most things myself.
I have saved a lot of money doing it.
p.s. I am now stalking (following) you on Pinterest.
howtonestforless says
I love stalkers 😉 And I love food… so now I’ll be stalking you.
Meena says
Stalk away…… =)
I also have a personal Pinterest page: https://www.pinterest.com/hotrod_mama/
I’m trying to figure out how to connect the two — my anchoredinsweets page and hotrodmama page.
nadine says
This is the tool that I use. I don’t have to put my finger in the caulk and it leaves a very clean line. You get to pick the size line you want and it even comes with a removal tool. After doing diy for 21 years I wish I had this when I started!
Amy says
Will this work for clear silicone caulk too?
howtonestforless says
Yes!
Kellie says
I just stumbled across this post and was like YESSSSS! When I was remodeling the master bathroom of my house, my then husband tried to tell me that “professionals just run a bead of caulk, that’s just how it is supposed to look” when referring to his caulking job along the baseboard of the walls. It looked like a kindergartener frosted a freaking cake. I used an old library card to smooth it out and scrape up the extra gobs. This method is SOOO much easier!! Will be doing this in my new bathroom!
howtonestforless says
Hah! “looked like a kindergartener frosted a freaking cake” LOVE that!!
Michele says
I think I read through all he comments, and I know it’s a little bit of an older thread, but I have a large bath/shower I’ve been PUTTING OFF forever!!! hahaha I didn’t notice anyone asking how you dealt with inner corners? did you have any? and how did you deal with those IF you did have them?
I’ve always done caulking the way the “pro-girl” spoke about, as ya do get faster if you do a lot of it. I understood her comments, but still don’t understand why she even made them in a “DIY-self-help-hey-look-at-what-I-accomplished-yay-for-me!” kind of blog!!! LOL
what I DONT like about her method, is that pro or not, sometimes ya just make a mistake. to CORRECT that mistake can get tediously messy, then sometimes having to redo a whole section! taping is an EXCELLENT way to keep things tidier in your working space!
thanks for the great idea!
howtonestforless says
I taped off the entire area first, including the corners. Just make sure you press in the tape really hard on the corners so you get a smooth, crisp line. Then start wiping away the caulk on one side of the corner and work your way out. Then go back to the other side of the corner and work your way out. Hope that makes sense!! And this is my favorite way to caulk. You seriously cannot mess it up!
Michele says
I guess I should have said “3-way” corner! haha I have to do a shower stall, UGH! but I can see even if I still just did the bottom part as you say, I can wait for that to cure a couple days and do my vertical lines then!
anyway ya look at it, I love the idea and can’t believe I never thought to do it all those times I caulked!!! because when you look at your photos of after you run your finger along the seam, THATS the EXACT mess that always had me re-doing and then re-messing it all up!!! LOL thanks for the advice! and the quick response time, I appreciate you!
Colleen says
I have a rather large caulking job ahead of me, re-caulking around my exterior door. I have put this off for a year because my past experience with a caulking gun was horrendous. I have tried the wet finger and soap method but the results were a mess. I’m okay tackling smaller caulking projects, but dread this task.
Does anyone have any suggestions for large, outdoor caulking projects?
TIA
Joe says
The correct way to apply caulk is to push the applicator and not pull it. By pushing it you are filling in the voids not covering it.
Suzette says
I tried this awesome method when I tiled my bathroom recently. I had to caulk where tile met tub and it worked beautifully!! I left the caulk sit for only about two or three minutes before removing the tape, and that was perfect timing for my project. I did wet my finger to smooth the caulk because I believe it gives a smoother finish and looks great. Also, I will respectfully disagree with the poster who suggests pushing the caulk vs. pulling it. I like pulling because I can see where I’ve been, I have more control and I get a nicer finish in the end. But to each his own. Try both ways and see what works for you. 🙂
Miz D says
Heck ya that’s kewl !! You have no idea how messy things have gotten and how stressed I became. To be honest …my caulking gun became covered with some of the places in needed to get. Haha so now the rest seems more like a …I can’t wait to do and not…..man ..I know I’m gonna make a mess. Haha thanks !!
Janis says
Thanks I really needed this tip. Some people may think it’s a lot more work but the way I see it is if you don’t have a good looking caulk line it makes all your hard work look tacky. Loving this tip.
Alicia says
Can you get caulk in other colors than white? It looks really good.
Elizabeth Scott says
Thank you so much for this tip . I have been wanting to repair the calk in our guest bathroom but was afraid I would make a mess . Now I am going to try it .
Ethel says
I have been putting off recaulking the backsplash because I never get it neat. Thanks so much for this great tip. Even I can do it now!
Dan says
Nice job! Next time you caulk you have to track down a product called tooling foam. You can buy this at any plumbing supply location. Simply apply the caulking by cutting the tip for the desired size bead making sure the crack is “completely”covered with a fine bead OF 100 % silicon . Then imediatly spray the tooling foam over the bead. it goes on like aerosol glass cleaner. Ensure complete coverage! Then go ahead and dab your finger in the foam and run your finger over the bead and watch in amazement as the excess caulking coils up leaving the professional result that you are after. You can run your finger over it 10 times if you want! the bead will not spread out in width at all. I once dropped the excess caulking that I tooled off on the carpet thinking oh NO! But I just picked it up and threw it in the garbage. This is why you want to insure you have no missing spots in the caulking before spraying the foam. Tooling foam dries with no residue safe on tile laminate granite and is awesome when caulking in sinks toilets back splash screen tile etc. I am a professional Joiner by trade and this stuff is incredible. Don’t mean to step on any toes here I used to do the masking tape method myself until I found this product.
laurie says
Never heard of it, I’m gonna check that stuff out.
laurie says
First, you’re holding the tube the wrong way, you’re supposed to cut the tip at an angle and hold it so it leaves the caulking behind the tubing not in front of the tip.So the tip is facing what needs to be done not what already has caulking. This is what really smoothes it out as you’re caulking. And doesn’t leave much of a mess to clean up with a wet finger. I had always wondered why my builder would stick his finger in his mouth before he smoothed up the caulking , then learned the hard way. I personally should never touch anything sticky or goopy because even with these tips from my builder I always have a monster of a mess and never thought to tape off on each side. Someone like me would need the four inch tape…or bigger… haha. Thanks for the tape tip, something everyone should be able to think of on their own but can’t, lol…………….i shouldn’t even be allowed to paint………..
TARA says
Great Idea.. Thanks for the tip!
Billy Syms says
You used the right caulking. But the pro’s use a moist grout sponge to wipe off excess. Faster and joint comes out looking cleaner. Take it from me, I do this at least once a day!
Garry von Bratt Cape Town. S Africa says
Thanks for the great tips it’s wonderful to see folk sharing tips, experiences and knowledge.
To those that skoff at the tips, try to be more understanding, accepting and complimentary of others triumphs and successes, not everyone has had the same exposure to this type of work, and it is a great sense of achievement for a layperson to have attempted and succeeded in carrying out a (quite probably) arduous task like this.
It gives one the motivation to try other possibly more challenging jobs.
I personally have been in the building and home maintenance industry since 1994, and just love to learn new things, and I started out with a basic technical knowledge, but had the self motivation to try, and the understanding to know that I may not get it right the first time, but decided never to give up trying.
Most things can be accomplished by everyone that can read understand and ponder over instructions, however I find that too many people just don’t believe in their own abilities, or are scared of using power tools.
Love the posts and keep on trying….. Don’t give up
I’ll definitely try to find the foam over my side of the pond. It sounds cool.
Betty says
is there a way to change the color from white to grey without removing the white?
Cheryl says
Thank you so much for these tips! I’ve never had good luck with caulking! I will try this! As for the comments from professionals- We (most of us reading this) are not professionals, nor can some of us afford a professional, or we wouldn’t be needing these tips! These tips are for us DIYers who need a little help! Thank you all for your DYI tips!
Laura says
What about weird angles? I need to do the corners of our baseboards (where they point outward rather than inward). Would this method work for tha? Is there a special caulk I should buy?
Christine says
Dearheart, there is no expert who is going to waste their time taping for caulk. Just like pro painters just cut in with an angled brush and they’re done. No taping, no window film, just paint. Caulking is the tip, a long, little fingernail (gross) and spit.
That said, housewives and we DIYers who don’t have 10 million bathrooms and kitchens under our belts can use tape and it IS perfect. Unbelievably gorgeous, straight lines without bunch up in the corners!
Good to show this “secret.”
Came in via Pinterest and am browsing around.
Marguerite Powell says
I just installed a new vanity top and two sinks. My question is, should I caulk around the perimeter of the sinks?
Bethel Smith says
I have a lot of projects that I need to work on for our home. I really liked how you used the painter’s tape to keep the caulking lines crisp and clean. This is something that I will look for as we find a professional to come to do the repairs in our home.
Jana says
Thanks! I recommend the green froggers tape over the blue tape though, especially if you have little grout lines. This really does work like a charm. I recently did the new floor up to the tub (wished I had for the toilet) and will be doing this when my backsplash is complete this week.
Gavin Bailey says
Another way that I have been shown by a plumber is to run your line of caulk, then spray over the caulked area to stop the caulk sticking to anywhere that it’s not wanted, then to use an ice cream stick and run it flush against one face (of the right angle) wiping off the excess as you go, then to do the same for the other face. This gives an excellent final result that I think people should give a try. The added bonus is that you can even get to eat an ice cream using this method.
carmen says
Ha! Wow! What a great tip. Thanks!
Gary thepartsman says
If you are using 100% silicone, which I highly recommend for longest life and best water proofing, you need to do these two important things.
1. Push down hard with your finger to be sure the outer edges of caulk are flat/flush with the blue tape.
2. Pull the blue tape “immediately”, do not wait even 30 seconds because silicone hardens much faster than latex caulks.
You will have perfect lines every time, guaranteed.
Spud says
Just coming across this now. Thank you! I have been putting off re-caulking my kitchen countertops for YEARS…just hadn’t found a handyman who would be willing to come in for just this job. I’m on it now.
Bill Gabbard says
You can use a hair drier or heat gun set on low heat and this will soften the old caulk and make removal easier.