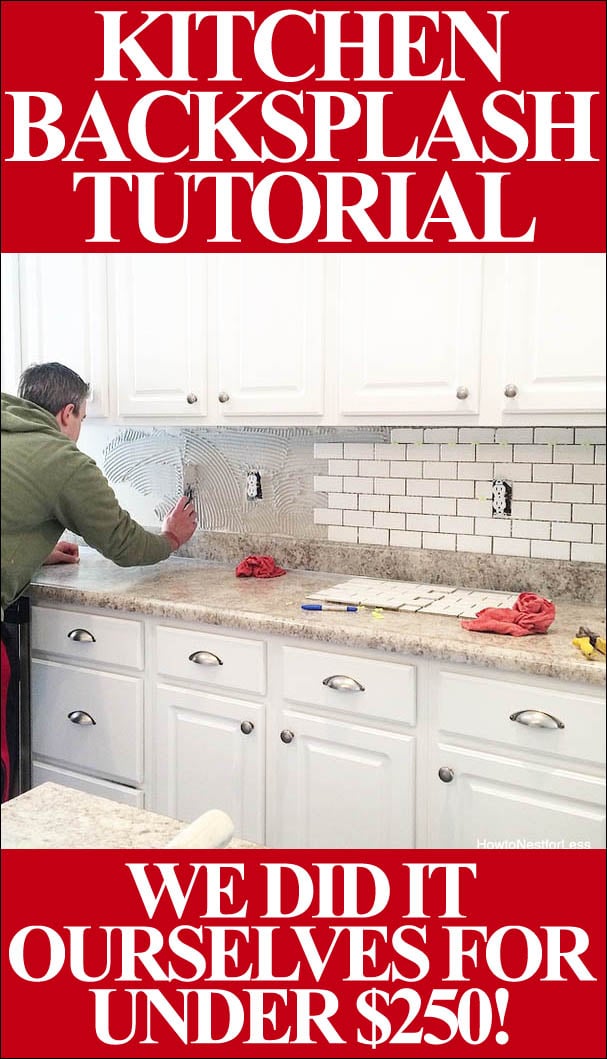
Yesterday I gave you a tour of our updated kitchen but today I’m giving you a little peek behind the scenes of our white subway tile backsplash. We actually decided to DIY, our first ever tile project. Scary? Yes. Totally worth it? Bigger yes. The best part? Our friend gave us a good lesson on how to install a kitchen backsplash.
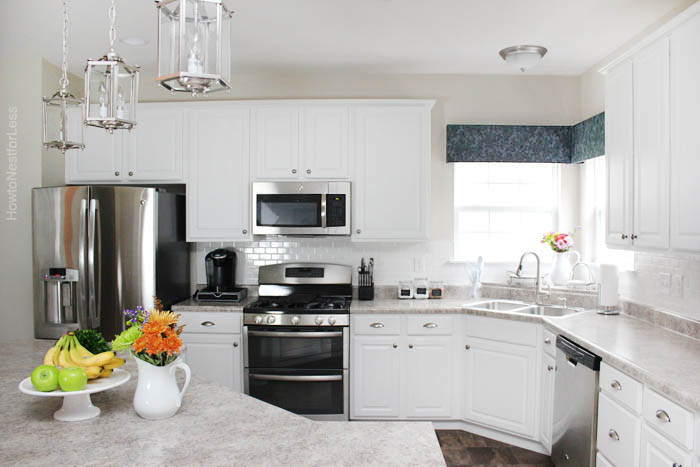
One of the reasons I’m happy we took on this project ourselves (with a bunch of help from our friend Nick) was the cost. We don’t have a small kitchen but the entire backsplash cost us about $250, and that includes enough leftovers for our butler’s pantry. That’s a lot of surface area to install a kitchen backsplash on.
Our supply list:
- Lots of white subway tiles from Lowe’s ($163.80 for all tile including butler’s pantry)
- White unsanded grout ($11.78 per bag, needed 1 bag)
- Grout boost ($39.98 per jug, needed 1 jug)
- Porcelain tile mortar ($13.98 per back, needed 1 bag)
- Grouting sponge ($2.97)
- Metal tile trim ($11.97 per 8ft)
- Notched ceramic tile trowel ($6.20)
- Grout float ($10.84)
- Spacers ($3.47)
- Grout haze remover (optional, we ended up not using it)
- Wet saw (we had one but you can get this one for only $85!)
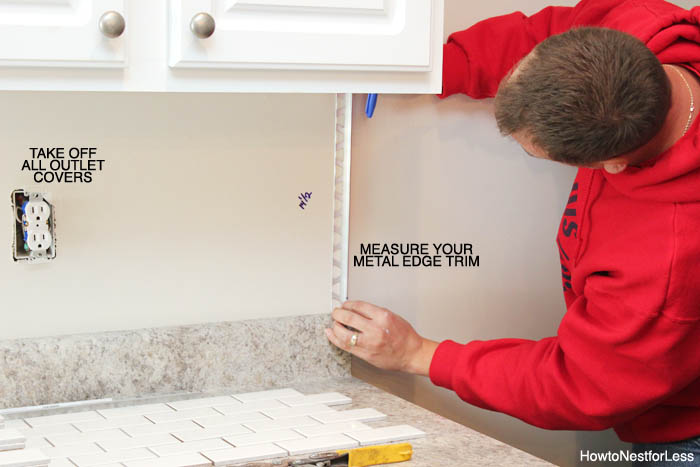
 To start take off all electric outlet covers. Then you’ll want to measure the space in between your countertops and the bottom of the cabinets. We measured all of the spaces on the wall and marked it with permanent marker (it will be covered up by tile in the end). Then you’ll need to trim your metal edging with a pair of strong scissors to fit the height.
Note: we decided to use metal edging instead of a tile edging for a few reasons. As novices, it gave us a nice clean finished edge to work with. Also even though it’s barely noticeable in the end, the slight bit of metal goes nicely with our stainless steel appliances.
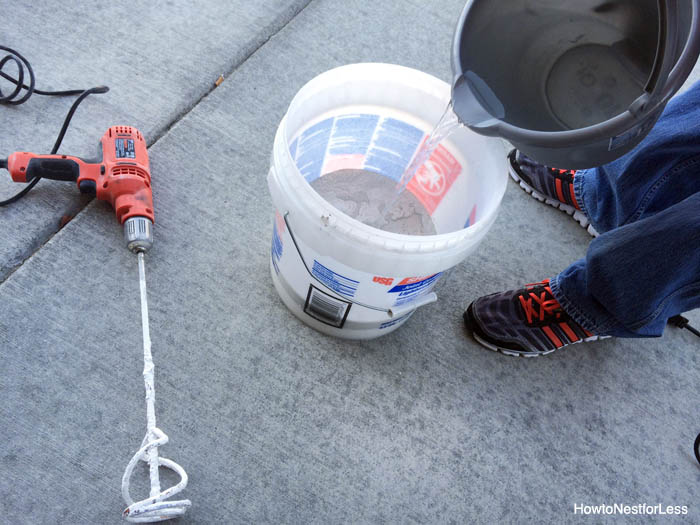
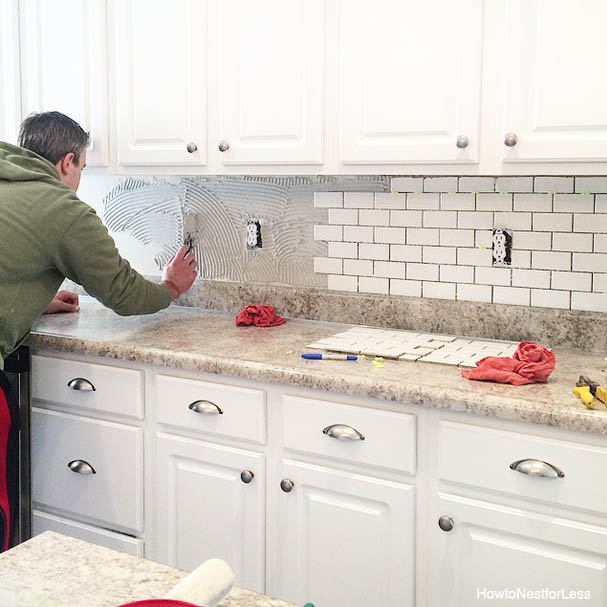
 Next it was time to get the mortar ready. We just followed the instructions on the bag for measurements. We used a large mixer and bucket to mix. Just make sure you don’t make too much mortar at a time. It will start to dry as soon as it’s mixed!
 We used a trowel at a 45 degree angle to spread the mortar on the wall.
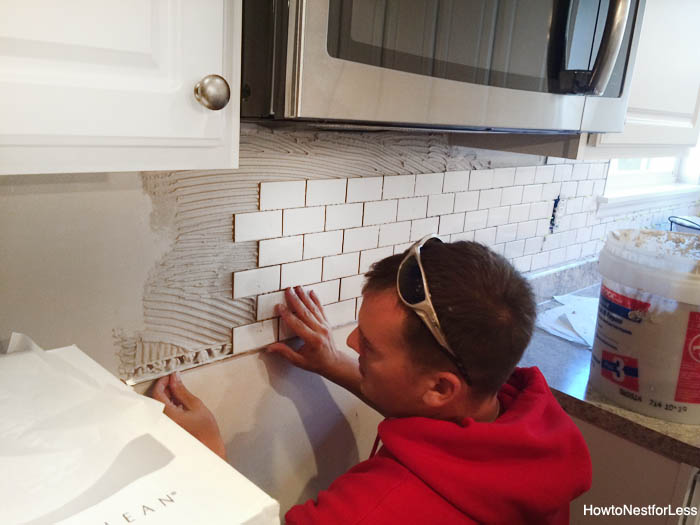
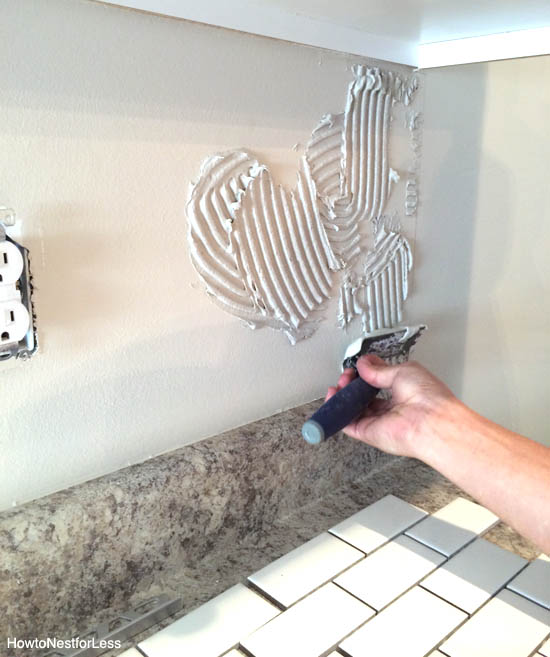 Once you get a small section with mortar, go ahead and place your metal trim and press into place. Then you can start laying your first set of tile flush with the top of your countertop and flush right with the metal trim.
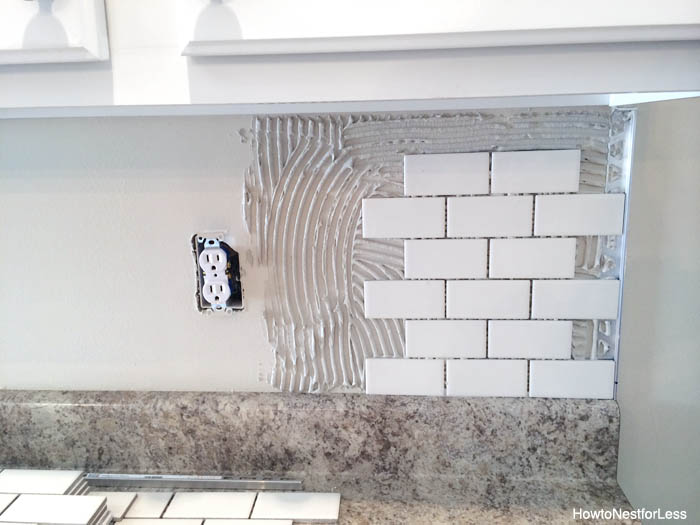 Then it was time to cut the pieces to fill in the gaps. We held up a single piece of white subway tile in place and marked the cut mark with a marker.
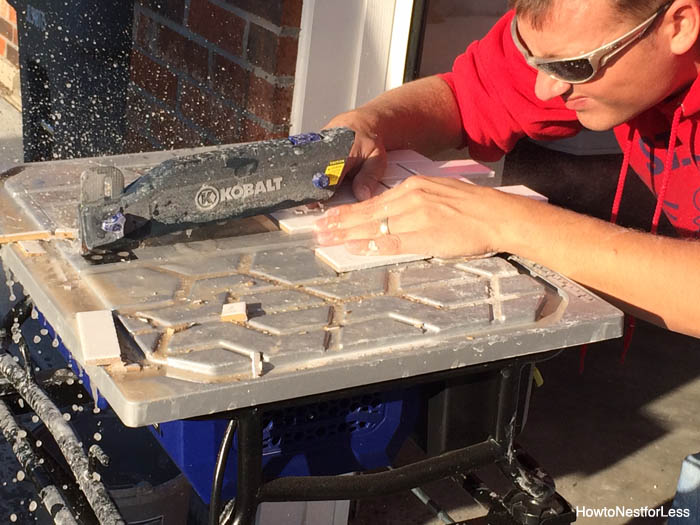
Now it was time to start cutting. We had the wet saw set up outside for this. I have never used a wet saw before but it seemed to go quite easily if you’ve used a normal table saw before (just wetter, right?). My biggest piece of advice is take it slow. Also you’ll need some extra tiles, trust me. Some will chip or your cuts will just be off. Not a big deal, just plan for it.
 We placed the filler pieces in the gaps and held in place with spacers. These will be your best friends. Trust me. Buy lots of them.
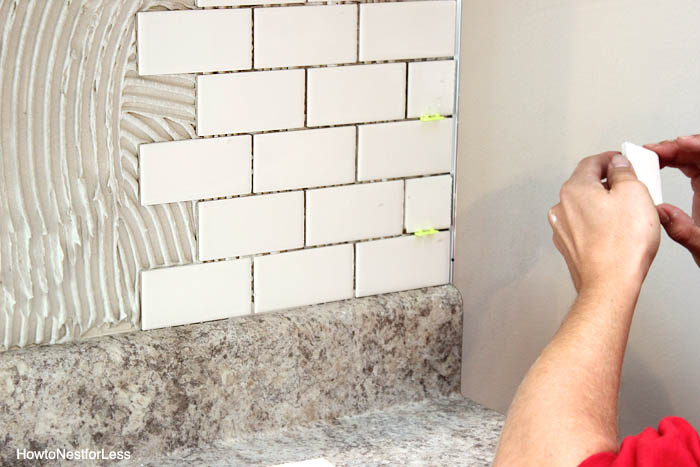 Once we got the hang of these steps we really started to move and groove. The biggest pain in the tush was working around outlets and the corner windows. We also had to cut every single tile for the top row directly under the cabinets since a full piece of tile didn’t quite fit.
 Behind the stove we also used the metal trim. This kept the tile from slipping down once it was set in place. In our last house we used a piece of wood for this instead. Either one works perfectly.
 Once all of the tile was in place we had to wait 24 hours for the mortar to set before we could grout.
Now as mentioned we used Grout Boost instead of water to mix the grout. The reason we decided to spend the extra $40? With Grout Boost you don’t have to seal your backsplash every year. Totally worth it in my book. I’m not the type of girl that remembers to seal my grout every year.
Once you’ve mixed the unsanded grout with Grout Boost or water, let the mixture stand for 5-10 minutes, then re-mix it. Also remember to periodically re-mix the grout to keep it from drying out.
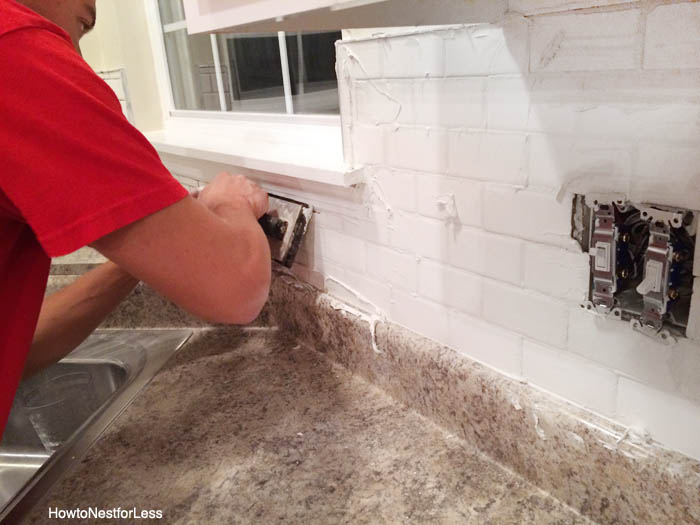 Apply the grout mixture with a grout float at a 45 degree angle. Work diagonally. Wipe off any excess grout. This part will not look pretty. Have no fear. It will get there.
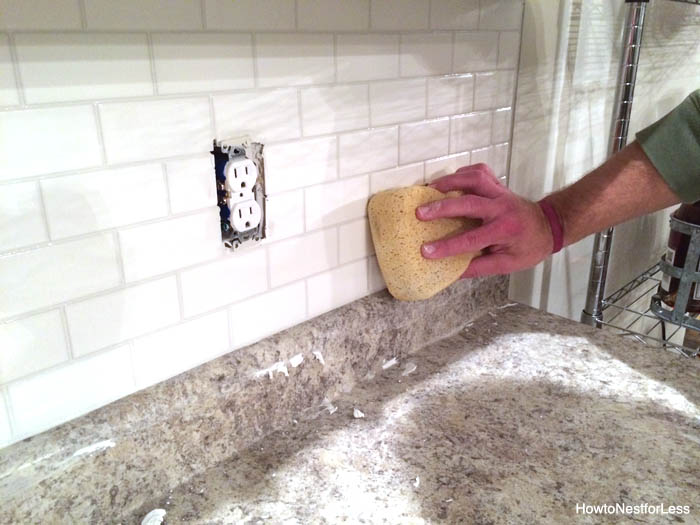 Then you’ll want to wipe away the excess grout with a damp sponge. Periodically clean out your sponge. Repeat this process several times, but start to limit the amount of water you use in the sponge. Let it dry for a couple hours then wipe away again with a slightly damp sponge to remove any haze. Trust me, buy these sponges before you try to install a kitchen backsplash!
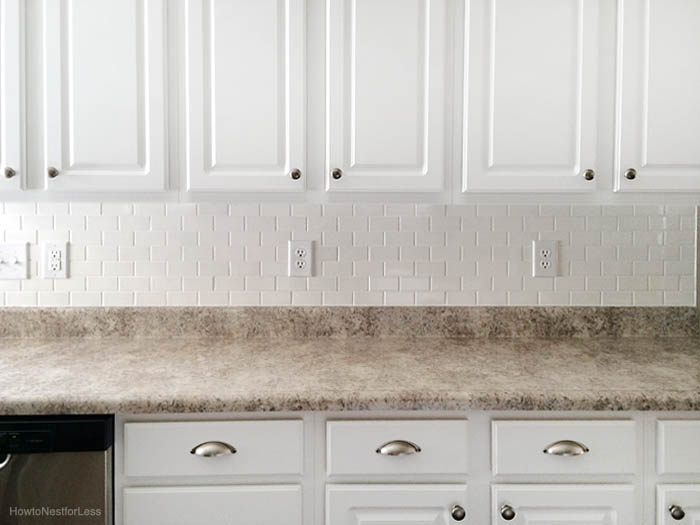
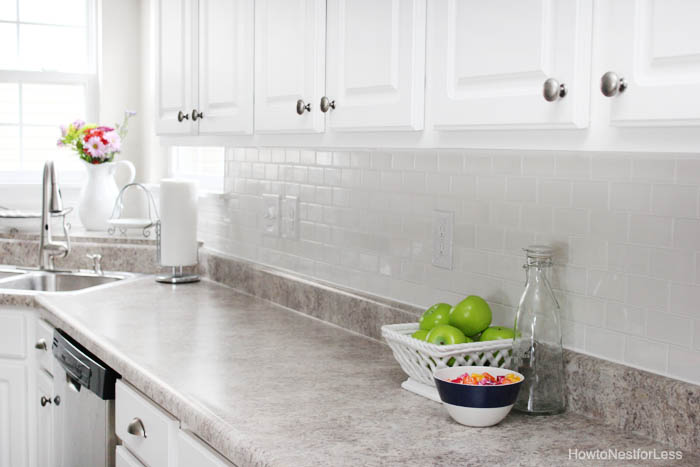
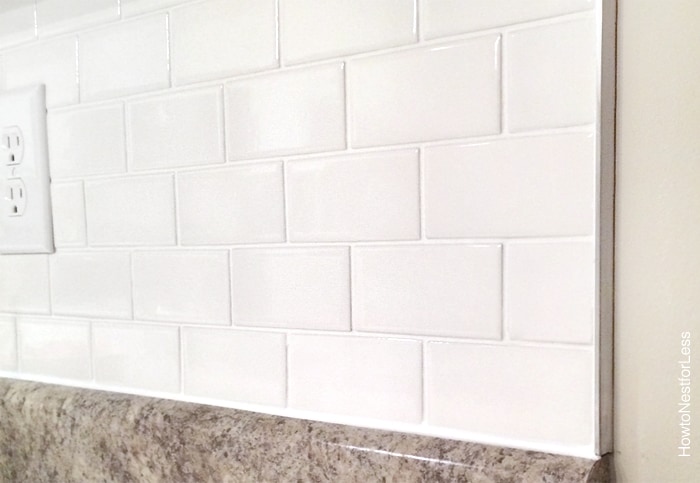
We waited about 24 hours before we caulked. You’ll want to hit where your new backsplash meets your countertops and where it meets the bottom of the cabinets. I have a little trick on this to get super smooth lines, but I’ll wait until tomorrow to share. For now, let’s just take a look at the finished backsplash…
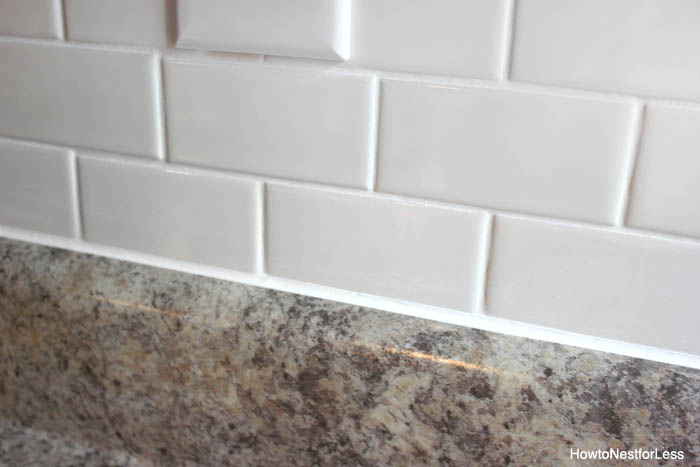
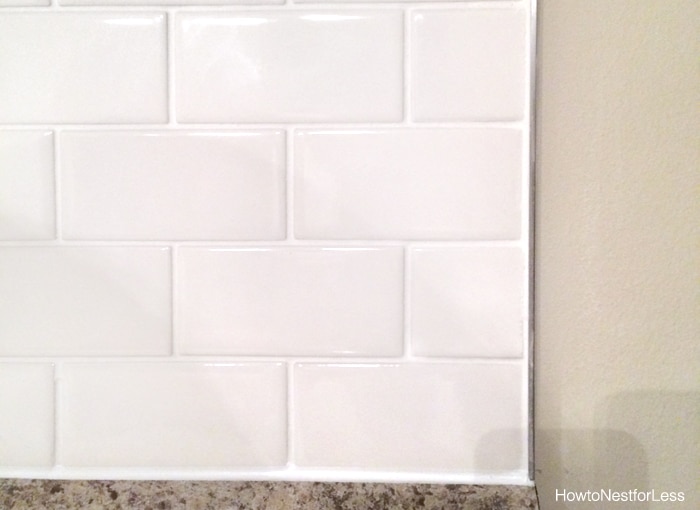
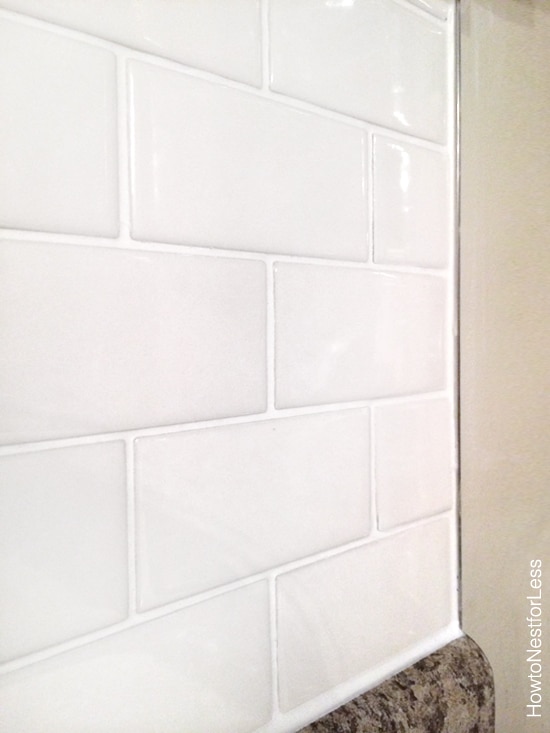
 And here’s some detailed photos of the finished edging.
 I’m loving the look of the new backsplash and so happy we conquered this project ourselves (with a lot of help from our friend Nick!). That’s how to install a kitchen backsplash!
TOTAL COST ON THIS PROJECT?
$248.46 plus tax
(does not include the wet saw).
A couple of things:
- I’m still not confident enough to use a wet saw myself. If we didn’t have to work around our corner windows, it might have been a different story. I just don’t want to give you too much confidence though that this is a great beginner DIY project. Love that we can now install a kitchen backsplash (still with a little help)!
- Caulking changes everything! There were a couple areas where I was nervous how it would look in the end, but caulk hid pretty much all imperfections. Can’t install a kitchen backsplash (or any backsplash) without it!
- I’m glad we used the metal edging. It gives a nice, clean finish and kept our edges level and straight.
So would I do this project ourselves again?
YES, in a heartbeat.
I’m already thinking of my next tile project.

Judy I, St. Louis MO says
Awesome project.. You guys did a great job and the detailed step by step photos would be a help to anyone that wanted to tackle a project like this.
howtonestforless says
Thank you so much Judy!
Franklin says
Do that make a bull nose tile if you don’t want to use the metal edge in some areas?
Elena says
Im tackling this one this weekend. Your post helps so much and i havent even started!
Shirley says
Yes I loved the detailed pictures!! Feel we can do this to! Awesome job!
Bryn says
That looks so good Erin! I’ve got a tile project all set and ready for you…
howtonestforless says
Let’s do this!!
Brandi says
Can you post a picture of what the metal edging looks like in the end? You mentioned it was barely noticeable and went well with your appliances.
howtonestforless says
I just uploaded 3 detailed pics. I hope they help!
Brandi says
Wow! What a super clean and finished edge. I love it. Great job!
Tara says
Did you caulk between the tile and metal edge, or is that grout? We coincidentally picked up the same tiles and planned to do the metal edge, but the only place I’ve seen the metal edge used before had 1/4″ tile rather than 1/8″ tile so it was more flush.
howtonestforless says
That’s just the grout, no caulk was needed there!
Joni says
Great tutorial and pix! Your instructions are clear and the end results looks beautiful.
Thank you.
howtonestforless says
Thank you!
Renee Johnson says
Hey! Can you post where you got your tiles from??
howtonestforless says
Lowe’s!
marie Goodman says
Where did you shop for the supplies?
howtonestforless says
Lowe’s.
Alyson R says
Great Job!….it’s beautiful. Now I need to know where I can get your “great little trick for the smooth lines”?
howtonestforless says
All the details here! https://howtonestforless.com/2014/10/15/how-to-caulk-like-a-pro/
Marian says
It looks fantastic. I’m getting ready to do mine but I was wondering about the outlets. Do you need to do anything to them or do the covers and screws fit right back on even with the additional depth of tile added?
howtonestforless says
You’ll need to purchase longer screws for the outlets (not the outlet cover, but behind that). Sorry, should have mentioned that 😉
Anna says
That was my question too. Do I just remove the old screws, pull out the outlet, and reinstall using long screws?
Laura says
Looks gorgeous! Question though- Did you use backer board? I didn’t see anything about it and if not, have you had any tiles loosen? I’m almost finished cutting tiles (strips cut from FREE granite, marble, soapstone and quartz scraps) and I’ve been told that I need them and that I don’t by different stores. I don’t want to waste the money if I don’t need them. No one has really given me an answer why or why not to use them.
howtonestforless says
No backer board was used! Tiles have held up perfectly. We also did our own backsplash in our older home and never had an issue!
Zuly says
What if there is a gap between the counter top and the wall? It is not flush can I use a trim there?
carmen says
You can if you’d like!
Kianna says
I can’t decide if this is a stupid question or not. 🙂 By the windows where the tile does not go any further up where there is no cabinet, did you use the metal edging on the top, or caulk it maybe? I can’t figure out how that would be finished off.
howtonestforless says
Not a stupid question! We used the metal edging there as well, with the exception of the space behind the kitchen faucet. I’ll take a photo of that area and add to the post this week!
Kimberly Nicholas says
Can you upload close up photos of the tile behind the sink and near the windows where there is no cabinet?
Sue P. says
So glad I found your tutorial! We’re about to tackle our own kitchen backsplash next week. I hope ours turns out as beautiful as yours did! We’re also using the stainless-steel-looking metal edge. Thanks for all your clear photos and tips.
Sue P.
howtonestforless says
You’re welcome Sue. Good luck with yours!
Jo says
This looks fabulous, you guys did a fantastic job! Love, love, love subway tile. We’re in the midst of redoing our kitchen (white cabs, Jet Mist granite, light gray/blue subway tile backsplash).
Question unrelated to the backsplash … is your hardware for Top Knobs? What finish is it? It’s quite pretty and looks great with your kitchen. Thanks so much for sharing your project!
howtonestforless says
Thanks! Hardware is from Lowe’s. Just plain satin nickel!
ronda says
What subway tile did you use specifically? There are so many choices! Thanks, Looks great!
howtonestforless says
We purchased ours from Lowe’s. They were the ones in stock on the shelves!
Christy says
is it too hard to just add a model number or add the link, geez!
howtonestforless says
This is the link to the tile:
http://www.lowes.com/pd_355358-74035-SL1024BJHC1P2_1z0vj2e__?productId=3477577&pl=1&Ntt=white+subway+tile
Everything else is photoed and I show a price. Just do a search on the Lowe’s page if needed.
Good luck and SMILE 🙂
Krista says
This is excellent. We are looking at doing the same thing in our kitchen! I’m excited to hear about that metal edging. Looks awesome! You guys did great!
Sharon Densmore says
I have a really tiny kitchen so would probably be half the cost. You did a wonderful job makes your whole kitchen look brand new!!!!
howtonestforless says
Thanks Sharon!
valerie goetz says
What kind of wet saw did you use? Thinking of diy-ing my backsplash!!
howtonestforless says
It’s a Cobalt 7 inch sliding wet saw. Good luck!!
Erica says
I know this post is a little older but I wanted to ask if you had to do anything special with your outlets, like as far as raising them up/out so that the covers will accommodate the tile.
Erica says
Nvm! Just went through all the comments and saw the longer screw answer! Lol
Ellen says
You put the tile right on your sheetrock? If so, it may fail.
howtonestforless says
Yes we did. No fear about it failing though. We’ve done several this way over the course of 10 years and never had any issues.
Colleen says
Excellent tutorial! Makes me think I can do my kitchen back splash myself too. All the helpful hints are appreciated.
howtonestforless says
Thanks! And good luck to you!!
Morgan says
Fantastic, what are those countertops? Brand and color, just great!
howtonestforless says
Thanks! The countertops are laminate: Belmonte Granite from Formica.
Maureen says
can I ask how much space is between your tile?? 1/16 or 1/8 we bought spacers (our tiles came separate and just curious what you used.
howtonestforless says
We actually bought the adjustable ones that people normally use for outlets and switches:
http://www.lowes.com/pd_18989-1781-GSP-04___
Sarah says
So I’m confused about the outlets. You only remove the cover right? And then tile up to the outlet itself and get a longer screw for the outletcover?
howtonestforless says
If needed you can use electrical spacers to bring the outlets out:
http://www.amazon.com/Gardner-Bender-GSP-04-Electrical-Spacers/dp/B000BQK0FS/ref=sr_1_2?ie=UTF8&qid=1462934122&sr=8-2&keywords=electrical+spacers
lillian says
Hi,
Beautiful kitchen. Just wondering what paint colour and brand you’ve used?
Thanks
howtonestforless says
Thank you! The paint color is Inspire Awe from Clark+Kensington at Ace Hardware.
Moira says
Hello! What a beautiful kitchen! and the tiling looks amazing!
I haven’t tried tiling my kitchen yet – today is the day! But something we did which hopefully will be quite helpful…
We bought the tiles at the same time as the kitchen, and then my joiner installed the kitchen cabinets at the right height to fit the tiles without having to cut them! So the height of the cabinets perfectly matches the tiles.
His idea, not mine!
Anyway, thank you for the tutorial, which me luck with my tiling!
howtonestforless says
Well isn’t that SMART!! Good luck with your tiling too, but I think you’re on your way to a job well done 😉
Katie says
Did you have to do anything special with the outlets….bring them out to accomodate for the tile?
howtonestforless says
We had to buy longer screws for the outlets.
If needed you can use electrical spacers to bring the outlets out:
http://www.amazon.com/Gardner-Bender-GSP-04-Electrical-Spacers/dp/B000BQK0FS/ref=sr_1_2?ie=UTF8&qid=1462934122&sr=8-2&keywords=electrical+spacers
Angela Joachim says
What kind of metal trim piece did you use for the end where the tile ends at the cabinets. What was it called and where did you buy it?
howtonestforless says
It’s just called metal trim. You can get it from Lowe’s. Here is a link:
http://www.lowes.com/pd/Schluter-Systems-0-375-in-W-x-98-5-in-L-Aluminum-Commercial-Residential-Tile-Edge-Trim/3772497?-_-store_code=1503&cm_mmc=SCE_PLA-_-Flooring-_-GroutMortarAndSealers-_-3772497:Schluter_Systems&CAWELAID=&kpid=3772497&CAWELAID=1474048323&k_clickID=ed6e92c3-bf9d-4c9a-bb73-ae632aef686d
Megan says
This looks beautiful. My husband wants to do this in our kitchen. Where did you find the subway tiles on a mesh back? We can only find individual tiles when I search for them which will make this project take longer than expected! Thanks for your help!
howtonestforless says
They’re from Lowe’s!
You can find the mesh backing version here:
http://www.lowes.com/pd_355358-74035-SL1024BJHC1P2_1z0vj2e__?productId=3477577&pl=1&Ntt=white+subway+tile
Greer says
Thank you! Thank you! Thank you! For these easy-to-follow how to! I can’t wait to get started on my project (s).
You all (with help from your friend Nick) did a great job!!!
Betty White says
You should have removed your backsplash and had the tile go all the way to the counter. Would have looked more finished and not like a DIY project.
howtonestforless says
That would have been an expensive project since the laminate countertops were all one piece. New countertops were not in the budget. To each their own!
Anna says
Did you have to cut the tiles face down, or with the porcelain side up? Did you encounter any cracking when you cut your tiles?
Stephanie says
Beautiful! How does the white grout hold up in your kitchen? Is it difficult to keep clean? I just finished timing and am now choosing a grout color. Back forth between a light grey or white.
Stephanie says
Oops! Meant to sat tiling, not timing:)
Gifts SG says
Neat piece of work, you make it look simple
Michelle says
Hi! I am wondering if you found the grout boost to be effective at sealing the grout and making it water and strain resistant? We are getting ready to do a tile backsplash and it seems the reviews aren’t actually that great for grout additives, though I really am wanting it to “work”! Thanks!
Kim says
Love it! What a nice difference. I too have the 4 inch attached piece on my laminate so I cannot run my tiles flush to the counter.. but your backsplash makes me hopeful I can do it despite that.. did you do anything to you counter? Ours is starting to really show wear but cant afford new yet. Do you have a tutorial on painting your kitchen cabinets? Thanks .