Are you looking to spruce up your walls with a fresh look? Installing picture frame molding is a great way to instantly elevate any room in your home. This article will show you how to install picture frame molding in your home so you can enjoy its beauty without much fuss.
Picture frame molding has been used since the Middle Ages, when it was first popularized in royal palaces as decoration. Today, it’s an easy and attractive way to update the look of any room. It can be a stylish accent for bedrooms and living rooms alike.
Installing picture frame molding may seem intimidating, but it’s actually a relatively simple process that requires minimal building experience.
This post may contain affiliate links.
Picture Frame Molding Supplies
- paper and pencil to sketch your plan
- measuring tape
- level
- painter’s tape
- compound miter saw or miter box
- batten molding
- chair rail molding
- glue for moldings (we used Elmer’s ProBond Advanced)
- brad nailer
- hammer and nail set
- wood filler
- sandpaper
- paint and primer
How to Install Picture Frame Molding
1. Measure and Map It Out
It’s always best to start off a project with lots of measuring and math. This way you can plan out the picture frame sizes.
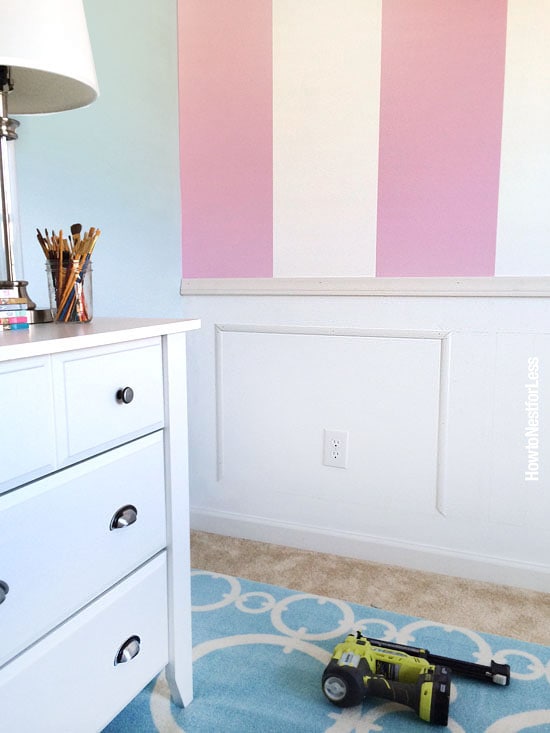
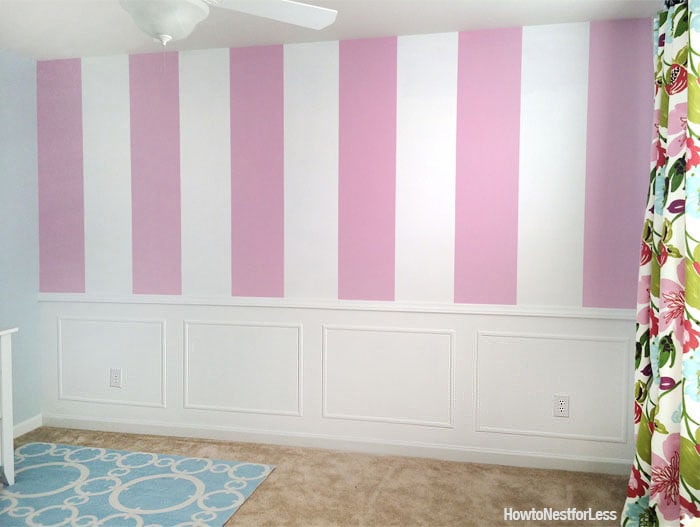
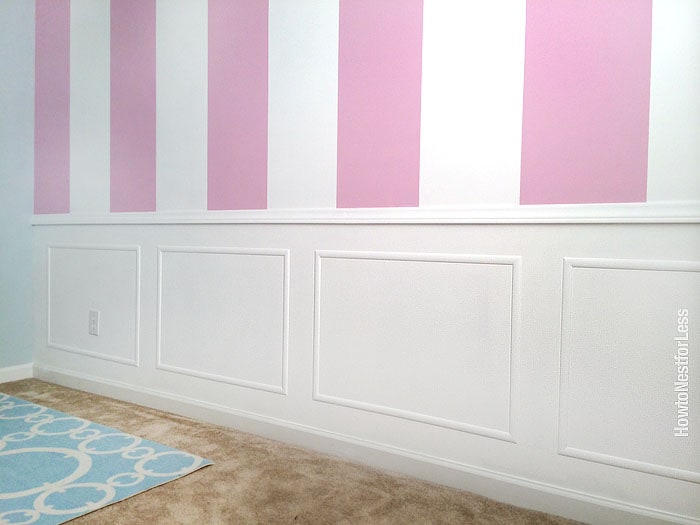
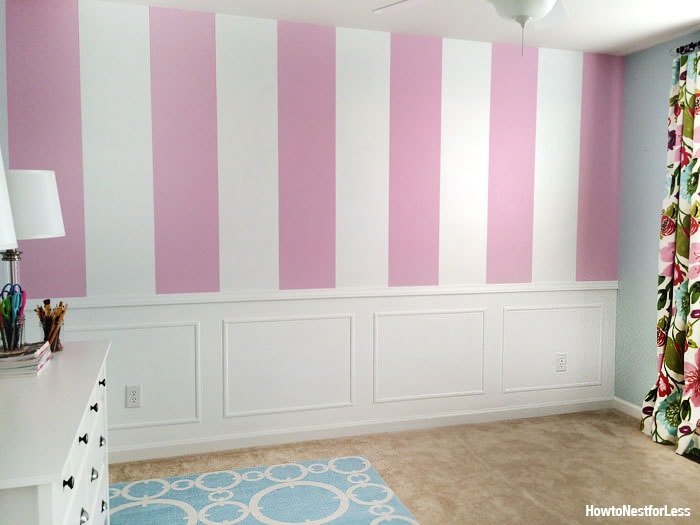
For this project, I decided to use moldings on the one wall in the room with painted stripes.
Determining the Size of the Picture Frame Moldings
I measured the length of the wall (148 inches) and planned out 4 picture frames for the wall.
It took some playing around with numbers, but I landed on 31 inches wide x 22.5 inches tall with about 5 inches between each picture frame.
31 inches wide x 4 picture frames = 124 inches
148 inch wall – 124 inches = 24 inches leftover for gaps
24 inches ÷ 5 gaps = about 5 inches

Picture Frame Molding Height
Chair rails are usually placed one-third of the ceiling height so if you have a 8-foot ceiling, they should be installed about 32 inches from the floor.
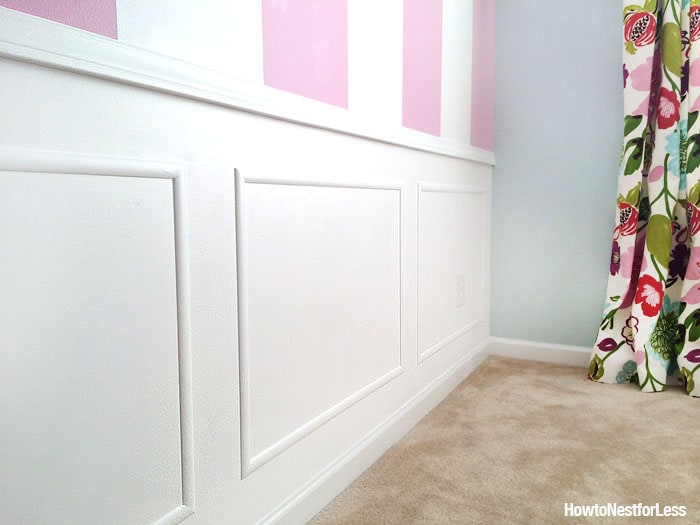
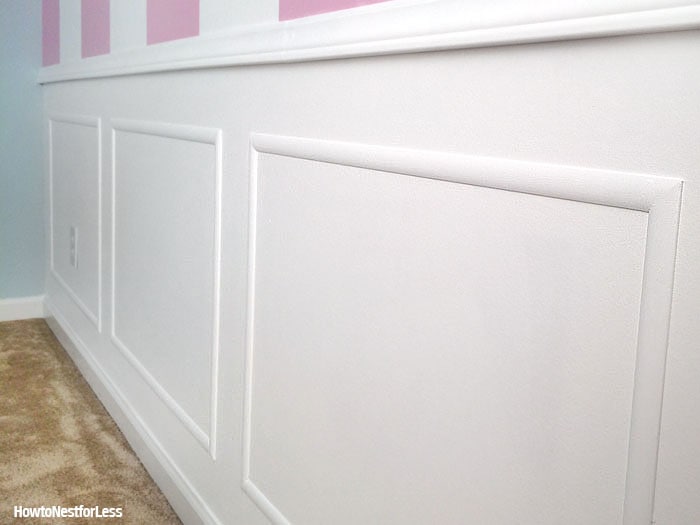
For this picture frame molding project, I landed on 4 inches between the chair rail and top of the picture frame moldings, and 4 inches from the bottom of the picture frame moldings to the baseboards. This left my picture frame moldings to be 22.5 inches tall.
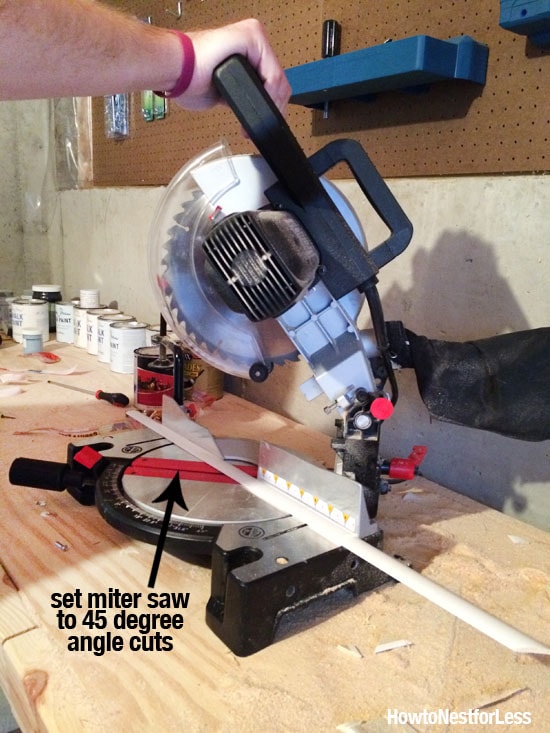
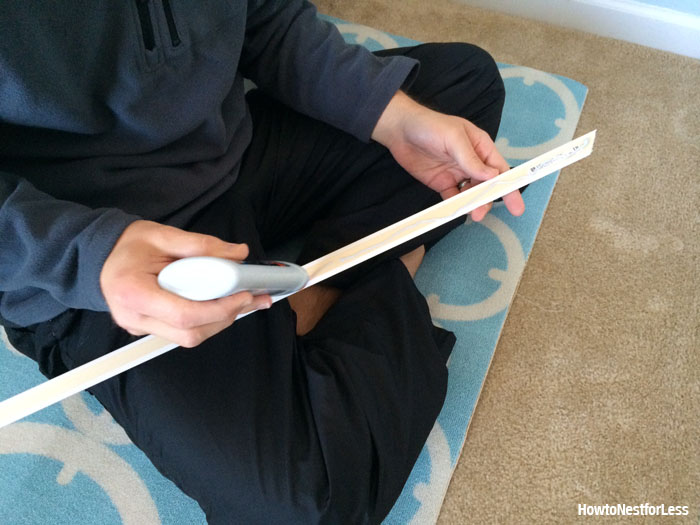
2. Cut
We bought all of the moldings and marked them with pencil for all of the pieces.
For the 4 picture frame moldings, we needed (8) 22.5 inch pieces and (8) 31 inch pieces.
Remember to cut at 45 degree angles to miter the pieces together so the measurements are for the long ends of the angled cut.
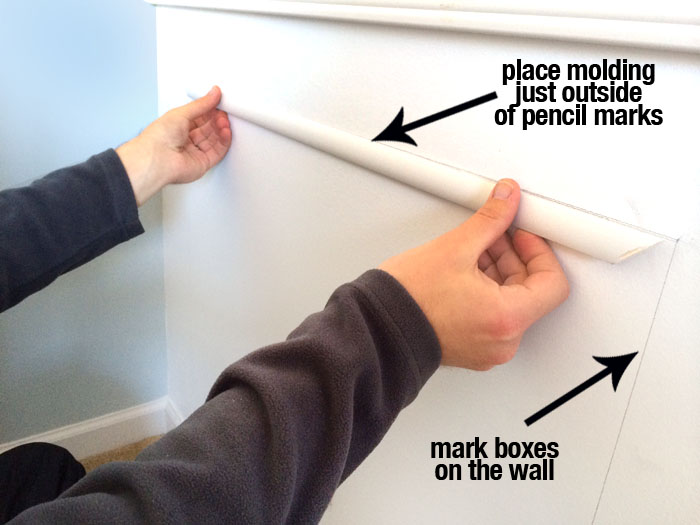
3. Map Out the Placement
Next, measure and draw the picture frame molding boxes onto the wall with a pencil. Use a laser level or a 36 inch level to keep your lines straight and level.
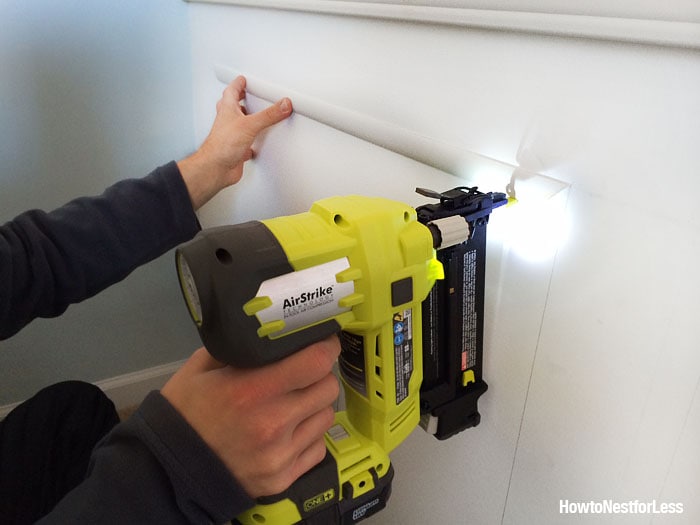
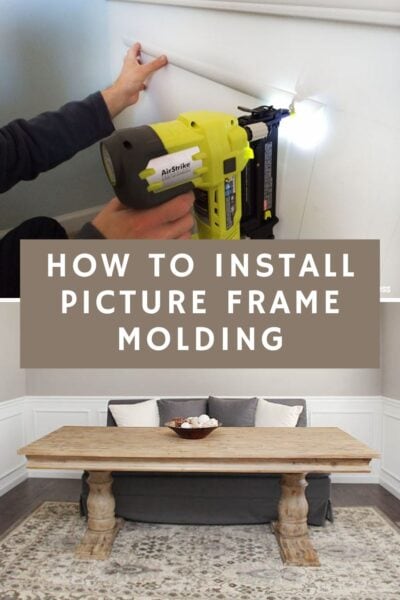
4. Glue
Grab the top picture frame molding piece and apply glue on the back.
5. Place the Molding
Next, place the molding piece on the wall, just overlapping the pencil marks so they won’t show.
We like to start with the top piece, then add the two sides, and finish each picture frame molding with the bottom piece.
6. Nail
We used three nails in each piece of molding, one on each side and one in the center.
7. Check with a Level
Check the moldings with a level to make sure everything is straight.
For an extra precaution, use a little painters tape right over the moldings to keep them in place and flush against the wall while the glue dries.
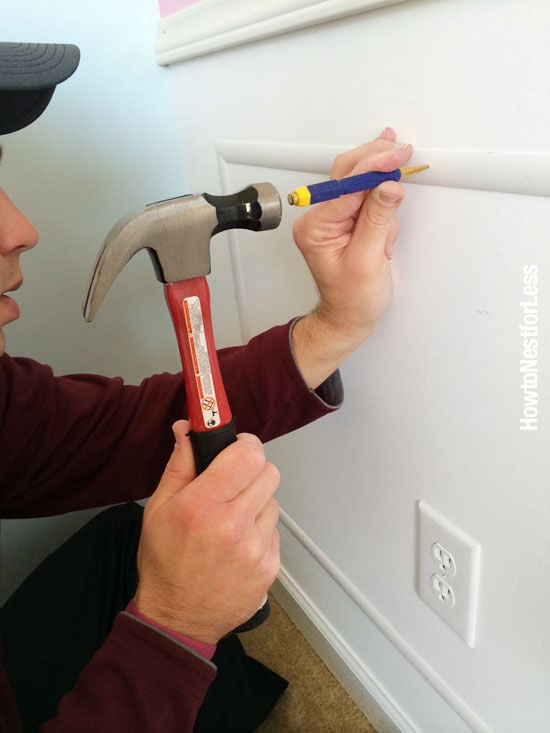
7. Tap In Nail Heads
Once all of the moldings are in place, use a nail set to tap the heads into the wood.
8. Fill In Holes and Mitered Corners
Then, fill in all of the nail holes and mitered corners so everything looks seamless.
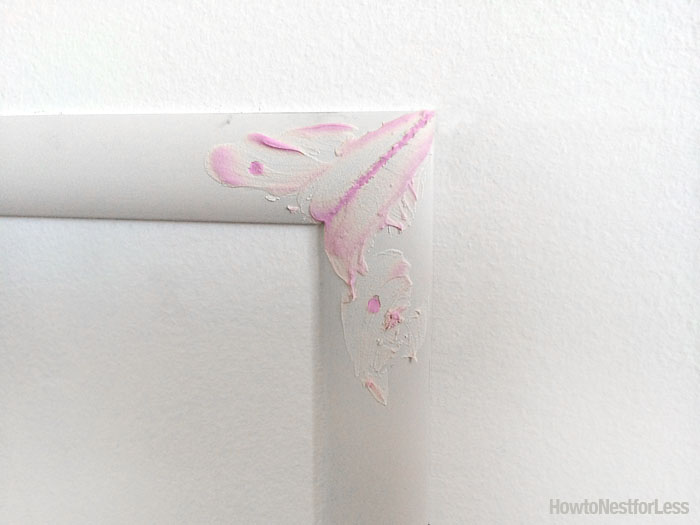
9. Sand and Paint
Once the filler has dried, sand everything smooth. Then, paint the picture frame moldings and wall.
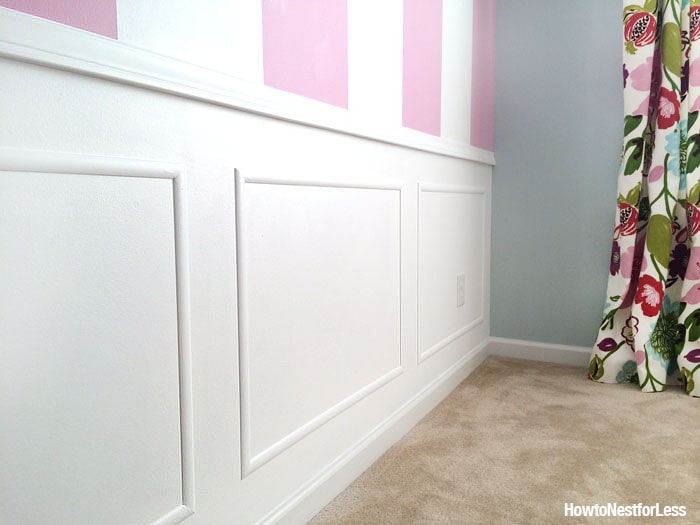
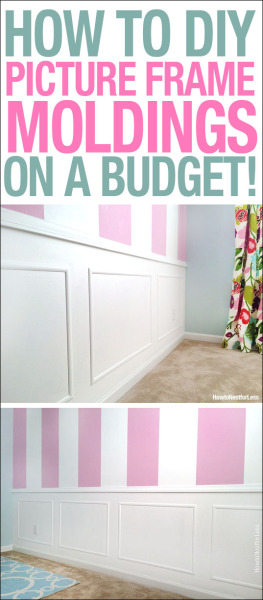
And here is the final look for under $30!
Cost of Picture Frame Molding
(2) pieces of white casing: $14.94
(6) pieces of 15/16 x 8ft white batten: $14.82
Luckily with a new house we had wood filler, sandpaper and white paint on hand.
And I bet I could have done all 4 walls for under $100. Crazy.
Money Saving Tips
Skip the Paneling
To save tons of money, don’t use paneling behind picture frame moldings. Instead, use white semi-glass paint on the wall and trim.
Use Foam Batten
Also, I used 15/16 inch white foam batten at only $2.47 for an 8-foot section.
Time Needed to Install Picture Frame Molding
This whole project took us only one afternoon to install. The biggest pain was waiting for the coats of paint and wood filler to dry.
While it’s not professional grade moldings, my craft room is quite happy with the $30 update. And now I have the confidence to do some other rooms in the house. I’m thinking master bedroom next?
If you’re looking for a tutorial with more detailed molding, check out this hallway molding blog post by Young House Love.
So, what do you think?
Not too shabby for moldings on a budget, right?
This weekend I’ll spend putting some finishing touches on this space.
Get ready for the final reveal on Monday!

Carolyn says
How did you nail in the picture modling? If there’s no stud, how does it hold the molding in place? I’ve always wondered this when I see it on HGTV. They just seem to nail molding wherever, not looking for studs.
howtonestforless says
I mentioned that we did use a stud finder for the chair rail. For the picture frame molding, between the glue and the nails it will hold just fine! It’s not heavy molding that will tear away at the drywall.